|
B CUSP 110B – Digital Thinking Exercise 2:
Download, Compile, and Run |
|
|
Starting out with XNA and C#!
Goals: Initial experience with
· downloading and locating files on file system
· compression/un-compression file format (zip)
· opening Integrated Development Environment
· compiling/running a program
· creating an jpg image from screen dump
In this exercise, you will begin to build experience to work with C# and XNA for building video games!
Here are the steps (please follow on your machine):
1. Download
this compressed zip file by clicking on this link. Make sure you can find
the downloaded file (filename: 1.MovingABallAround.zip)
on your desktop machine (how?).
2. Un-compress:
a. Move
the zip file to your desktop.
b. Unzip the file by Right-Mouse-Clip on
the file, into the 1.MovingABallAround folder.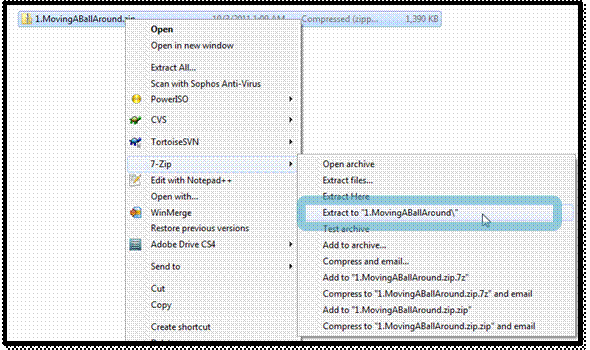
Notice the new folder on your desktop: 1.MovingABallAround. Now be very careful, notice the zip file and the new folder looks very much a like! Double click to open the folder (not the zip file!) and you will see another 1.MovingABallAround folder, double click on that again to open that folder, and you will see: (once again, Warning: be careful!! DO NOT double click to open the .zip file!!)
3. Invoke
the development environment: there are many files in the 1.MovingABallAround folder, together all these files are referred
to as the “Project.” Now, we want to open the “project” to run the program:
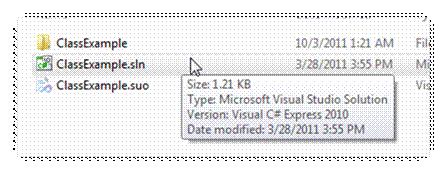
a. Double click on ClassExample.sln: This is the Project File for Visual C# Express 2010. By double clicking on this file, you open the project with the Visual C# Express 2010 development environment, this is what you will see: (if you have mistakenly opened the .zip file, this stop will not work, not to worry, just go back and open the folder instead of the zip file)
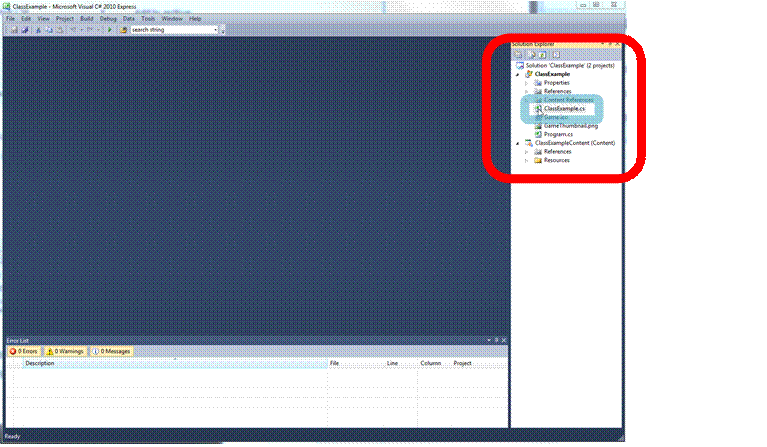
b. Refer to the above image, the window to the right (high-lighted by the red-square) is the “Solution Explorer”. Now double click on the file “ClassExample.cs” (high-lighted by the blue square) in the Solution Explorer, and you will see something that looks like:
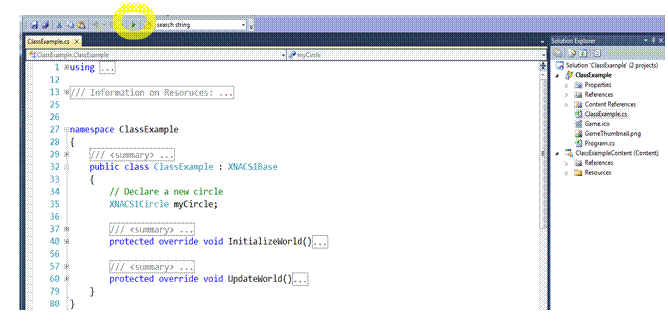
c. ClassExample.cs is the “source
code” file we will program our video games with!
4. Compile and Run:
a. For now, click on the green arrow (high-lighted by the yellow ellipse above) and in a short while (computer “compiling” the program into machine code), you will see:
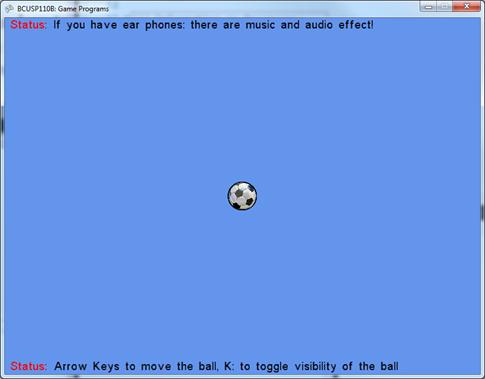
b. Use the arrow key and the “K” key to move and control the visibility of the soccer!
c. Fun
eh? Simple?
5. Creating screen shot:
a. Activate the game window: click on the menu area of the above game window
b. Type: Alt-PrintScreen (type both the keys together). These two keys tell the Window to make a copy of current active window in its internal clipboard.
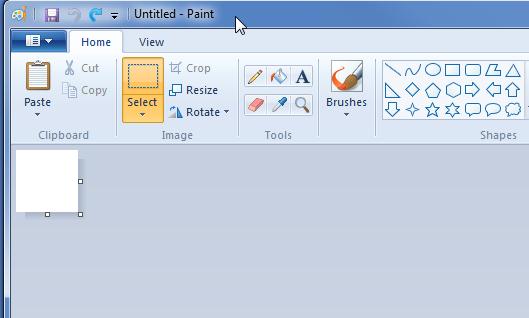
c. Start the Paint Program:
i. Start à All Programs à Accessories à Paint
d. Now paste the copied image, by click on the Paste button (high-lighted in red in the following image):

e. Viola! You have a Screen Shot of your game window.
f. Now, save this file as a jpg image!
To Turn In
Send me (ksung@uw.edu)
an email from your uw-netid email account, include
the screenshot image as an attachment in your email. This will count towards
your in-class participation.
Wrap Up
In this exercise you experienced with downloading program source code in the form of a zip file, uncompressing the zip file, compiling the program source code, running the program from a development environment, and creating a screen shot of the running program. All of these are important steps in a software engineer’s daily routine.