Decontamination & Sterilization Part 2
The processes of sterilization and decontamination are complex, requiring specific infrastructure and equipment, They also involve several steps that must be followed correctly: device collection, receipt by the decontamination unit, processing, storage, and distribution throughout the facility. In many resource-limited settings, the procedures for decontamination of medical devices are inadequate and not standardized. In this module, you will learn about the cleaning process, some of the considerations involved in inspecting, assembling, and packaging medical devices, and different methods of disinfection and sterilization.
Learning Objectives
By the end of this module, you will be able to:
- describe the importance of, and appropriate methods for, cleaning medical devices;
- outline best practices for inspection, assembly and packaging of medical devices;
- explain the various elements of the validation process for steam sterilization; and
- describe the various methods of disinfection and sterilization.
Learning Activities
-
Cleaning Process (5 min)
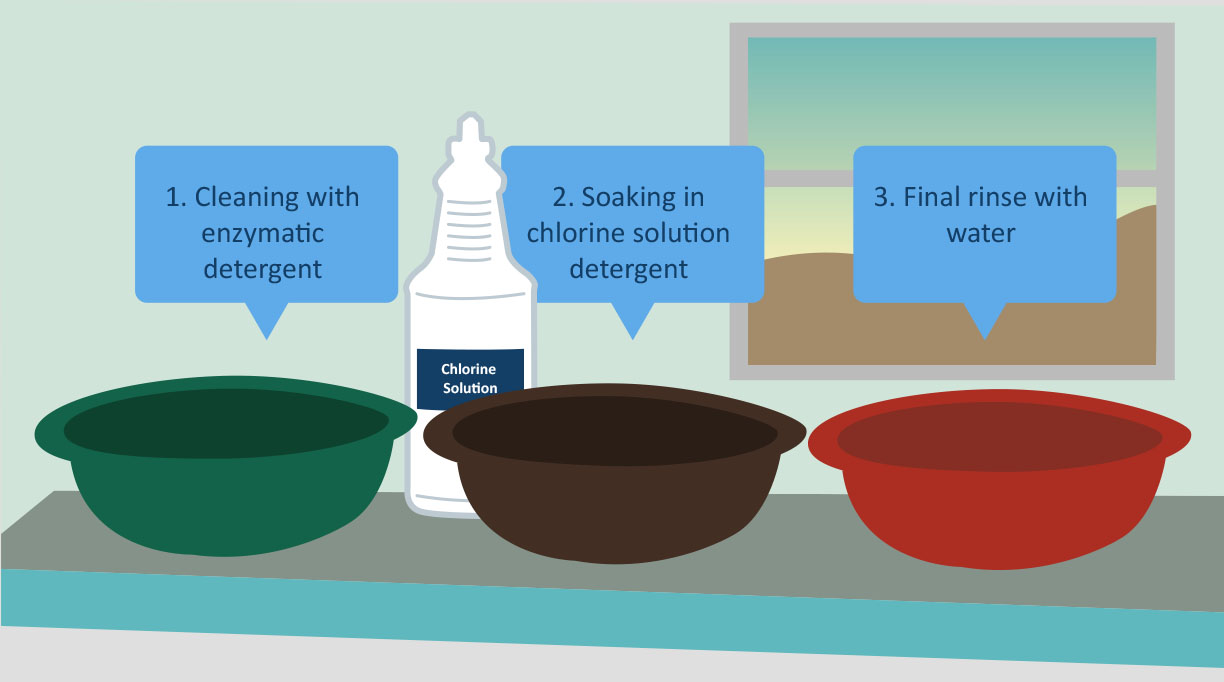
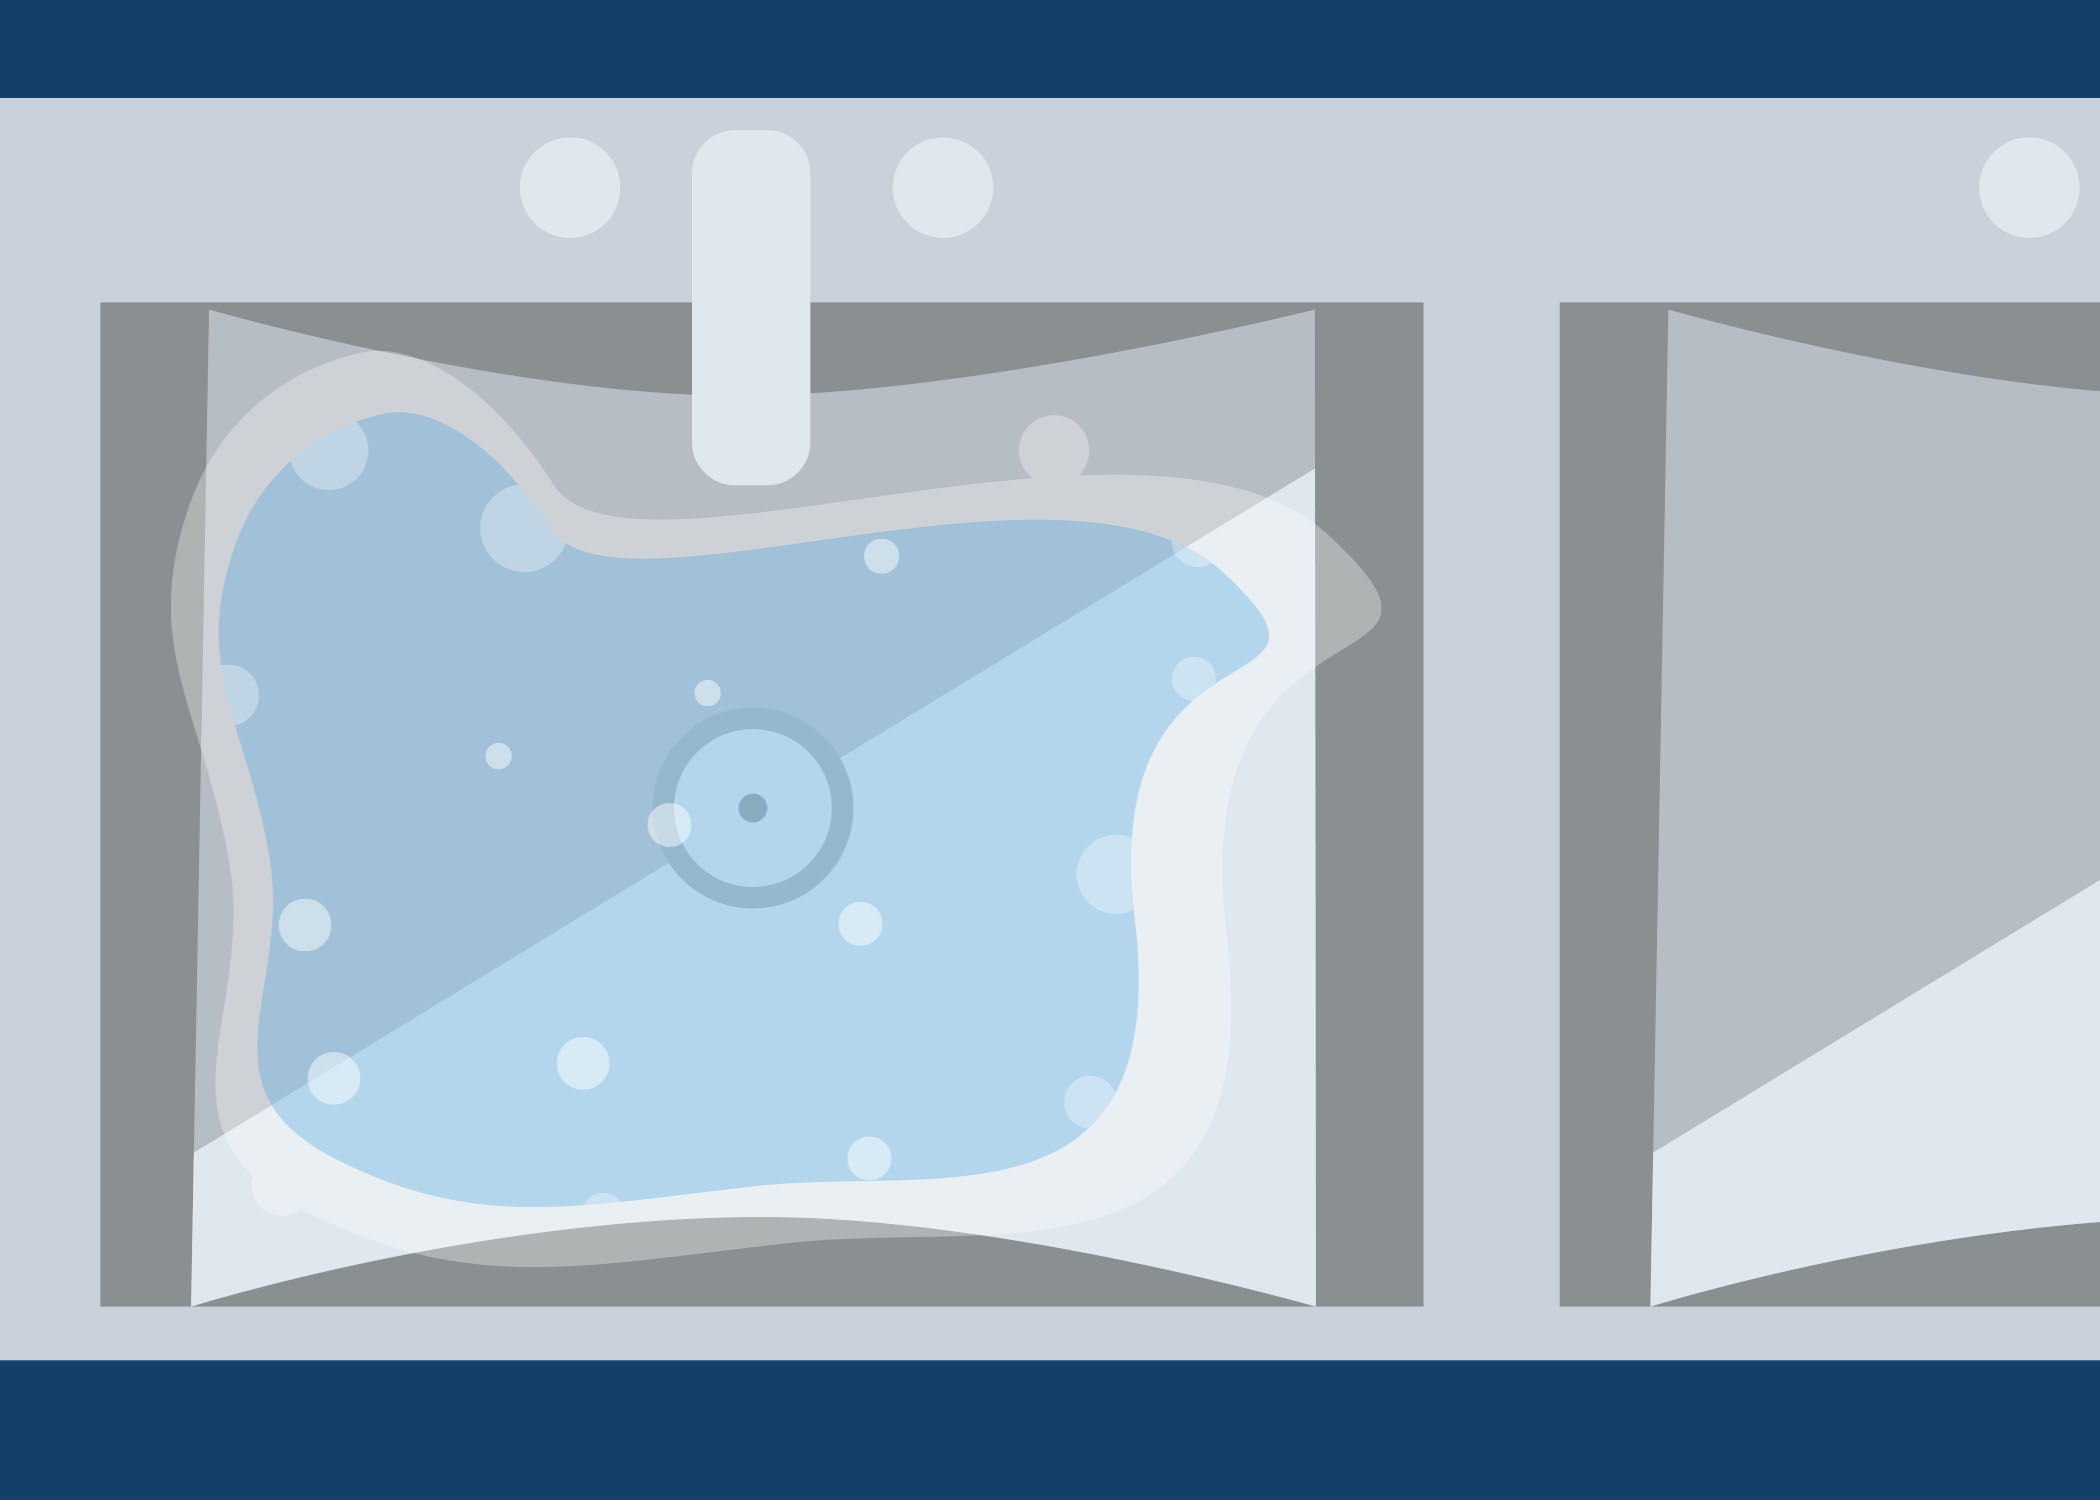
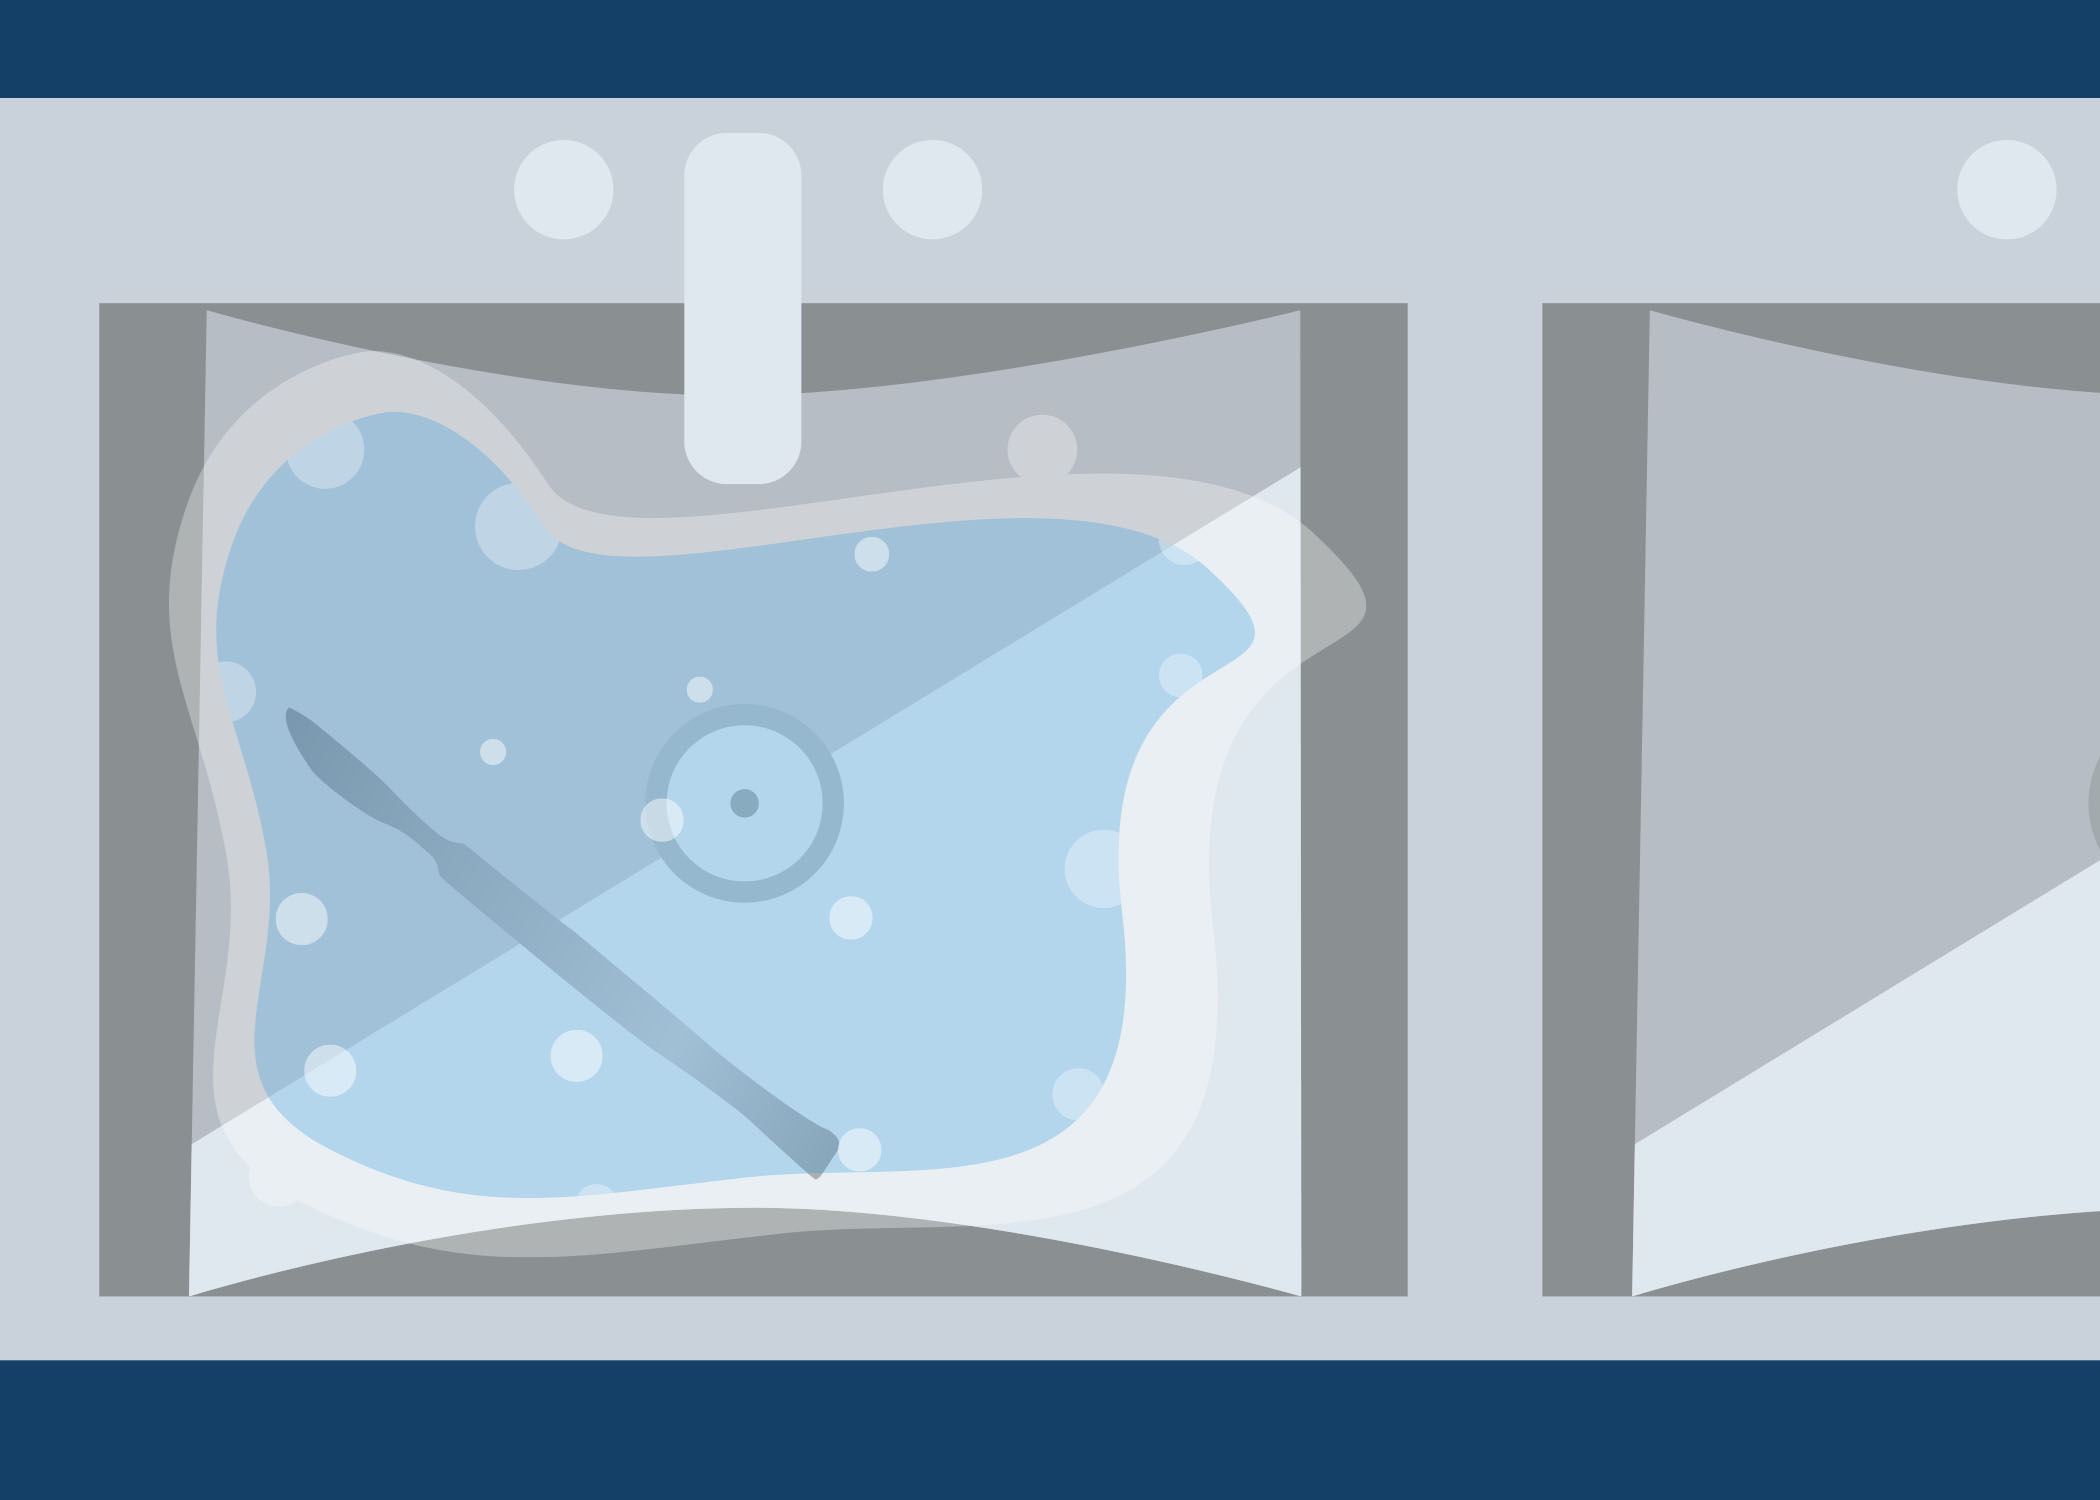
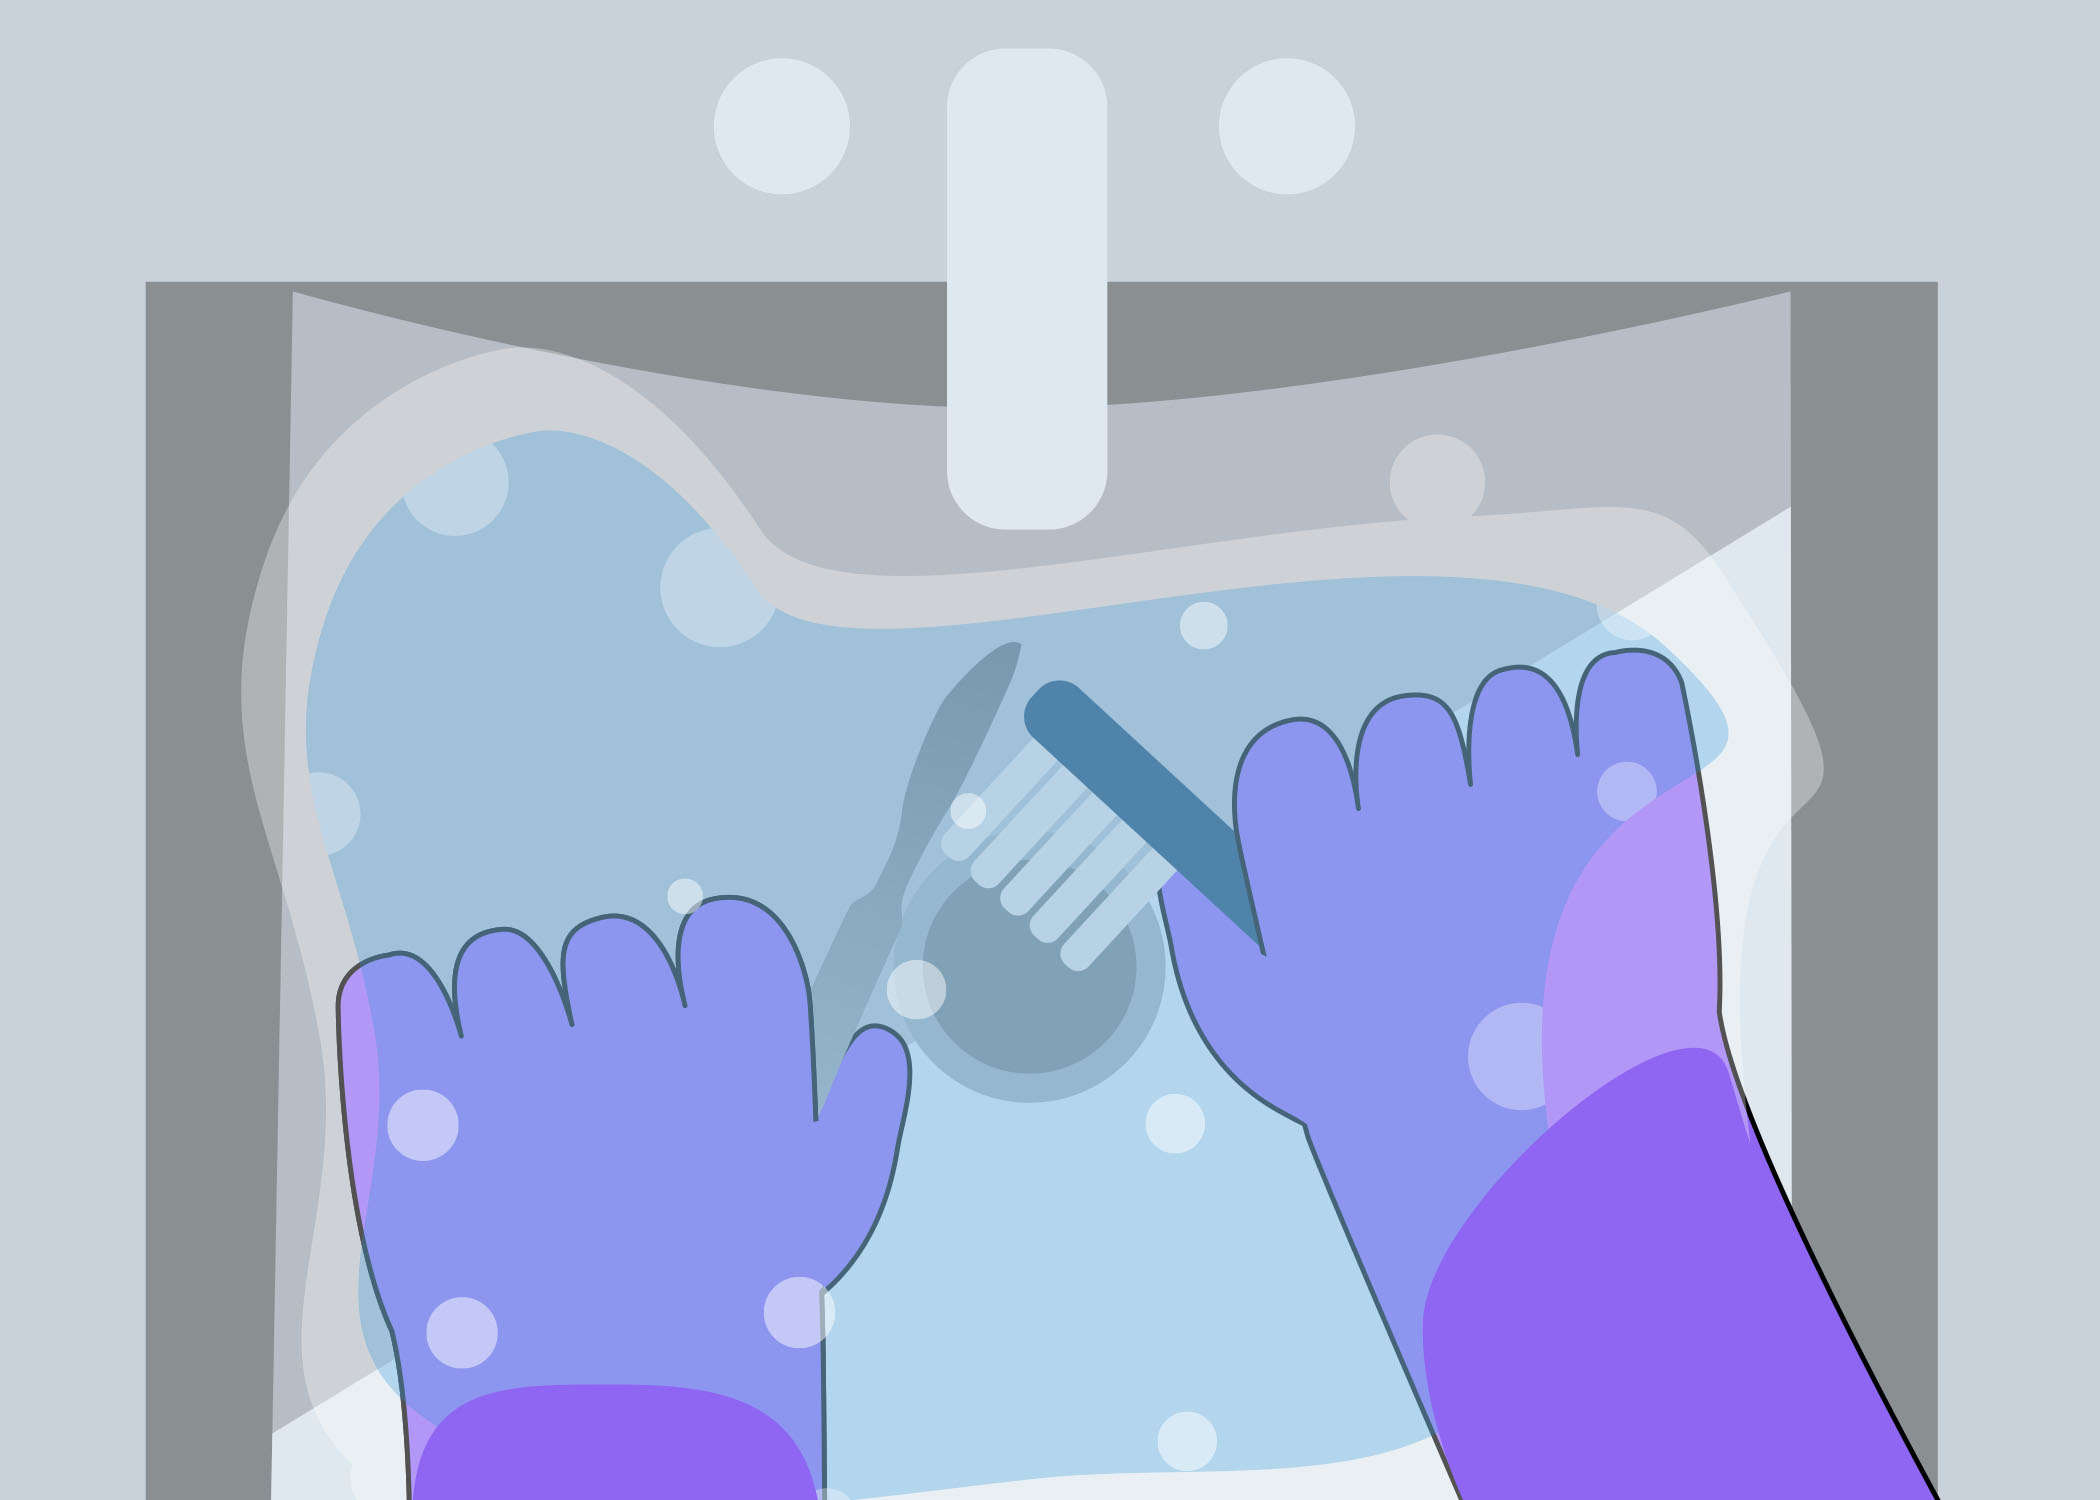
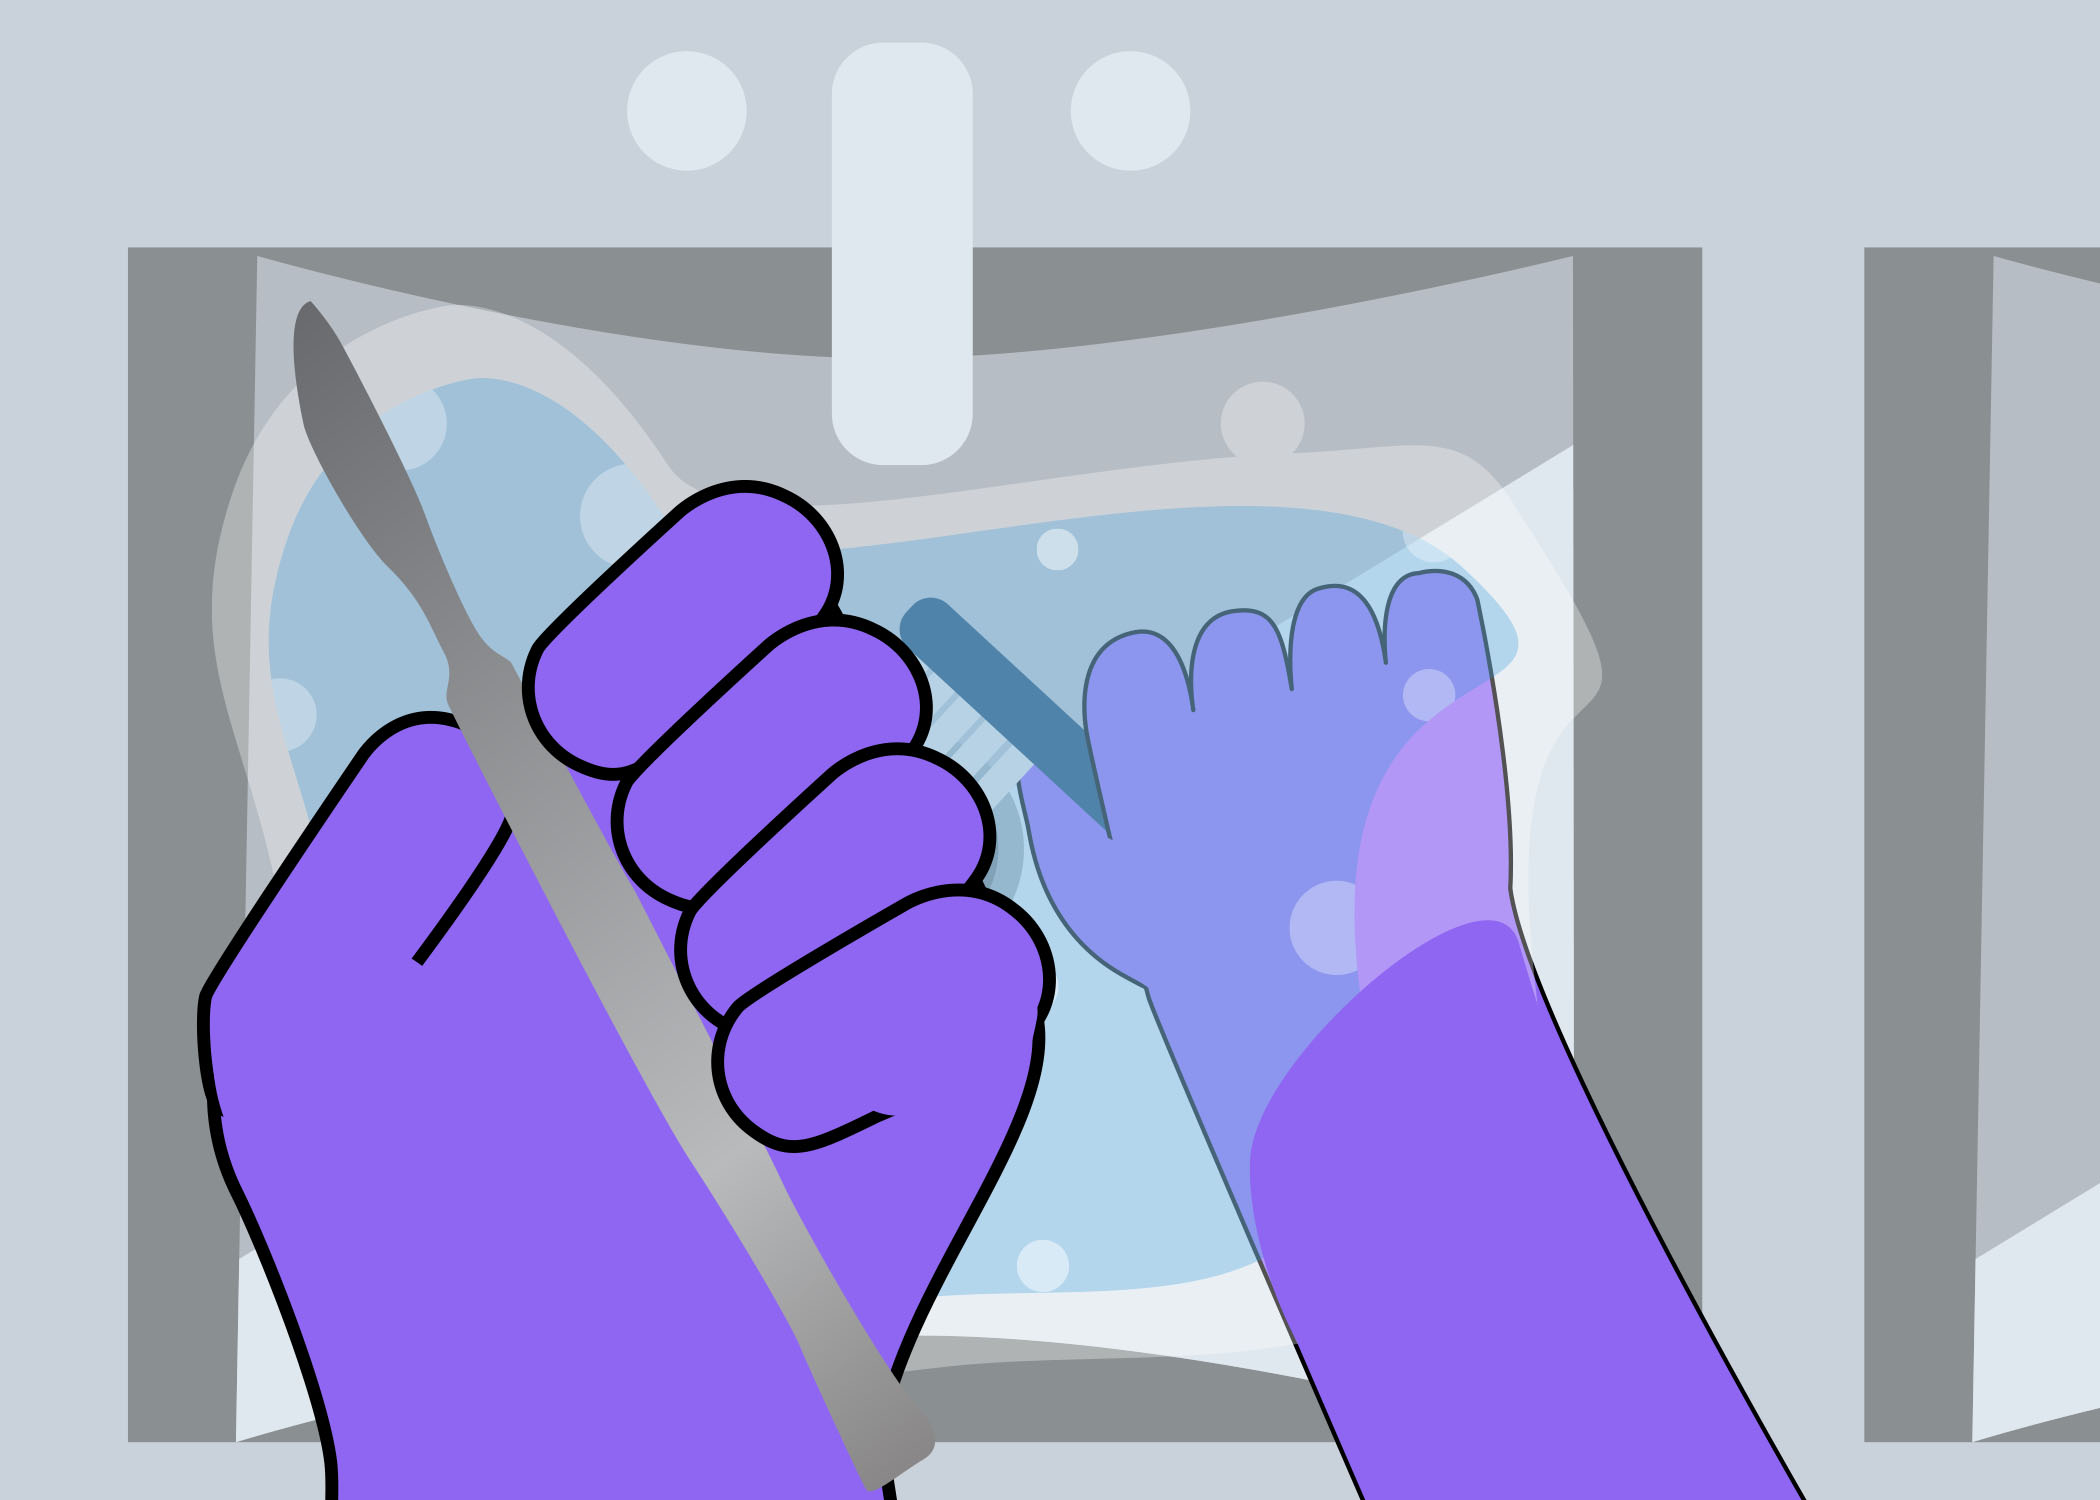
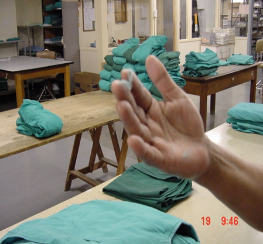
Look at the image below. On a piece of paper or in the box below, describe what is wrong with this set up for cleaning. As you go through this module, you will learn about the cleaning process.
-
Cleaning (5 min)
Why Clean Medical Equipment?
Instruments and materials used during patient care and operations will be covered with blood, body fluids and tissue remains. Hinged instruments may have remnants of blood, body fluids and tissue from the operation. The tubing of hollow instruments may be also full of these soiled materials.
You cannot sterilize or disinfect without cleaning; thorough cleaning is essential because it removes:
- microorganisms, blood, body fluids and organic matter;
- organic matter which attach to the instrument and protects microorganisms during disinfection and sterilization; and
- organic matter that can inactivate disinfectants.
Cleaning protects:
- equipment from organic matter that can damage it; and
- staff from the risks posed by inappropriately cleaned medical devices.
Equipment Needed for Cleaning
Before starting the cleaning process, you must prepare cloths, brushes, spray guns and flushing device. The cloths should be soft and disposable; in some countries, they can be recycled and laundered. The brushes must have soft nylon bristles that will not damage the surface of the medical device; do not use brushes with metal or wire bristles. There should be at least two brushes available: one flat and one bottle brush. The spray guns should contain pressurized air or water, depending on what is available. Flushing devices can be automated; large syringes can be used if spray guns are not available.
Staff Protection
PPE goes a long way towards protecting health care workers from splashes and sprays when handling dirty medical devices. It is essential to protect the health care worker with:
- gloves (long domestic-style rubber gloves);
- aprons (plastic/waterproof);
- visors (eye covering); and
- closed-toe shoes or boots.
There should be clearly defined protocols in place for all stages of medical device reprocessing. Health care workers should be immunized for hepatitis B.
-
Cleaning Process (10 min)
The five main elements for effective cleaning are mechanical action, chemical action, contact time, temperature and solvent water. Combined, they will result in more effective cleaning of instruments. Click or tap on the different parts of the cleaning cycle to read more about each element.
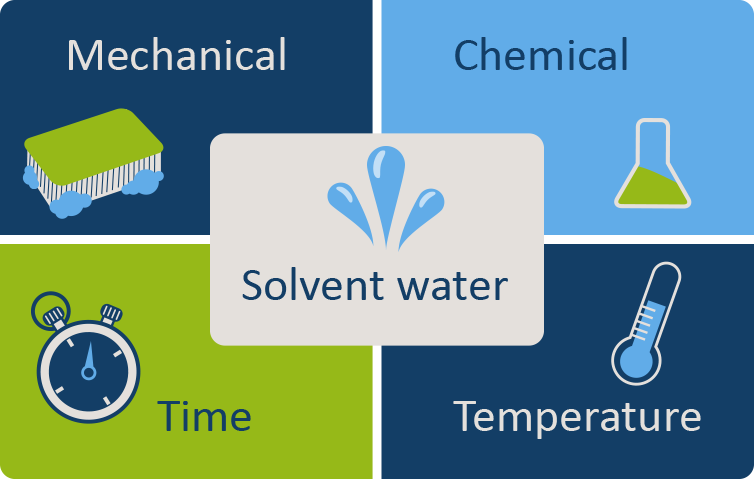
Mechanical action
Mechanical action is essential to cleaning. This is best accomplished by using soft nylon brushes, which do not damage equipment surfaces. Use wiping, flushing, brushing and spraying actions.
Chemical action
Water alone is not an effective cleanser; a detergent (see section below) that attracts and holds organic matter is necessary. Be sure to use a detergent that is recommended for use with medical devices.
Contact time
The recommended contact time for detergent to interact with the various surfaces must be adhered to. Do not rush.
Temperature
Heat improves detergent performance, but not at temperatures over 45 °C. Make sure the temperature is not too high or materials with protein will coagulate.
Solvent water
Availability of good-quality water is essential; the water should be soft (with low mineral and salt content). Water-softening systems are available.
During the entire cleaning process, be sure to wear appropriate PPE to protect against the risk of splashes (which create aerosols) during manual cleaning and flushing of a medical device. Be sure that you have access to all surfaces on the device. Hinged devices must be opened so that all surfaces are in contact with the detergent. You should take apart more complex devices. Clean lumens with a brush.
After thorough cleaning with an enzymatic detergent (to break down and help dislodge debris), the instruments should be rinsed with water. You do not need to soak them in a hypochlorite or any other disinfectant solution as part of the cleaning process; this is common practice in many low-resource settings but is not recommended and rather strongly discouraged.
Detergents
Whenever possible, use an enzymatic detergent recommended by the instrument manufacturer. When this is not possible or practical, use a locally available detergent intended for washing items by hand. Take care that the detergent is fully dissolved before use and thoroughly removed from the instrument by rinsing afterwards. Detergent solutions should not stay in use for more than one day. Containers used for making up and using detergents should be rinsed after use and dried.
Domestic-grade detergents, such as those you would use at home, are not recommended for health care instruments; this is to prevent corrosion of instruments. The proper detergents are based on pH and inhibit corrosion. Water hardness will determine the type and quantity of detergent used under manufacturer guidelines, so be sure to use the correct amount. When only domestic-grade detergent is available, check during each cleaning for any signs of corrosion.
To prepare the correct strength of detergent, use this formula (note that the WHO manual’s formula is incorrect):
Volume of detergent required (mL)=(concentration required × capacity of the sink or bowl (mL) concentration suppliedClick or tap the arrows in the image carousel to view the process for preparing detergent.
-
Put a marker in the sink and fill with clean tepid water. -

Take a clear container and mark the level for the amount of detergent. -
Add concentrated detergent to the clean water and mix well.
Immersion Method
Click or tap the arrows in the image carousel to learn about the immersion method for cleaning medical devices.
-
Fill a sink or appropriate basin with enough warm water (27 ºC to 44 ºC or 80 ºF to 110 ºF) and detergent for complete immersion of the device. -
Fully immerse the opened or disassembled medical device. -
Keep the device below water level and scrub with a soft nylon brush. Thorough cleaning is crucial, especially with medical devices that have hollow lumens. -
Inspect the device frequently to ensure all surfaces are clean. -

In another sink or basin, completely immerse the device in clean, purified water and rinse thoroughly. -

Mechanically dry; if this is not available, or not recommended by the manufacturer, air-dry or hand-dry using a disposable clean, non-linting cloth.
Lumen Devices
Soft brushes are needed when cleaning lumens to prevent damage to the instrument. You will need a brush that is long enough to pass through and exit the other side. If the brush is not long enough, the lumen should be rinsed thoroughly several times during cleaning. Make sure all lumen devices are well cleaned with a bottle brush and then flush through under pressure with either water or air. Be sure to wear appropriate PPE to protect against the risk of splashes (which create aerosols) during manual cleaning and flushing of a medical device.
Dos and Don’ts of Cleaning
Click or tap on the tabs to learn about the dos and don’ts of cleaning devices.
Do
When cleaning devices, be sure to
- wear appropriate PPE to protect against the risk of splashes (which create aerosols) during manual cleaning and flushing of a medical device;
- ensure detergent is prepared at the correct concentration and temperature (see above), and is used for the recommended contact time;
- keep soiled instruments moist, and clean as soon as possible after the procedure;
- take apart instruments before cleaning;
- open hinged/jointed instruments to ensure access to all surfaces;
- use appropriately sized brushes to clean lumen devices;
- use soft-bristle brushes to clean serrations and box locks;
- inspect instruments after cleaning; magnifying glasses can be used for close inspection of clean instruments under the surface of the water to reduce the risk of aerosol production; and
- follow manufacturer instructions for the cleaning of all medical devices.
Don’t
When cleaning devices, never
- use disinfectants (especially bleach) because they are corrosive, may destroy the medical device, and will leave a residue that could cause harm to the patient. Disinfectants are inactivated by organic matter anyway, so using them is a waste of resources. If used incorrectly, disinfectants can cause toxic reactions in staff;
- use water over 45 oC, as it coagulates protein, making devices difficult to clean;
- use a hard or abrasive item; and
- scrub under a running tap, because this produces aerosols.
-
-
SOPs and Record Keeping (5 min)
It is important to develop standard operating procedures (SOPs) for the SSD or decontamination unit and review them regularly. The SOPs must have a date of implementation and an expected review date.
In addition to SOPs, the decontamination unit should also have:
- records of staff training (both induction and regular updates);
- a logbook for each occurrence of equipment testing and maintenance;
- a record of system failures and remedial action;
- records of stock control; and
- schemes for identifying the location of items (e.g., in storage, sterile service department/decontamination unit).
If there is a failure in the decontamination process, having these records will make it easy for you to track and trace equipment and recall patients for follow-up.
-
Knowledge Check (5 min)
For each of the following questions, move the slider to indicate whether you should or should not do the activity when cleaning medical devices.
-
Inspection, Assembly and Packaging (5 min)
In the decontamination unit, there should be an area for inspection, assembly and packaging. This area is used for inspecting and function-testing cleaned medical devices before reassembly and packaging for sterilization, and for maintaining quality/traceability records.
Let us look at each of these activities in more detail. Click or tap on each step in the graphic below to learn more.

Inspection
Before assembly, it is important to inspect all devices to ensure that all of them are present, visibly clean and functioning correctly. Be sure to inspect the integrity of the instrument or equipment for any issue that may hinder the medical device from functioning properly and/or undergoing decontamination. A magnifying lens may be required to assist in identifying minor damage that cannot be seen by the naked eye.
For this process, you will need:
- the original packaging checklist – to verify the presence of all devices in a tray;
- good lighting – to aid inspection;
- magnification – to aid inspection; and
- SOPs – for reference to ensure that the procedure is followed correctly.
Assembly
During assembly, you should make sure that all parts are present and correctly reassembled (when necessary).
Packaging
The purpose of packaging medical devices is to allow penetration of the sterilizing agent (e.g., steam, gas), maintain the sterility of the contents of the pack from the sterilization process, and allow removal of the contents using aseptic techniques.
Newspaper and brown paper cannot be used; the paper should be strong (the surgical tray weighs 8 kg), allow penetration of steam without becoming saturated, and not lint or shed onto the device. The paper must also be single-use only; however, if the equipment is double-wrapped, the outer layer could be used as a sterile surface. Both layers must be discarded after use. Alternatively, a non-linting penetrable paper that is steam-tolerant could be used on the inside and cotton wrapping on the outside. It is important to note that sterility is not guaranteed with this method if devices are stored incorrectly.
There are advantages and disadvantages to using cotton in packaging. The advantages are that cotton can be used as an inner wrapper or outer dust cover, and that it is strong, easy to work with and can be reused. The disadvantages are that it does not provide an adequate microbial barrier, and it can release particles and/or lint. The lint from cotton wraps can be introduced into wounds and cause infection or foreign body reaction in the patient.
reveal_title
reveal_content
-
Disinfection: Chemical Methods (10 min)
In the last part of this module, we will cover disinfection and sterilization. We will start with a discussion of disinfection achieved by using chemical methods. There is a difference between a disinfectant and an antiseptic. A disinfectant is a chemical agent that is capable of killing most pathogenic microorganisms, but not necessarily bacterial spores, on inanimate surfaces. It is recommended for killing a range of microorganisms. Antiseptic is the equivalent agent for killing microorganisms present on skin and mucous membrane.
When choosing a disinfectant, consider the following:
- purpose: the level of decontamination required;
- range and level of activity;
- rate of kill/turnaround time;
- how quickly it dries and whether it leaves a residue;
- health and safety issues (e.g., Glutaraldehyde);
- compatibility with the material used – for example, hypochlorite (bleach) damages surgical instruments;
- inactivation by organic matter (e.g., alcohol and hypochlorite (bleach));
- ease of use; and
- cost.
All of these criteria are important. Consideration should be given to each one, weighted based on your context. This graphic shows resistance to germicidal activity of chemical disinfectants against various microorganisms, in descending order.
Micro-organisms Level of decontamination Prions (agents for Creutzfield-Jakob disease) Prion reprocessing Bacterial spores (bacillus subtilis, clostridium difficile)
Coccidia (cryptosporidium)Sterilization Mycobacteria (mycobacterium tuberculosis) High level disinfection Nonlipid or small viruses (poliovirus, rhinovirus) Intermediate level disinfection Vegetative bacteria (E. coli, Staph aureus)
Lipid or medium sized viruses (Hepatitis B, HIV)Low level disinfection Click or tap on the tabs to learn more about disinfectants.
Antimicrobial activity
This table summarizes the properties of disinfectants. The four most commonly used to disinfect medical devices and equipment are alcohol 60–70%, chlorine-releasing agents, glutaraldehyde, and peracetic acid.
Disinfectant Antimicrobial activity Bacteria Mycobacteria Spores Viruses Enveloped Non-enveloped Alcohol 60–70%
(ethanol or isopropanol)+++ +++ - ++ ++ Chlorine releasing agents
(0.5–1% available chlorine)+++ +++ +++ +++ +++ Glutaraldehyde (2%) +++ +++ +++ +++ +++ Peracetic acid (0.2–0.35%) +++ +++ +++ +++ +++ Peroxygen compounds*
(3–6%)+++ ± ± +++ ± Activity: +++ = Good; ++ = Moderate; ± = Variable; - = no or insufficient activity. *Activity varies with concentration
Other properties
Disinfectant Other properties Stability Inactivation by
organic matterCorrosive/
damagingIrritant/
sensitizingAlcohol 60–70%
(ethanol or isopropanol)Yes (in closed container) Yes (fixative) Slight (lens cements) No Chlorine releasing agents
(0.5–1% available chlorine)No (< 1 day) Yes Yes Yes Glutaraldehyde (2%) Moderately (14–28 days) No (fixative) No Yes Peracetic acid (0.2–0.35%) No (< 1 day) No Slight Slight Peroxygen compounds*
(3–6%)Moderately (7 days) Yes Slight No *Activity varies with concentration
Chlorine-releasing Agents
Chlorine-releasing agents include liquid bleach and sodium dichloroisocyanurate (NaDCC) tablets. Their main use is for disinfection of the environment, unless otherwise recommended by the manufacturer of the medical device. Diluted solutions are unstable; they should therefore be freshly prepared daily and used before the expiry date. Decomposition of chlorine is accelerated by light, heat and heavy metal.
These agents may bleach fabrics, carpets or soft furnishings, and are inactivated by organic matter such as blood and body fluids. Thorough cleaning of the device prior to using these agents is essential. They are corrosive to metal, damaged plastic, rubber and similar components on prolonged contact and thus are not recommended for use on surgical instruments, whether prior to cleaning or for disinfection of PPE.
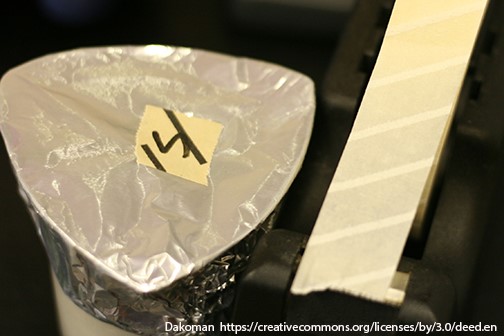
After thorough cleaning, hypochlorite solution can be used only for certain substances, as outlined in the table. Use the recommended solution strengths. Test strips are available to check the correct strength of chlorine.
Use Available chlorine ppm* Blood spills 10,000 Laboratory discards jars 2,500 General environmental disinfection 1,000 Disinfection of clean instruments 500 Infant feeding bottles and teat 125 Food preparation areas and catering equipment 125 Eradication of Legionella from the water supply system depending on exposure time 5-50 Hydrotherapy pools Routine 1.5-3 If contaminated 6-10 Routine water treatment 1.5-1 *Undiluted commercial bleach products are usually available between 5.25% or 6.00%-6.15% sodium hypochlorite depending upon the manufacturer.
Sodium dichloro-isocynaurate (NaDCC) tablets are also available and may be used for the preparation of chlorine solutions.
There are test strips available for measuring the level of available chlorine in a diluted bleach solution to ensure the desired concentration as outline above.
Do not use the following chemicals for medical devices:
- chlorhexidine gluconate
- hexachlorophene
- iodophor
- benzalkonium chloride
- cetrimide
- quaternary ammonium compounds
-
Disinfection: Thermal Methods (5 min)
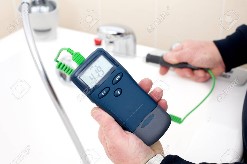
High-Pressure Cooker
A high-pressure cooker is not recommended for cleaning medical devices because the devices will only be thermally disinfected, not sterilized. However, in many limited-resource settings, high-pressure cookers are unfortunately the most common method for thermal disinfection. The IPC focal person must advocate to leadership the need for more appropriate, recommended decontamination methods. This type of thermal disinfection should only be an interim solution until a recommended method is available.
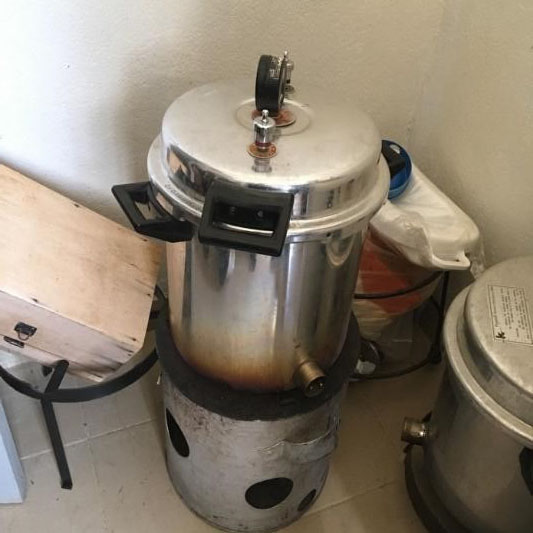
Note: In this picture, the heat source is inadequate to heat up the pressure cooker. It needs to be operated electrically.
If used as a temporary solution:
- The cycle should take 20 minutes.
- Set the temperature at ≥100 °C.
- Fill the cooker with a layer of water.
- Put the rack with the cleaned instruments in the cooker.
Warning: Ensure staff are aware of the risk of burning/scalding when emptying the cooker.
Boiler
Boilers are used widely in low- and middle-income countries. This method uses boiling water 100 °C for 5–10 minutes. Boilers are effective, inexpensive, and leave no toxic residues. However, they must meet certain criteria to effectively disinfect medical devices. Requirements include:
- temperature control (using a thermometer);
- a working gauge;
- ability to time the procedure (using a timer);
- a basket (to prevent contamination, avoid use of cheatle forceps);
- a cover with a lockable lid to prevent more items being added before the designated time period has elapsed; and
- items must be cleaned first (this is a must before immersion).
Source: Saltanat ebli, Wikimedia Commons
It is essential that a logbook be kept for each boiler.
Boilers are not suitable for heat-sensitive items and they have no process controls, such as time/temperature interlock for monitoring or validation. Also, forceps are required to remove devices from the boiler to try to maintain disinfection. Moreover, the health worker is at greater risk for scalding or burning than with other methods, and boilers can become contaminated when not in use. For these reasons, such methods for disinfection can offer high-level disinfection, but not true sterilization.
-
Knowledge Check (5 min)
For each statement, move the slider to indicate whether it is an advantage or disadvantage of using cotton for packaging medical devices before sterilization.
-
Sterilization (5 min)
Steam Sterilization
Steam is the best sterilizer for heat-stable devices. It can be heated to temperatures above 100 oC only by increasing the pressure to above that of normal atmosphere at sea level. By removing the air (required) from the chamber (via gravity or vacuum), pressurized saturated steam penetrates the packages in the chamber and is held there (holding time). Steam is extracted by reintroducing air to the chamber. This video may help you better understand the autoclave process.
Whether the device can be steam sterilized will depend upon whether it has been cleaned before sterilization; its tolerance to heat, moisture and pressure; the use and type of material it is wrapped in; the manufacturer’s directions on the proper method to use for reprocessing; and its design. In addition, the device must be solid so that all surfaces are exposed to steam. A hollow lumen (depending on its length/diameter) may hamper the efficacy of the sterilization process into the lumen.
Non-vacuum autoclaves, including non-vacuum bench-top sterilizers and pressure cookers, are not recommended. Pressure cookers do not remove air, so uniform penetration cannot be achieved – this is especially true when items are wrapped.
Limitations of non-vacuum autoclaves include
- a lack of downward displacement;
- a lack of penetration, meaning they are only suitable for solid items, such as scissors;
- instruments becoming non-sterile on removal because they are not wrapped; and
- no drying cycle.
Low-Temperature Sterilization
Steam sterilization using an autoclave may not always be possible. Some of the options available for low-temperature sterilization are:
- low-temperature plasma sterilization;
- ethylene oxide gas;
- vaporized hydrogen peroxide (VHP);
- H2 O2 -gas plasma;
- chemical disinfectants (glutaraldehyde, peracetic acid); and
- ultraviolet light.
These low-temperature alternatives require additional special handling for safe use. Sterilization with gaseous chemical methods, such as ethylene oxide, should be carried out in chambers with automated cycles that provide safety for the user and guarantee sterilization.
Dry Heat Sterilization
A dry heat sterilizer is a suitable option for sterilizing medical devices that can be damaged by steam. It is suitable for use with glassware, metallic items, heat-stable powders and such non-aqueous liquids as Vaseline, kerosene and grease.
Though hot-air ovens are convenient, they are not suitable for a number of medical items, including aqueous fluids and materials made of plastics, rubber and paper. One disadvantage of using hot-air ovens is that the decontamination cycle is long: pre-heating is essential prior to sterilization, and post-sterilization cooling time is lengthy. Another disadvantage is that dense loads often cause a problem, as the convection/conduction method used to heat the chamber does a poor job of penetrating tightly packed items, and the lack of a fan causes poor heat distribution.
Items cannot be wrapped in the sterilizer, due to risk of fire. It is therefore difficult to keep items sterile once they have been through the cycle.
This sterilization process cannot be audited or safely validated. More on validation later in this module.
-
Time and Temperature (5 min)
To achieve effective sterilization/disinfection using heat methods, it is essential that time and temperature relationships are understood and observed. This process must be validated (more information is provided later in this module).
Process Temperature (C) Holding period (min) Comments HEAT Moist heating (autoclaving) 121 15 Sterilization 126 10 Sterilization 134 3 Sterilization Dry heat* 160 120 Sterilization 170 60 Sterilization 180 30 Sterilization Low-temperature Steam and formaldehyde 73 180 Sterilization Low temperature Steam 73 10 Disinfection Boilers¥ 100 5-10 Disinfection Pasteurizers 70-100 Variable Disinfection *All temperature and times quoted for dry heat are minimums.
¥At higher altitudes, longer times are required because the boiling-point of water gets lower the higher one gets above sea level.
-
Validation and Testing of Sterilization (10 min)
How do you know a piece of equipment is safe for use? All sterilization methods must be validated to ensure the process is working properly and safely. The results are logged in a register or log book, as well as in the patient’s file, as an essential part of the record.
So, what is validation? Validation is the documented procedure for obtaining, recording, and interpreting the results required to establish that a process will consistently disinfect and sterilize instruments and other medical devices. It applies to equipment or procedures used when reprocessing medical devices for reuse. Each step of the decontamination cycle requires validation. Validating a process consists of systematically carrying it out in a specific manner to improve it by:
- establishing temporary programmes and checklists;
- validating protocols with criteria for acceptance/rejection;
- planning for resource needs; and
- performing risk analyses.
Validation should include installation, operational and performance qualifications. Click or tap on each type of qualification to learn more.
Installation
In some countries, equipment that is purchased or donated must first be checked to make sure it is fit for its intended purpose. Before accepting any equipment, it is essential to document that it has been installed according to manufacturer specifications. Be sure to:
- verify the correct installation of connections: water, steam, electricity, compressed air and ventilation. This ensures that the different parameters meet the manufacturer’s specifications and any applicable regulations.
- verify the correct operation of the equipment’s different security functions, according to the manufacturer’s guidelines.
- confirm that the machine is equipped with adequate technical documentation – such as installation plans and a technical/operational user manual.
- document in the equipment log-book.
Operational
Operational qualification is the process of obtaining and documenting evidence that the installed equipment operates within predetermined limits when used in accordance with its operational procedures.
The following steps should be taken for a pre-vacuum autoclave:
- calibrate the regulation and control elements;
- run a cycle with the vacuum test;
- run a cycle with the Bowie-Dick test; and
- implement three thermometric tests in an empty chamber in order to obtain the temperature profile at all points of the chamber.
The following steps should be taken for a displacement autoclave:
- calibrate the regulation and control elements; and
- implement three thermometric tests in an empty chamber in order to obtain the temperature profile at all points of the chamber.
Performance
Equipment should be installed and operated in accordance with operational procedures. Performance qualification must be undertaken consistently, in accordance with predetermined criteria as specified.
Measurements for Validation
Click or tap on each process to find out what needs to be measured and how often.
Cleaning
What to measure: Each item.
How to measure: Visual inspection or by using a cleaning test.
When to measure: Daily (or every time the process is performed using detergent or a disinfectant).
Disinfection
What to measure: A load (everything disinfected in that cycle).
How to measure: Time of exposure.
When to measure: Daily. Use of disinfection by concentration, temperature and pH of disinfectant.
Chemical sterilizers
What to measure: Per process (i.e., the sterilizing process itself) or each item.
How to measure: Biological, chemical or physical indicators. If measuring per item, external indicators.
Steam sterilizer
What to measure: Per process (i.e., the sterilizing process itself) or each item.
How to measure: Biological, chemical or physical parameters met as per PQ. If measuring per item, external indicators.
When to measure: Daily. Bowie-Dick test for steam penetration in porous loads (pre-vacuum autoclave), Helix test for hollow lumen instruments, if available. Clean chamber every week.
Steam Sterilizers
Various methods can be used to validate steam sterilizers:
- Visual inspection: All packs must be dry (no visible moisture on inspection).
- Thermocouple test (a temperature-measuring device used by engineers): Leads are placed in different parts of the load and chamber (and drain) during a sterilization cycle.
- Physical indicators: Temperature and pressure charts are created.
- Leak test: A vacuum is created, and the return to atmospheric pressure observed.
The following tests aim to measure the accuracy of the sterilizer during the sterilization cycle.
-
Air removal test: Bowie-Dick test for air removal (look for uniform change of colour). If there are patches, it means that the steam has not penetrated the load uniformly, so sterilization is not fully achieved. -
Thermocouple test: for any sterilizer. -

Air detector test: pre-vacuum. -
Chemical indicators: dry and steam (colour-changing tape) -
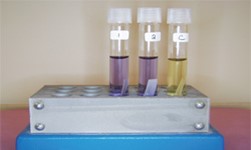
Biological indicators: contain spores which should be killed by the process (note colour change).
It is vital to understand the use of each of these validation tests, and where they can or cannot be applied.
-
Storage (5 min)
Without good storage (i.e., protection from contamination), disinfection and sterilization of medical devices will not matter. Decontaminated medical devices should be stored in a dry, clean and dust-free environment, with no water tapping points. The room temperature should be 20 °C. Store the devices away from direct sunlight and label them well (with name, expiry date, sterilization indicator). To allow air to circulate, do not pile the devices on top of each other. Medical devices should not touch the ground, walls or ceiling, and should not be placed on wooden shelves. Check expiry dates at least once a year and secure the data with a signed list.
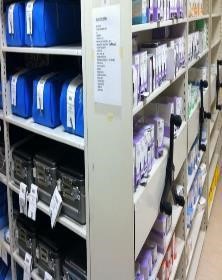
Photo credit: Christina Bradley
-
Knowledge Check (5 min)
-
Summary (5 min)
In summary, cleaning is a crucial step in the decontamination process; cleaning must be done before disinfection and sterilization. The five main elements for effective cleaning are contact time, temperature, mechanical action, chemical action (type of detergent) and solvent water. In the module, you learned the immersion method for cleaning, and how to clean lumen devices.
This module also covered the inspection, assembly and packaging processes for medical devices.
Finally, you learnt about different disinfection and sterilization methods. Disinfection methods include chemical and heat. Disinfection does not kill all microorganisms. To kill all microorganisms (except prions—that procedure is called prions reprocessing), sterilization is required, whether that be with steam, low-temperature methods or dry heat with proper validation of all cycle parameters.
To wrap up parts 1 and 2 of the decontamination modules, here are the key considerations for a proper decontamination process:
- Wear appropriate PPEs during the decontamination process.
- Don’t pre-soak instruments.
- Make sure a dedicated area is available for decontamination.
- Develop and follow SOPs.
- Declutter and keep your area clean, dry and dust-free.
- Improve cleaning of instruments.
- Improve inspection, assembly and packing.
- Improve workflow from dirty (receipt/cleaning of contaminated instruments) to clean (sterilized items) areas.
- Ensure appropriate validation of the sterilization process.
- Maintain temperature and humidity control.
- Provide a sink for hand-washing.
- Provide suitable education and training of staff.
-
References
- Fraise AP. Decontamination of the environment and medical equipment in hospitals. In: Principles and practice of disinfection, preservation, and sterilization, 5th edition. Oxford: John Wiley & Sons; 2013. p. 445–58.
- Damani N. Manual of infection prevention and control. Oxford: Oxford University Press; 2019.
- Decontamination and reprocessing of medical devices for health-care facilities. Geneva: World Health Organization. 2016.
- Guideline for disinfection and sterilization in healthcare facilities. Centers for Disease Control and Prevention. 2008.