Personal Protective Equipment
Personal protective equipment (PPE) is specialized clothing worn by healthcare personnel (HCP) for protection against infectious materials. PPE is a safety element used in healthcare delivery that relies on correct and consistent use by HCP. Because of this, it is less effective than replacement or removal of hazards, engineering controls, and administrative controls.
When used correctly, PPE provides a physical barrier that protects your eyes, nose, mouth, skin, and clothing. Safely putting on, using, and removing PPE during healthcare activities relies on human decision-making and performance; therefore, it is essential to recognize risk of potential exposures and be sure PPE is used correctly and appropriately.
Learning Objectives
By the end of this module, you will be able to:
- Explain how personal protective equipment (PPE) is used in healthcare settings.
- Identify types of PPE and rationale for use.
- Describe how to safely put on, use, and remove PPE.
Learning Activities Estimated time:
-
PPE Use in Health Care (10 min)
Healthcare personnel should wear PPE when there is risk of exposure to infectious materials, such as blood or body fluids, used medical equipment or supplies, or soiled environmental surfaces. Healthcare personnel include all persons, paid and unpaid, in the healthcare setting who have direct patient contact or potential for exposure to infectious materials. This includes persons not directly involved in patient care, such as environmental services/cleaning staff or volunteers, who could be exposed to infectious material.1
PPE should also be available for family members or visitors who participate in patient care and who may be exposed to infectious materials. Such family members must be carefully instructed on correct use, removal, and disposal of PPE.
Understanding Risk
Appropriate use of PPE is a component of Standard Precautions. PPE selection is based on the nature of the patient interaction and anticipated exposure to an infectious agent(s). Understanding the interaction and anticipated exposure is based on risk recognition and risk assessment.
“A set of infection control practices used to reduce transmission of microorganisms in all healthcare settings. They are recommended for the care of all patients regardless of suspected or confirmed infection in any healthcare setting”- Risk recognition is the concept that every HCP should be able to identify sources of infection and actions that can lead to possible infections.
- Risk assessment is the approach every HCP takes to reduce the risk of transmitting microorganisms and potential pathogens among HCP, patients, and the environment.
In other words, risk recognition is identifying sources of infection and risk assessment is taking appropriate action to reduce transmission of microorganisms. A risk assessment is performed before every interaction with a patient or the patient care environment.
For example, a patient presents to the emergency room with a cough, runny nose, and sneezing. The nurse recognizes a potential for transmission and separates the patient to a different area of the waiting room. She also provides a mask to the patient, offers tissues, and instructs the patient to perform timely hand hygiene.
In this example, the risk recognition is that the nurse identified that germs can spread to others in the air from someone who is coughing or sneezing. The risk assessment by the nurse led to the actions of physically separating the patient, providing a mask and tissues, and encouraging hand hygiene.
- Separating the patient decreases the risk of infectious respiratory droplets spreading to others.
- Giving a patient a mask stops infectious particles from spreading in the air.
- Hand hygiene at the right moment prevents hands from spreading germs on surfaces and to others.
-
Types of PPE (5 min)
Click or tap on each type of routine PPE for HCWs to learn more.
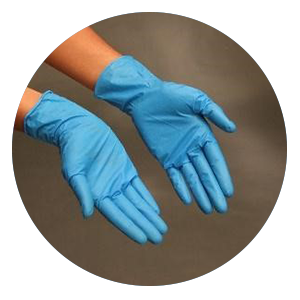
Gloves
Gloves protect HCP hands from coming in contact with potentially infectious materials. Always perform hand hygiene before reaching into a box of clean gloves to prevent contamination. Remove gloves carefully and dispose of them to prevent the infectious material from spreading or transferring to other surfaces and perform hand hygiene.
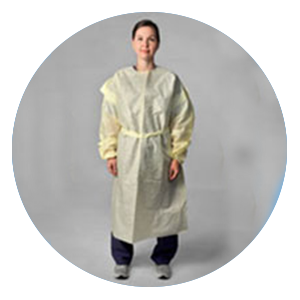
Gowns
Gowns are a physical barrier that protects clothing and skin from infectious material when contamination by splashes or sprays are possible or likely (i.e., during procedures like childbirth). Gowns can be single-use (disposable) or reusable, depending on the type of material. Always remove gowns promptly after completing the task and before removing the immediate care area to prevent the infectious material from spreading or transferring to other surfaces.
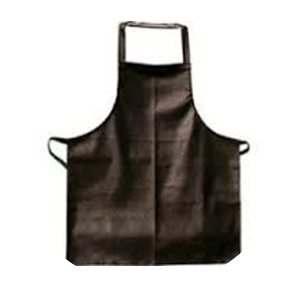
Aprons
Aprons provide a waterproof barrier along the front of the body, protecting the gown and clothing of the HCP when large amounts of splashes or sprays are anticipated during patient care or cleaning activities. Aprons can be disposable or reusable, depending on the material type.
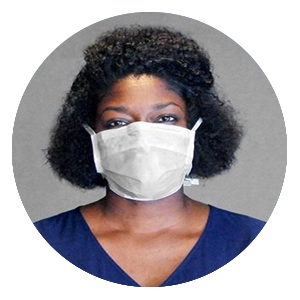
Masks
Masks are physical barriers that prevent splashes or sprays from reaching a HCP’s mucous membranes (e.g., nose, mouth). They also block oral secretions from HCP to patient (e.g., during surgery, lumbar punctures). Masks are single-use only.
Particulate respirator
Some masks, called respirators (N95), can protect HCPs from inhalation of microorganisms in tiny particles that float in the air and remain infectious, e.g., for tuberculosis generated by coughs or by aerosol-generating procedures.
Eye protection
Eye protection provides a physical barrier during procedures likely to involve splashes or sprays of blood, body fluids, or chemicals (cleaners and disinfectants). Eye protection includes goggles or face shields. Goggles are usually reusable and must be cleaned between uses. Face shields are usually disposable.
You’ll learn about the rationale and considerations for use for each item in the next section.
Additional PPE:
Head covering: Head covers—such as caps or hoods—contain long hair during work and prevent infectious material from landing on or being applied to hair, e.g., by soiled hands.
Rubber boots can provide additional protection in wet or muddy environments, when routinely available footwear doesn’t adequately cover HCP feet (e.g., sandals), and when using hazardous chemicals.
-
Knowledge Check (5 min)
-
Gloves (10 min)
Gloves are a disposable barrier, serving two primary functions:
- To protect your hands from potentially infectious materials when providing patient care.
- To serve as a layer that can be removed, along with any microorganisms that may be present because of patient care, to prevent transmission to you, another patient, or the environment.
Medical gloves are defined as disposable gloves used during medical procedures. They include:
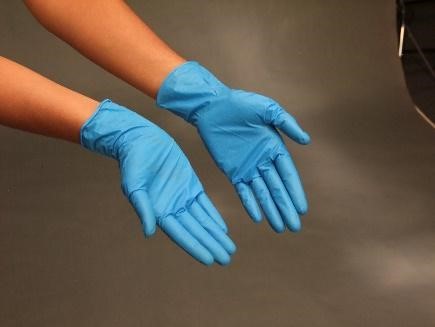
- Examination gloves (nonsterile)
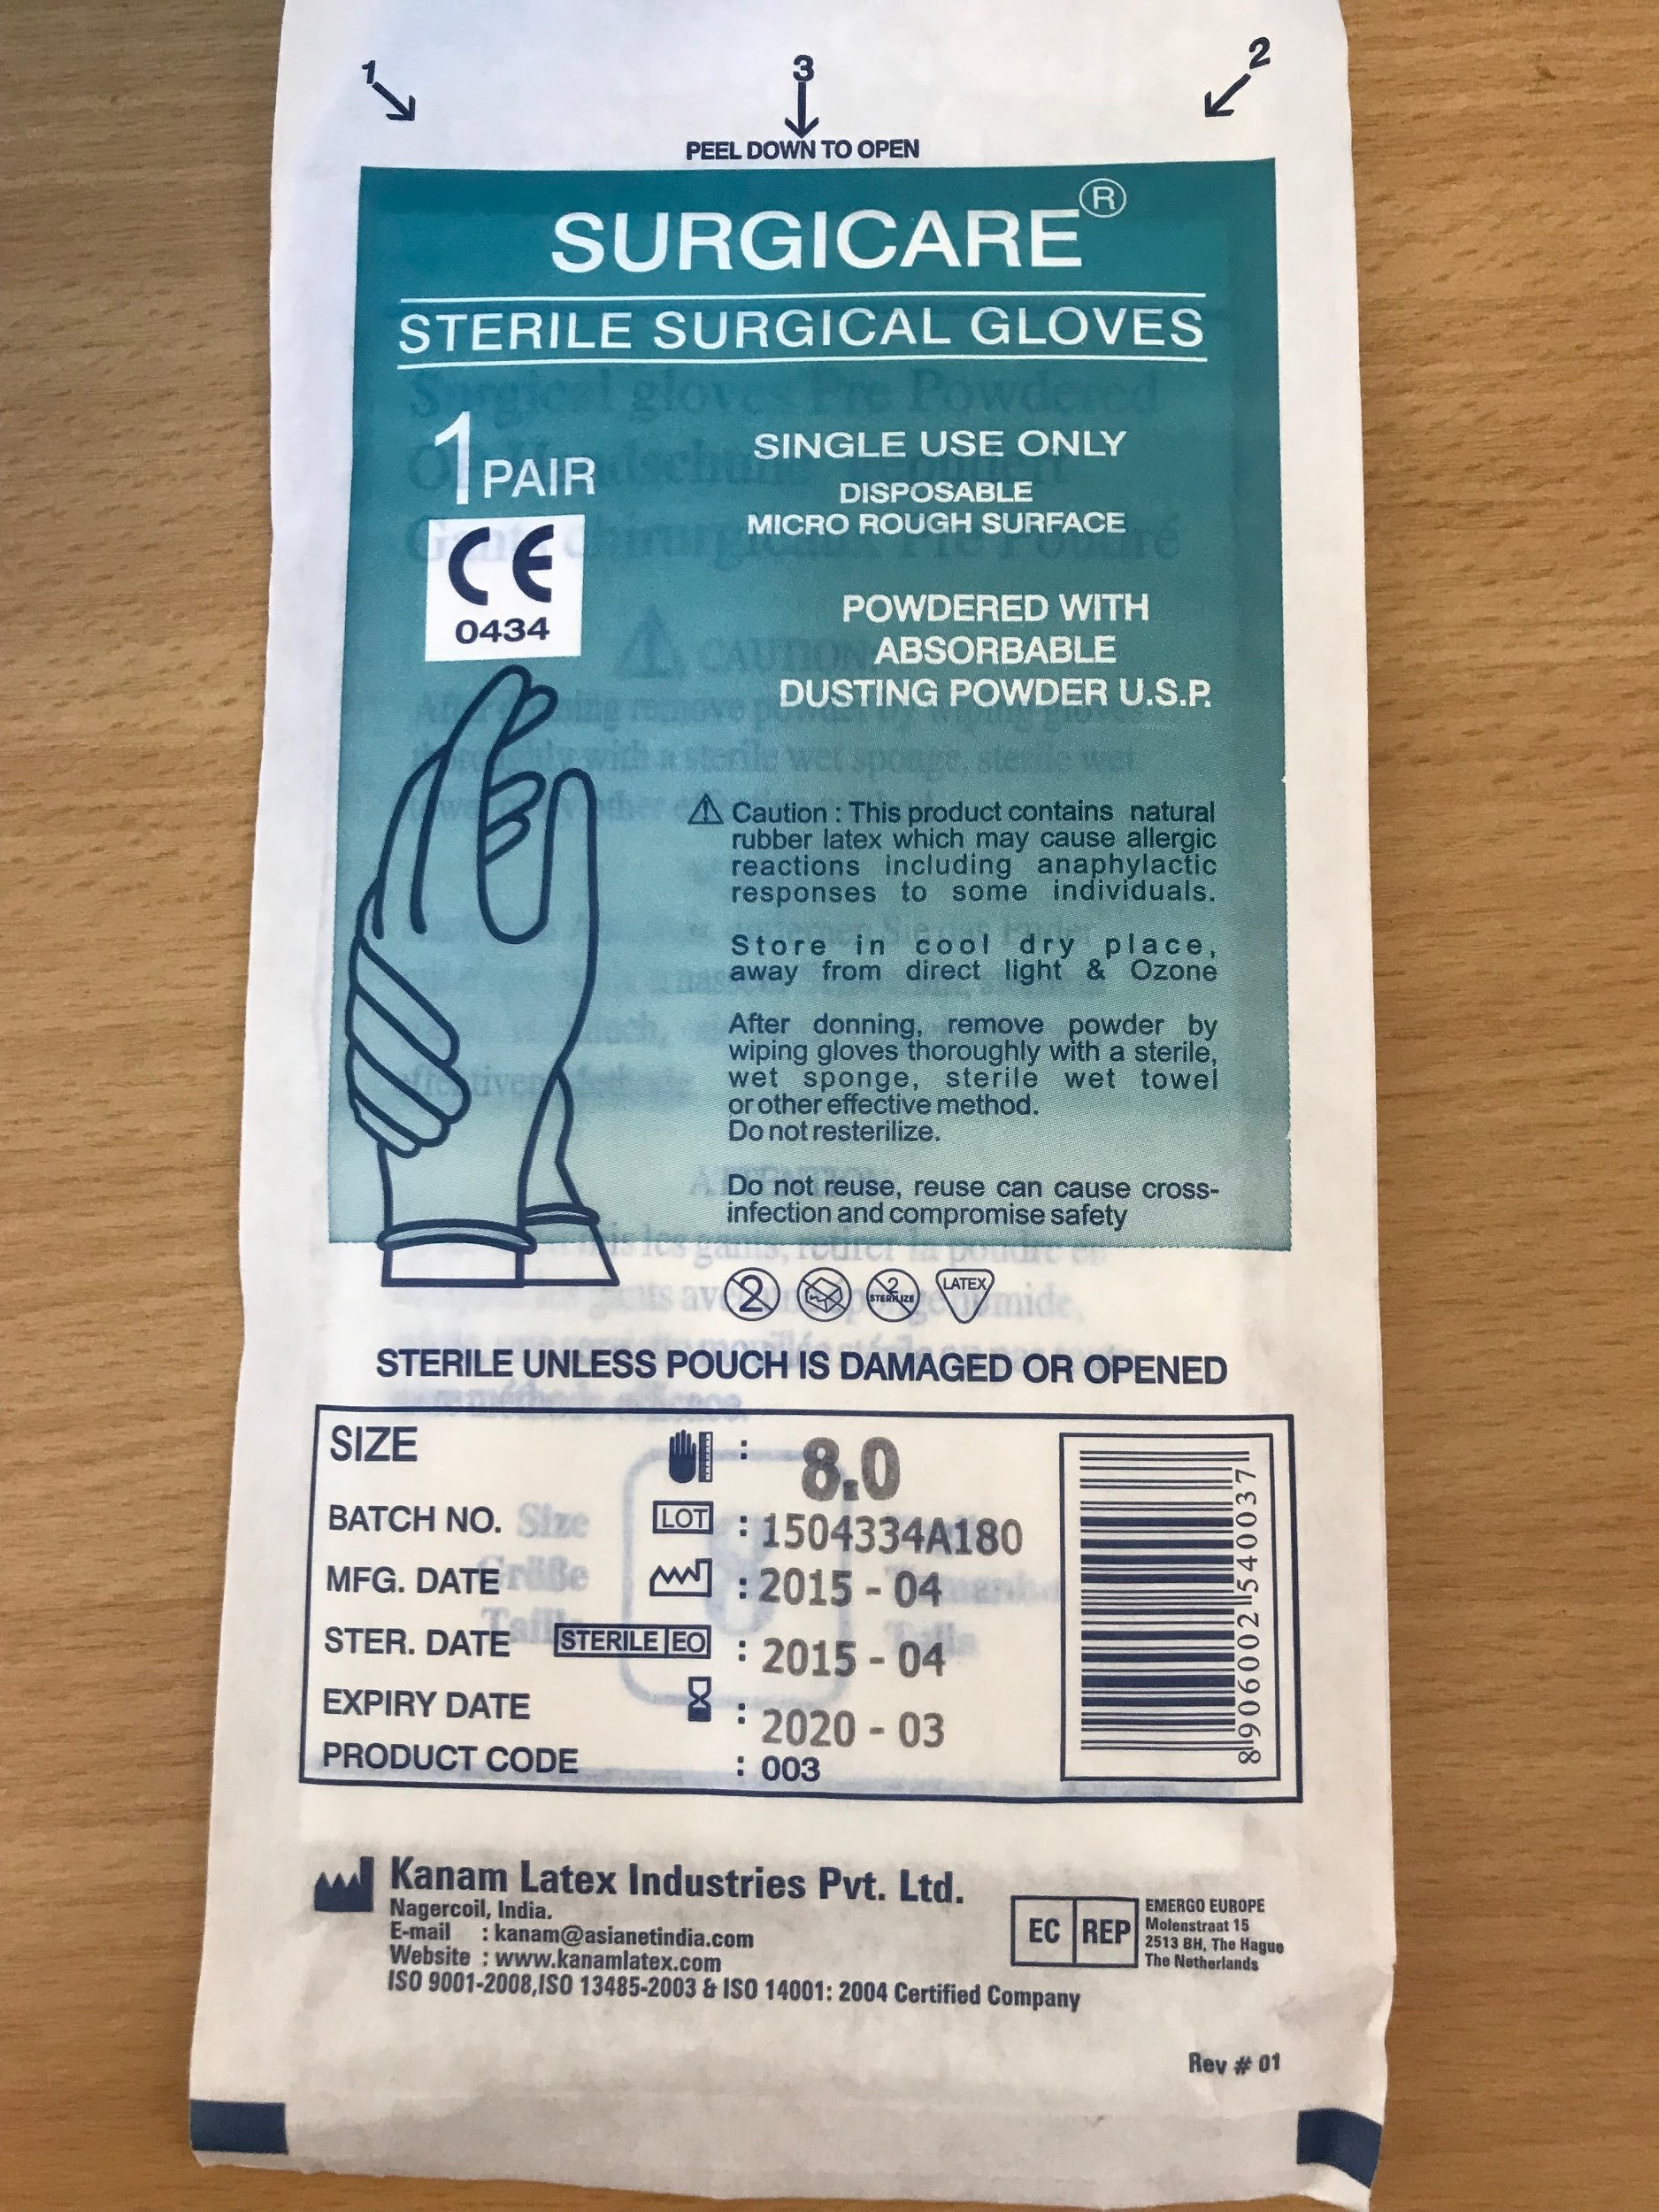
- Sterile surgical gloves have specific characteristics of thickness, elasticity, and strength. Surgical gloves prevent the transmission of microorganisms from the hands of HCPs to patients during sterile procedures, such as surgery or catheter insertion. They are packaged in individual sterile sets.
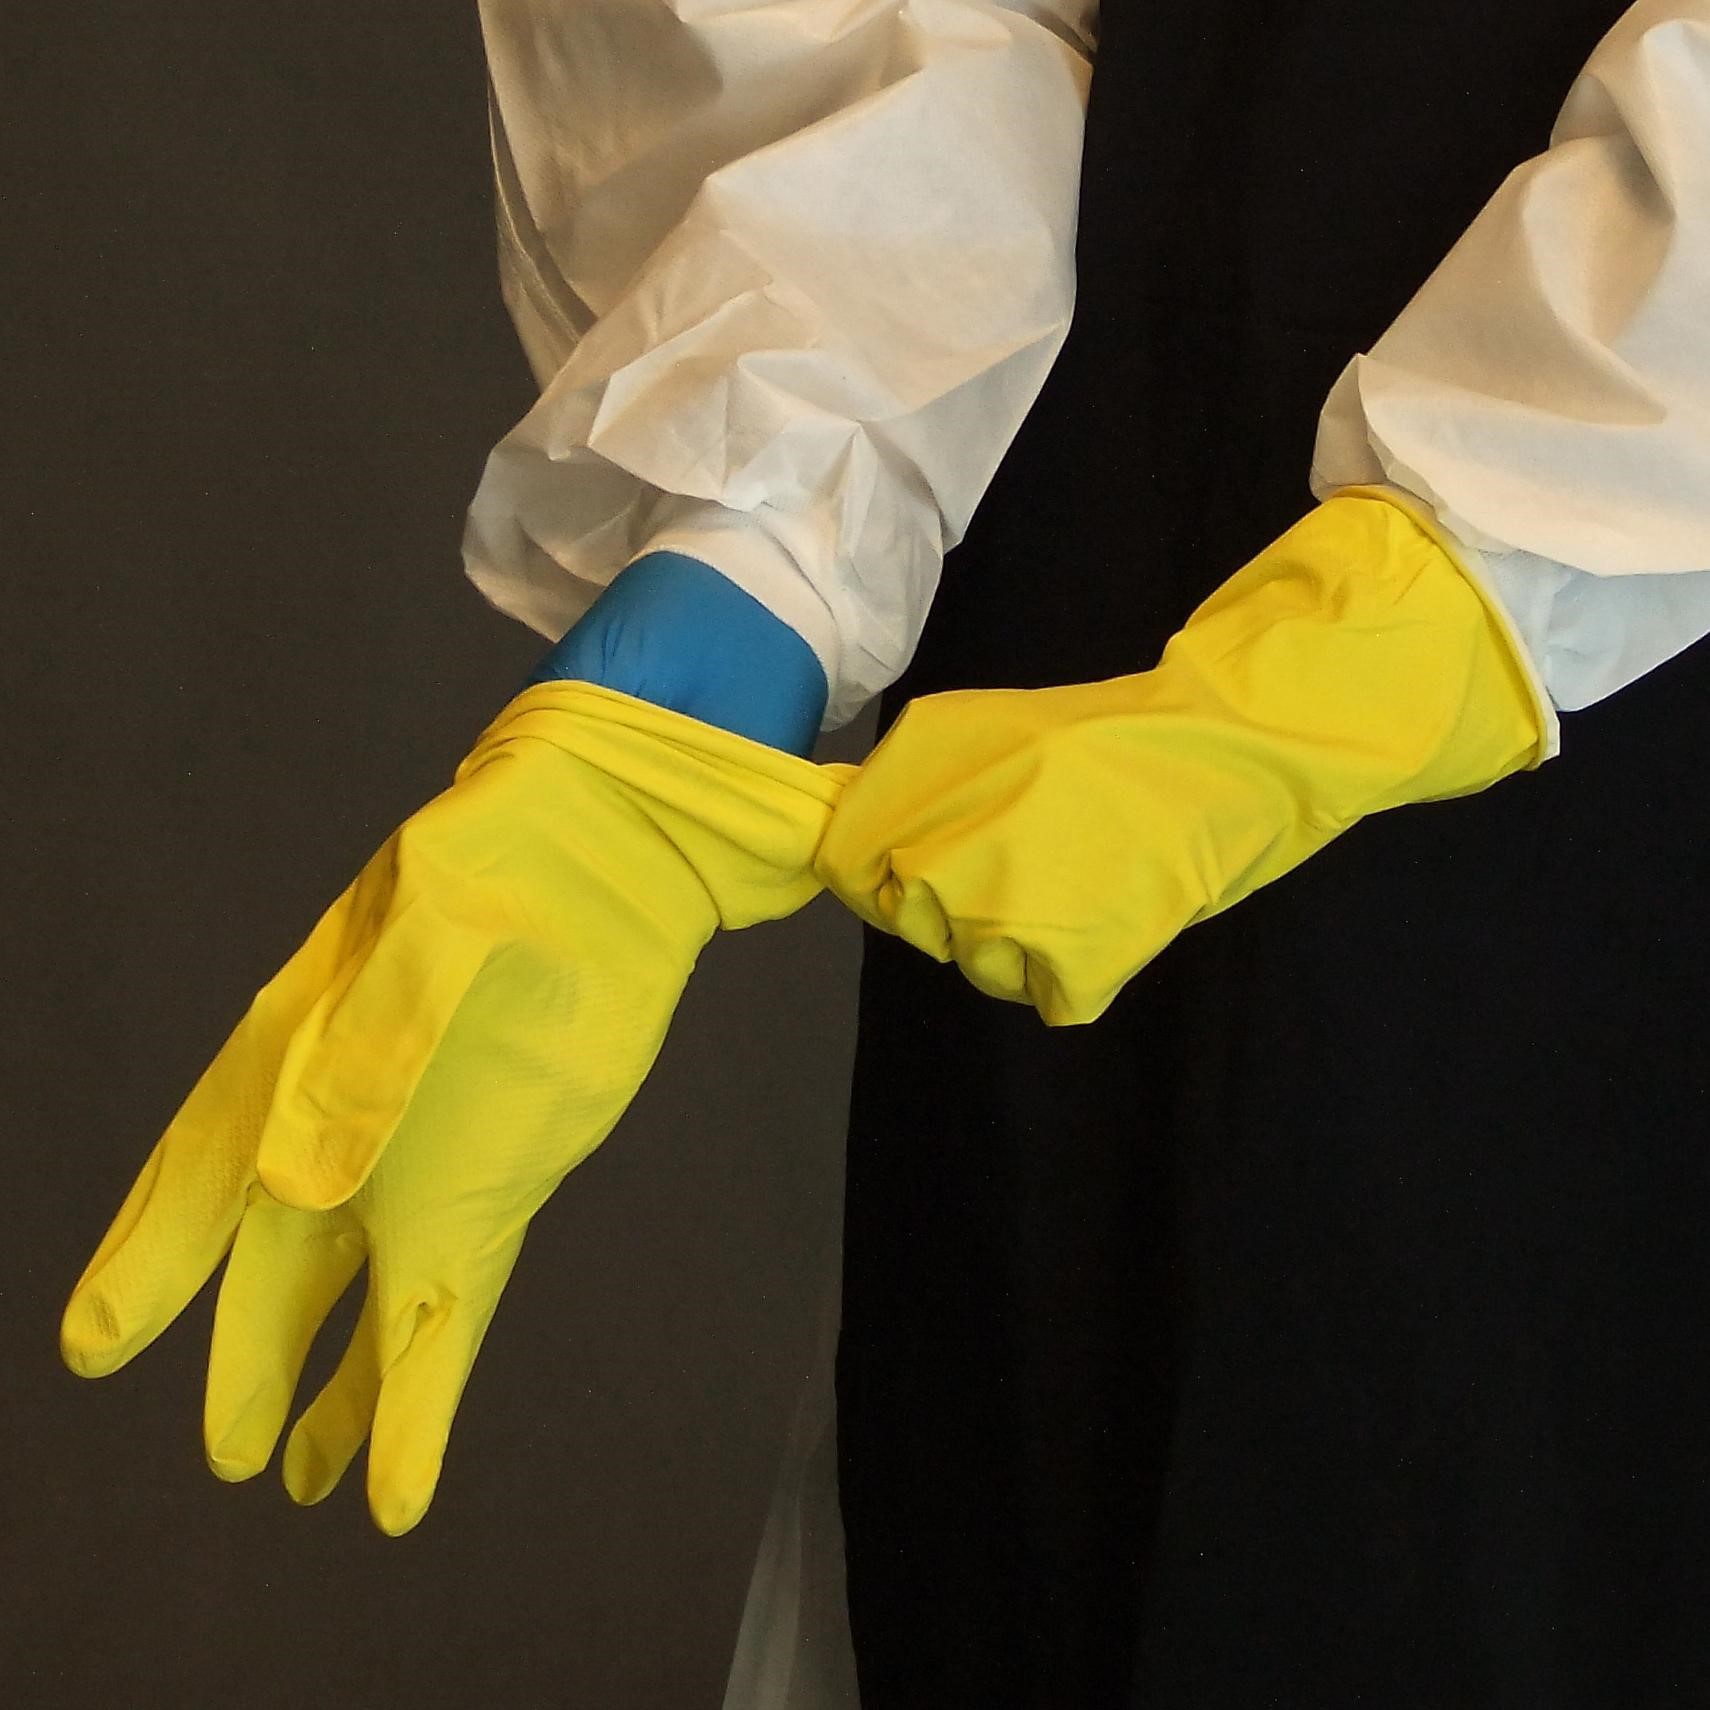
- Heavier, reusable utility gloves are indicated for non-patient care activities, such as handling or cleaning contaminated equipment or surfaces.
Remember, even the best-quality gloves do not provide complete protection— it is always recommended to perform hand hygiene before and after glove use. Hands can become soiled during removal, and there can be small holes from manufacturing defects. This is why the use of gloves never replaces the need for hand hygiene.
Putting on, Changing, and Removing Gloves
- Hand hygiene is performed before putting on gloves. Unclean hands can contaminate a box of gloves.
- Carefully remove and dispose of gloves after each exposure to prevent spreading or transmitting any infectious material. Do not wear the same pair of gloves for the care of more than one patient.
- Change gloves if damaged during patient care, e.g., tears or holes.
- During patient care, remove gloves and perform hand hygiene if moving from a contaminated body site to an uncontaminated body site. For example, remove and dispose of gloves after performing a wound dressing on non-intact skin, and before performing phlebotomy.
- Perform hand hygiene after glove removal. It is important to know that hand contamination can occur during glove removal due to poor technique and also, possibly, as a result of small, undetected holes in gloves.
- Never wash or reuse disposable gloves.
Fit and Material
Gloves should fit the user’s hands comfortably—they should not be too loose or too tight. They also should not tear or damage easily. If the integrity of a glove is compromised (e.g., punctured), change it as soon as possible and perform hand hygiene. Non-powdered gloves are recommended because they don't react with alcohol-based handrubs.
Double Gloving
Double gloving means wearing two sets of gloves. This is an appropriate practice for some high-risk procedures that increase the risk of cuts or punctures to surgical gloves, like orthopedic procedures.2
Other indications may include disease specific PPE requirements (e.g., Ebola Virus Disease and other hemorrhagic fevers) for which easy removal of a soiled outer layer can be helpful. Remember, double gloving is not a substitute for hand hygiene.
Prioritizing Glove Use
If gloves are limited:
- Reserve them for situations with a high likelihood of contact with blood or body fluids
- Use other barriers (towels, napkins) when there is no direct contact with patient secretions, or provide no-touch care if possible.
- Do not use gloves for activities that are not considered high-risk (e.g., providing oral medications)
Medical gloves are single-use items, so glove decontamination and reprocessing are not recommended and should be avoided, even if it is common practice in many healthcare settings with low resources and where glove supply is limited3
Gloves Activity
-
Gowns, Coveralls, and Aprons (10 min)
Gowns or coveralls are physical barriers that protect clothing and skin when contamination is likely. Aprons are an additional layer that can provide a waterproof barrier along the front of the body, protecting the gown and clothing from large volumes of splashes or sprays during patient care (e.g., during cesarean delivery or vaginal delivery).
Click or tap on each type of garment4 to learn more.
Gown:
- Generally more familiar to HCP
- Easier to put on and, in particular, take off than coveralls (ease of wear and removal without self-contamination)
- Does not provide leg protection
- Generally manufactured as disposable, but textile versions can be laundered for reuse
- Important to have sufficient overlap of the fabric so that it wraps around the body to cover the back (ensuring that if the wearer squats or sits down, the gown still protects the back area of the body)
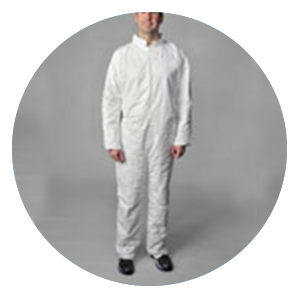
Coverall:
- Designed to cover the whole body including legs and, for hooded models, neck, and head
- Difficult to take off safely, compared to gowns (there is a high risk of self-contamination)
- More heat stress while wearing coverall creates worker risk in hot environments
Apron:
- Disposable or reusable depending on material
- Wear aprons over other protective garments for additional protection against saturation when large amounts of liquid are anticipated, such as a vaginal delivery or caesarean section, and when easy removal of a soiled layer is desired during patient care.
Additionally, there are different types of gowns available depending on the level of protection needed. Unfortunately, these product names are not standardized. Gowns might also be called:
- surgical gowns
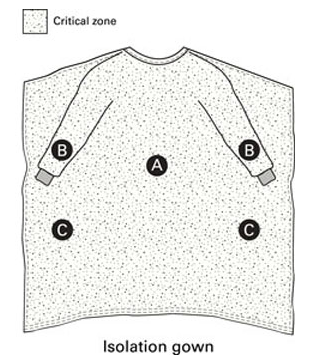
- isolation gowns
- surgical isolation gowns
- nonsurgical gowns
- procedural gowns
- operating room gowns
In this module, we will use the terms isolation gown and surgical gown. Remember that other terms might be used in your workplace.
The distinction between an isolation gown and a surgical gown depends on the protection needed and fluid exposure involved. Surgical gowns are specifically designed to prevent wearer exposure to blood and body fluids during activities during which saturation of a gown is possible. Isolation gowns are not designed for very wet procedures or activities.
Click on each gown6 to learn more.
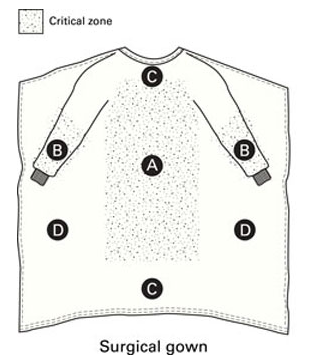
Surgical gowns
- Sterile and preferably fluid-resistant, with sleeves that taper or end with elastic or ties around the wrists
- Worn during surgical procedures to protect both the patient and HCP from transfer of microorganisms, body fluids, and particulate matter
- Excisional biopsies
- Open hernia repair
- Sterile catheter insertion
Isolation gowns
- Long-sleeved, fluid-resistant, and usually disposable (preferred)
- Generally manufactured as nonsterile
- Worn as indicated to protect the HCP from contact with blood or body fluids
- Patient placed on contact precautions
- Draining wounds
- Urine or stool incontinence
Fit and Material
Depending upon the material, gowns, coveralls, and aprons are single use (discarded after each patient) or reusable (cleaned or laundered after each use).
- Gowns should fully cover the torso, fit comfortably over the body, have long sleeves, and fit snuggly at the wrist.
Prioritizing Gown Use
If gowns are limited, wear when:
- Performing procedures during which splashes of infectious material are likely
- Performing activities that involve extensive close contact, e.g., bathing and turning bed-bound patients.
- It is NOT appropriate to reuse gowns between patients
It may be possible to use a single gown for multiple patients if patients are cohorted for the same illness. An example of this is in an isolation ward and all patients in the ward have one pathogen that is transmitted by direct or indirect contact
-
Masks and Respirators (10 min)
Masks are physical barriers that prevent splashes or sprays from reaching your mucous membranes (your nose and mouth). Masks also block oral secretions from your mouth to a patient (during surgery or lumbar punctures).
Respirators are a type of mask that filter particles from the air, greatly reducing the number of particles or microorganisms the wearer inhales. Different types of respirators are used depending on activity and potential hazard. Particulate respirators (N95) are the most common type of respirator used in healthcare settings.
Click on each type of mask to learn more:
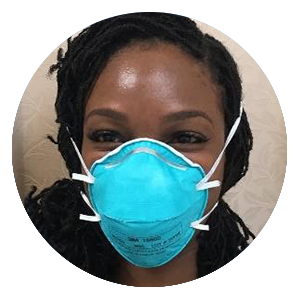
Respirator
- The turquoise and white mask on the left is a N95 respirator. An N95 respirator filters 95% of airborne particles.
- Provides tight, sealed fit between mask and face
Medical mask
- An example is the picture on the right.
- May be called surgical, isolation, or medical procedure masks.
- Loose fit between mask and face
Wear masks during procedures and patient care activities likely to generate splashes or sprays of blood and body fluids. Any time splashing is anticipated, your eyes must also be protected; thus, masks are worn in combination with eye protection.
Examples include:
- Injections in epidural space
- Surgical procedures
- A patient with respiratory symptoms can wear a surgical mask to protect others when sitting in public areas of a healthcare facility.
Wear respirators when risk of inhaling infectious microorganisms, such as tuberculosis or measles, is a concern or when performing aerosol-generating procedures. Sometimes eye protection is also required (for example, when performing aerosol-generating procedures).
Examples include:
- Performing aerosol-generating procedures, such as intubation, bronchoscopy, or sputum induction
- Caring for patients placed on airborne precautions
Changing and Removal
- Masks and respirators are intended as single use, disposable devices. If your mask or respirator is damaged or soiled, or if breathing becomes difficult, you should safely remove it, discard it, and replace it with a new one. Always perform hand hygiene after mask or respirator removal.
Fit
Masks should fully cover face and mouth. Face masks do not provide complete protection from germs and other contaminants because of the loose fit between the surface of the face mask and your face.
Respirators require proper fit for function. Respirators are designed to achieve a very close facial fit. Do a fit test before using a respirator for the first time, and perform a seal check every time a respirator is used. HCPs with chronic respiratory, cardiac, or other medical conditions should check before using an N95 respirator because the respirator can make it more difficult for the wearer to breathe.
A “fit test” tests the seal between the respirator's facepiece and your face. It takes about fifteen to twenty minutes to complete and is performed at least annually. After passing a fit test with a respirator, you must use the exact same make, model, style, and size respirator on the job.Seal check is a procedure conducted by the wearer of a particulate respirator to determine if the respirator is properly sealed to the face. The user seal check can be either a positive pressure (i.e., breathing out to check for leak on exhalation) or negative pressure check (i.e., breathing in to check for leak on inhalation) or both.Prioritizing
If masks or respirators are limited, wear when:
- Prioritize respirators for high-risk exposures, such as performing aerosol-generating procedures (the number of HCPs in the room can also be limited to only those essential for patient care and support)
- Consider other ways to minimize aerosol transmission to preserve respirators. For example, maximizing air flow and cross-ventilation in an open-air ward for patients with tuberculosis.
-
Eye Protection (10 min)
Eye protection is a physical barrier for the eyes during procedures likely to involve splashes or sprays of blood, body fluids, or chemicals. Eye protection includes goggles or face shields. Personal prescription lenses or contacts don’t provide optimal protection and shouldn’t be used as a substitute for eye protection.
Click or tap on each type of protective eyewear to read more.
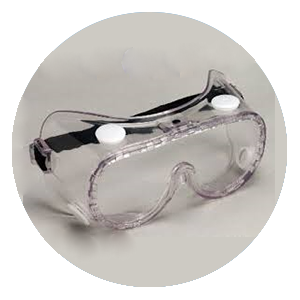
Goggles:
- Made from rubber or plastic, usually with an adjustable strap
- Prone to fogging and overheating
- Provide complete peripheral coverage, unless it has open vent holes
- May be reusable if cleaned between uses
Face shield:
- Made of two parts; clear plastic shield and headband
- Made with foam or plastic headbands
- Worn as an alternative to goggles
- There is a risk of splashes from below
- There are different types of face shields available
Goggles or face shields are usually worn in combination with a face mask to protect the mucous membranes. Goggles should be worn instead of face-shields when extra protection is needed from splashes coming from a low angle. With either device, additional PPE to protect the wearer’s nose and mouth should be worn when needed.
Fit
Goggles should fit over and around the eyes or personal prescription lenses.
A face shield should cover the forehead, extend below the chin, and wrap around the side of the face. Face shields are more comfortable to wear with eyeglasses.
-
Head Covering and Footwear (10 min)
Head Covering

Head covers—such as caps or hoods—contain long hair during work and prevent infectious material from contaminating hair. Head coverings are not necessary for most areas in a healthcare facility; however, in some settings where large amounts of splashing might occur during care, head coverings might be indicated.
Footwear
Shoes should be worn at all times in a healthcare facility. Sturdy, closed-toe shoes are recommended for all clinical areas. Rubber boots can provide additional protection in wet or muddy environments or when using hazardous chemicals. Another practical use of rubber boots in some settings is to allow efficient cleaning and disinfection of the boots after spills of infectious material.
Note: Open-toed sandals do not provide protection from blood, body fluids, sharps, and other hazardous materials. They also do not provide appropriate protection against slips and falls.
-
PPE and Transmission-based Precautions (10 min)
PPE is also indicated when a patient is placed on Transmission-based Precautions. These precautions are used in addition to Standard Precautions when a particular infection is confirmed or suspected. PPE worn by a HCP when a patient is placed on Transmission-based Precautions depends on the mode of the transmission of the pathogen.
Transmission-based Precautions are additional precautions for patients who might be infected or colonized with certain pathogens for which the mode of transmission is known.Transmission-based Precautions include:
- Contact
- Droplet
- Airborne
Contact Gown is donned upon entry into patient room or patient care area, and removed prior to exit.
Gloves are donned upon entry into the patient room or patient care area, and removed prior to exit.Droplet Face protection (mask and goggles OR full face shield) is donned upon entry and removed prior to exit. Airborne N95 or higher level respirator is worn before entering room of patient and removed after exiting room. Consult disease-specific guidance for emerging respiratory pathogens.You’ll learn more about Transmission-based Precautions and apply use of PPE in the Transmission-based Precautions module.
-
Knowledge Check (5 min)
-
Safely Wearing PPE (10 min)
Now that you understand the purpose and indications for wearing PPE, we’ll learn more about how to safely wear PPE. Safely wearing PPE relies on consistent and correct use while donning (putting on), using, and doffing (taking off) PPE.
Remember, PPE relies on decision-making and performance, meaning there is potential for human error. PPE is not effective if adherence is incomplete or when risk of exposure is unrecognized. Improper use of PPE can put other people, particularly patients and coworkers, at risk. It is essential to recognize risk of potential exposures and use PPE correctly.
Donning PPE
Personal protective equipment should be put on before the task or procedure for which it is required.
The following general principles apply when putting on PPE:
- Check for tears and other damage that could reduce effectiveness
- Check for proper fit (to minimize adjusting during patient care)
- Any item that ties should be tied securely, but not so tightly that extra manipulation will be needed to take it off
- Perform hand hygiene before donning PPE
- Always ensure the cuff of the glove is overtop the cuff of the gown if worn together
During Use
Once PPE has been put on, avoid touching or adjusting it. Do not touch your face while working, to prevent self-contamination of mucous membranes.
If PPE becomes heavily contaminated with blood or body fluids, it should be changed without delay. PPE should also be changed if it becomes damaged (e.g., glove tears, gown rips).
Doffing PPE
Take off PPE immediately following exposure to prevent spread of the infectious material. The risk of self-contamination is very high when removing PPE—there is potential for contamination from PPE to hands, mucous membranes, clothing, and skin. PPE should be removed slowly and carefully, then discarded in the appropriate waste bin.
This is critical because the ease or difficulty with which PPE is put on and removed affects its effectiveness and the potential for self-contamination, especially during doffing of contaminated PPE.5
-
Donning and Doffing Gloves (10 min)
The following slideshow shows the steps of how to put on non-sterile gloves. Click or tap on the right arrow to go to the next image.
-
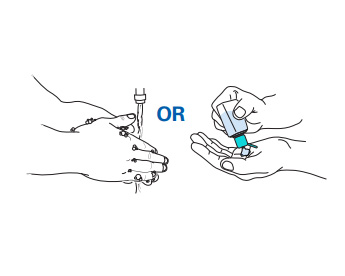
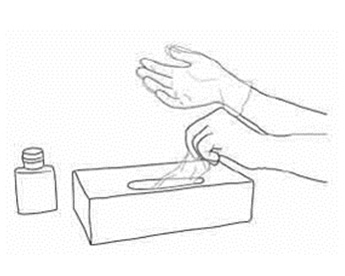
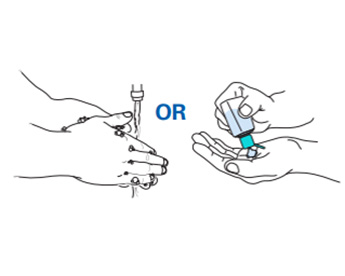
Perform hand hygiene (alcohol-based handrub or soap and water). -
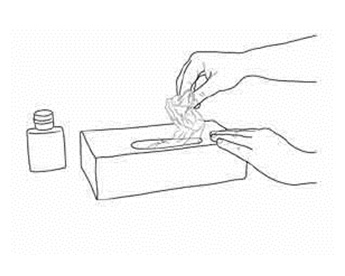
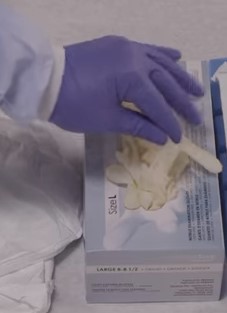
Take out glove from its original box. -
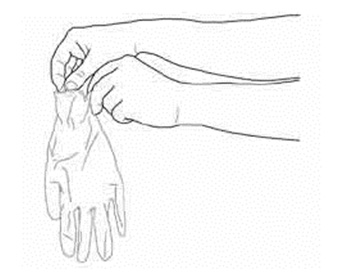
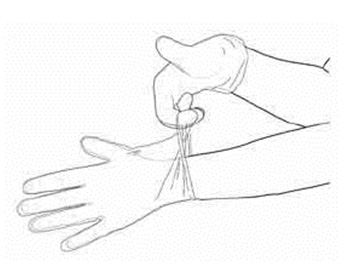
Put on first glove (grab the top edge of the cuff). -
Put on first glove (grab the top edge of the cuff). -
Take second glove out of the box with your bare hand (grab cuff area of glove). -
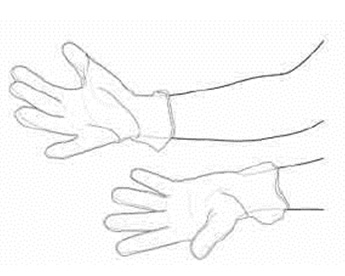
Put on second glove (grab external side of glove with fingers of gloved hands to avoid touching wrist and forearm). -
Once gloves are on, use caution. To reduce the risk of tearing gloves, keep natural fingernails short.
The following slideshow shows the steps of how to remove non-sterile gloves. Click or tap on the right arrow to go to the next image.
-
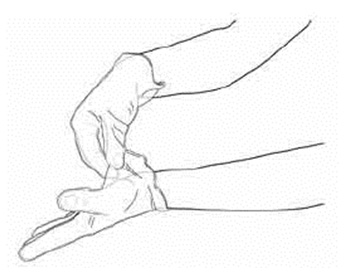
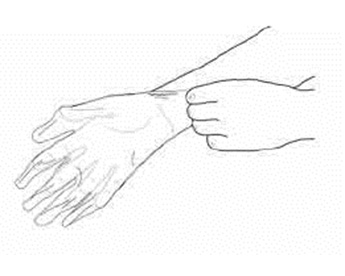
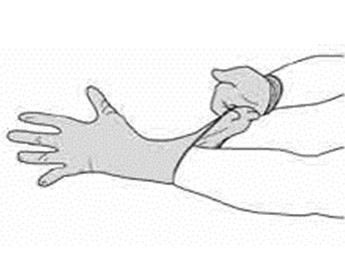
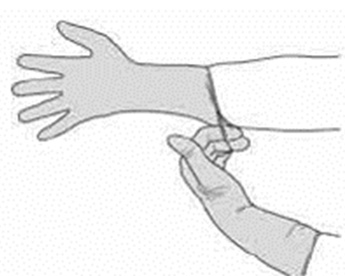
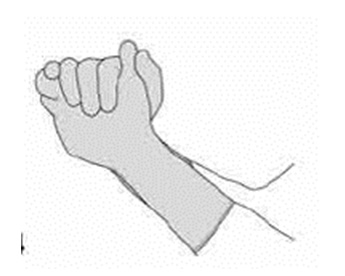
Pinch one glove at wrist and peel away from hand, thus allowing the glove to turn inside out -
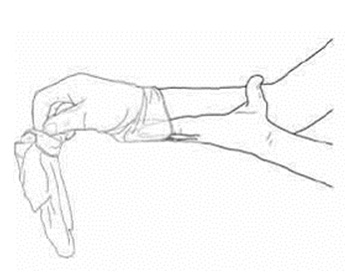
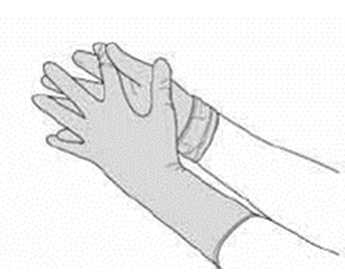
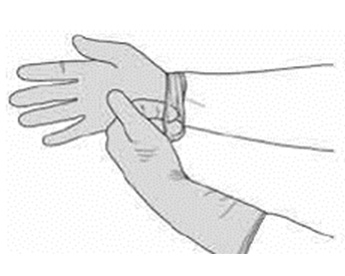
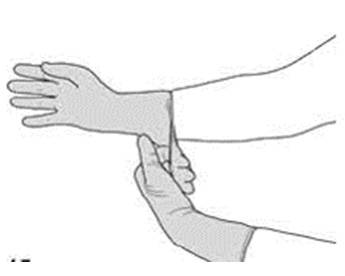
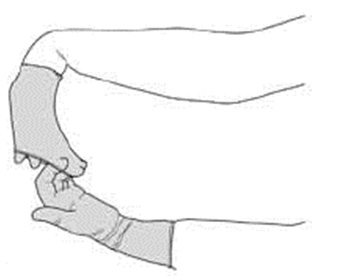
Hold removed gloved in other hand and slide fingers of ungloved hand inside wrist area. Remove second glove by rolling it down and fold inside-out into the first glove. -
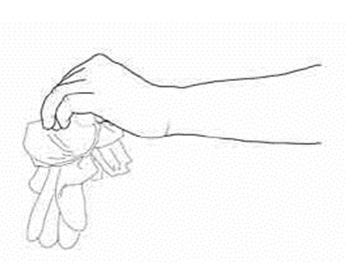
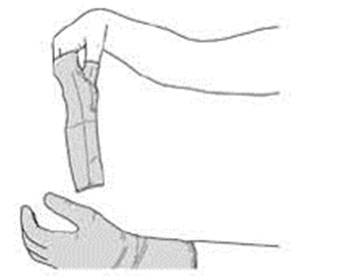
Discard the gloves -
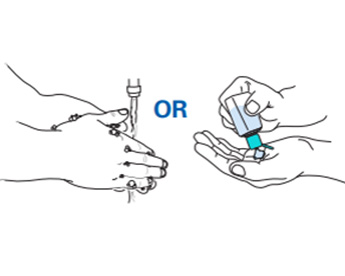
Perform hand hygiene. Remember, the use of gloves never replaces the need for hand hygiene.
The following slideshow shows the steps of how to put on sterile gloves. Click or tap on the right arrow to go to the next image.
-
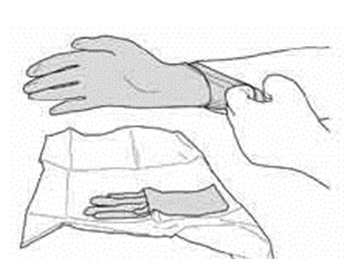
Remember, sterile gloves are used for sterile procedures. For surgical procedures, surgical hand antisepsis (scrubbing) will be performed before donning gloves. -
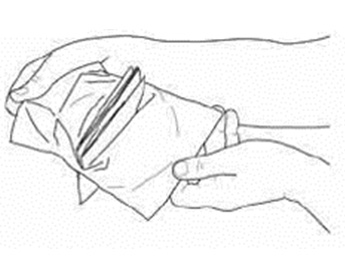
Check package for integrity. Open the packaging (first layer is non-sterile) by peeling it completely off the heat seal to expose the second wrapper (sterile). -
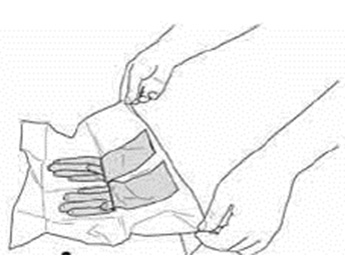
Place the second wrapper (sterile) on a clean, dry surface without touching the surface. Unfold the wrapper towards the bottom. Note that the cuff of each glove is folded toward the fingers of the glove.
-
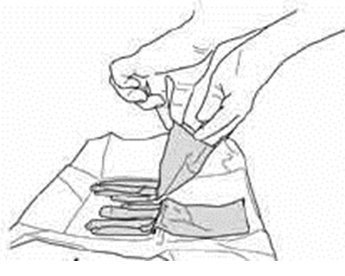
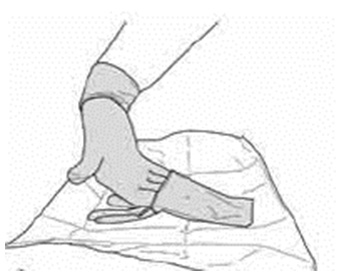
Using your thumb and index finger of one hand, carefully grasp the folded cuff edge of the glove. -
Slip your hand into the glove in a single movement, keeping the folded cuff at wrist level. -
Pick up the second glove by sliding the fingers of the gloved hand underneath the cuff of the glove. -

Pick up the second glove by sliding the fingers of the gloved hand underneath the cuff of the glove. -
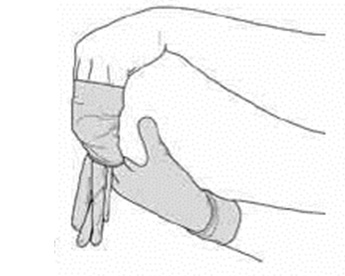
In a single movement, slip the second glove on. It is important that the gloved hand not rest on any surface other than the second glove being donned—this is a lack of asepsis and requires a change of glove. -
In a single movement, slip the second glove on. It is important that the gloved hand not rest on any surface other than the second glove being donned—this is a lack of asepsis and requires a change of glove. -
In a single movement, slip the second glove on. It is important that the gloved hand not rest on any surface other than the second glove being donned—this is a lack of asepsis and requires a change of glove. -
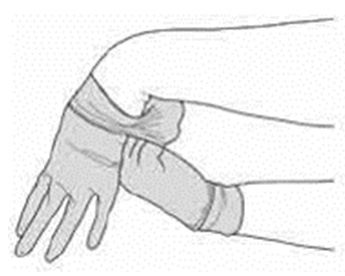
If needed, after donning both gloves, adjust the fingers and between the fingers until the gloves fit comfortably. Note that the cuff of the first glove is still folded. -
Unfold the cuff of the first gloved hand by gently slipping the fingers of the other hand inside the fold. Make sure to avoid contact with any surface that is not the glove. -
Unfold the cuff of the first gloved hand by gently slipping the fingers of the other hand inside the fold. Make sure to avoid contact with any surface that is not the glove. -
Once sterile gloves are on, use caution. Sterile gloves must touch sterile devices or the previously-disinfected patient’s body area.
The following slideshow shows the steps of how to remove sterile gloves. Click or tap on the right arrow to go to the next image.
-
Remove the first glove by peeling it back with the fingers of the opposite hand. -
Remove the first glove by peeling it back with the fingers of the opposite hand. -
Remove the glove by rolling it inside out to the middle of the fingers (do not remove completely). -
Remove the other glove by grabbing its outer edge on the fingers of the partially ungloved hand. Roll inside-out. -
Remove gloves by turning them inside out (always keep contact with the inner surface of the glove). -
Discard gloves in appropriate waste bin. -
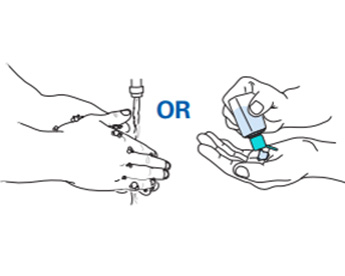
Perform hand hygiene. Remember, the use of gloves never replaces the need for hand hygiene.
-
-
Donning and Doffing Gloves (5 min)
Watch this video for how to properly put on and take off non-sterile gloves.
-
Donning and Doffing Gowns (10 min)
The following slideshow shows the steps of how to put on a gown. Click or tap on the right arrow to go to the next image.
-
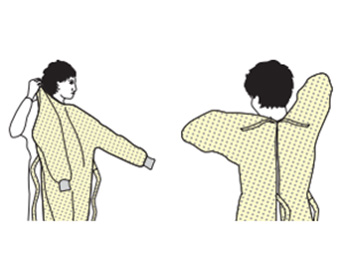
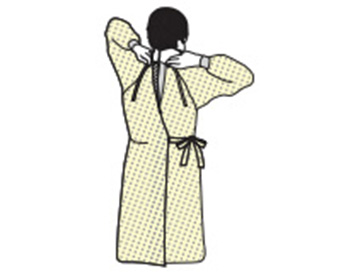
Unfold the gown and insert both hands in the sleeve of the gown, one after the other. -

Secure using the tie at the neck and at the waist. Make sure to tie the waist knot on the side so that it is easy to untie at time of removal. If also wearing gloves, be sure to pull gloves up over the cuff of the gown to protect the wrists.
The following slideshow shows the steps of how to take off a gown. Click or tap the right arrow to go to the next image.
-
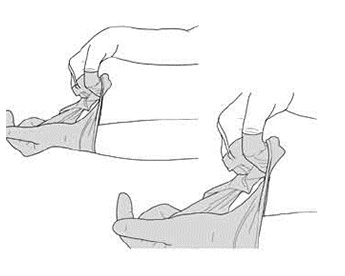
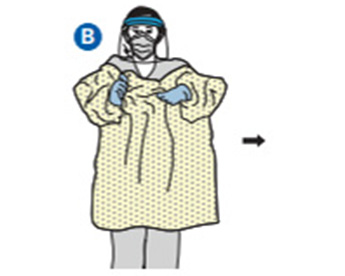
Release or break the knot around the neck followed by the side knot. -
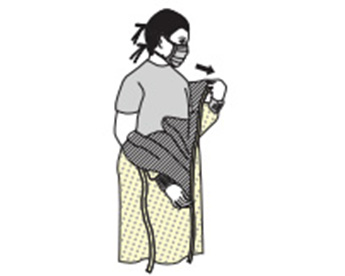
Grasp external front shoulders and pull forward slowly (pull away from your body and remove inside out). -
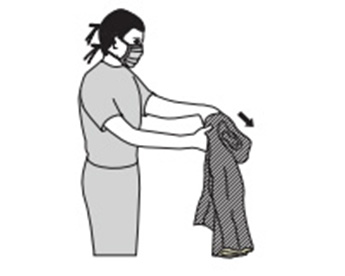
Fold the gown inside out, ensuring you avoid touching the outer surface of the gown. Dispose of single-use gowns in appropriate waste bin; dispose of reusable gowns in container dedicated to gowns and other PPE that will be laundered later. -

Grasp gown in front and pull away from body so that the ties break (only touch outside of gown with gloved hands). -
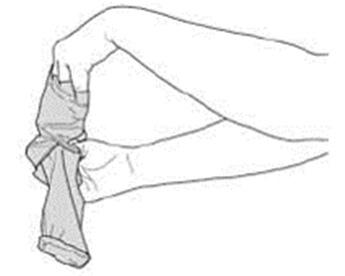
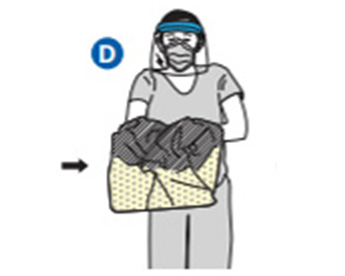
While removing the gown, fold or roll the gown inside-out into a bundle. -

While removing the gown, fold or roll the gown inside-out into a bundle. -
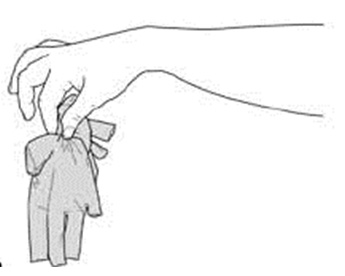
As you are removing the gown, peel off your gloves at the same time, only touching the inside of the gloves and gown with your bare hands. -
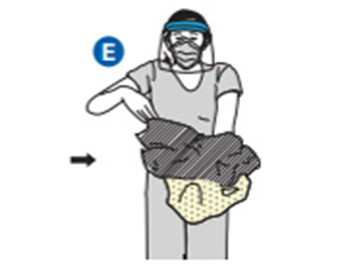
As you are removing the gown, peel off your gloves at the same time, only touching the inside of the gloves and gown with your bare hands. Place the gown and gloves in the appropriate waste bin.
-
-
Putting On and Removing Face Protection (10 min)
The following slideshow shows the steps of how to put and take off a mask or respirator. Click or tap on the right arrow to go to the next image.
-
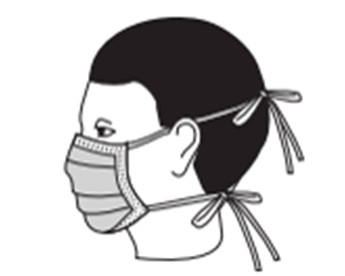
- Place the mask over the nose and cover the nose, mouth, and chin.
- Fit the flexible nose piece over the bridge of the nose.
- Secure on the head with ties or elastic.
- Adjust to fit.
-

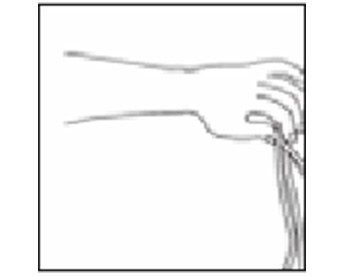
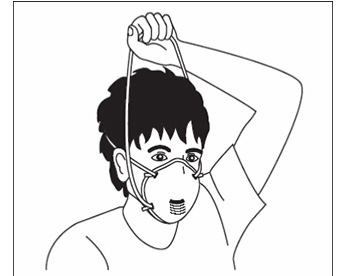
- Cup respirator in one hand, with nosepiece at your fingertips, allowing the straps to hang freely below your hand.
- Position the respirator under your chin with the nosepiece up. Pull the top strap over your head, resting it high at the top of your head. Pull the bottom strap over your head and position it below the ears.
The following slideshow shows the steps of how to put and take off a goggles or a face shield. Click or tap on the right arrow to go to the next image.
-
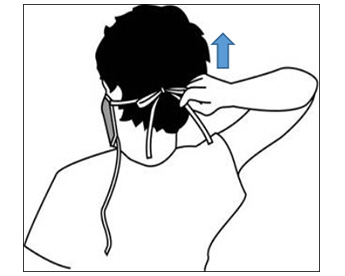
Grasp bottom strap and lift over head, or untie bottom tie. -
Lift off the top strap or top tie. -
Bring mask or respirator forward off face and discard.
-
-
Knowledge Check (10 min)
-
Summary (5 min)
In this module you have learned how specialized clothing, called PPE, provides a physical barrier between your body and potentially infectious materials. Consistent and correct use of these items will ensure that they function properly and safely. This is why it is important to know when types of PPE are used and how to use them.
In order to understand when to use types of PPE, you must use risk recognition to determine what type of PPE is appropriate for a given situation. Risk-based selection of appropriate PPE depends on the level of patient interaction and the anticipation of exposure to blood, body fluid, or hazardous chemicals. Every HCP is responsible for risk recognition. This means that all HCPs must be able to identify possible sources of infection and actions that may lead to infection. This skill allows for HCP to then make the best decisions when selecting PPE in any situation.
In addition to being able to identify the proper activities in which PPE should be worn, and the different types of PPE that can be used, it is essential to understand how to put on, use, and remove PPE. Proper donning of PPE ensures protection for HCP and patients, and proper doffing prevents self-contamination. Understanding and applying these principles of proper PPE use will enable HCP and patients in your facility to protect themselves from contact with potentially infectious materials.
-
References
- HICPAC, Core Practices of IPC, https://www.cdc.gov/hicpac/pdf/core-practices.pdf
- WHO Leaflet for Glove Use (2009). http://www.who.int/gpsc/5may/Glove_Use_Information_Leaflet.pdf
- National Institute of Occupational Health and Safety; https://www.cdc.gov/niosh/npptl/topics/protectiveclothing/default.html
- https://www.fda.gov/medicaldevices/productsandmedicalprocedures/generalhospitaldevicesandsupplies/ personalprotectiveequipment/ucm452775.htm
- CDC- NPPTL - Considerations for Selecting Protective Clothing used in Healthcare for Protection against Microorganisms in Blood and Body Fluids
- NIOSH: Critical zones defined for surgical gowns and isolation gowns in ANSI/AAMI PB70. Adapted with permission from ANSI/AAMI PB70:2012, “Liquid barrier performance and classification of protective apparel and drapes intended for use in health care facilities.”
- NIOSH, https://www.cdc.gov/niosh/npptl/topics/protectiveclothing/default.html
- https://www.cdc.gov/niosh/npptl/topics/protectiveclothing/default.html
- WHO Leaflet for Glove Use (2009). http://www.who.int/gpsc/5may/Glove_Use_Information_Leaflet.pdf
- CDC Sequence for Putting on PPE and how to safely remove PPE https://www.cdc.gov/hai/pdfs/ppe/PPE-Sequence.pdf