Cameras in Trees
Set Up
Guide to Installing Time Lapse Cameras in Trees
Required Equipment
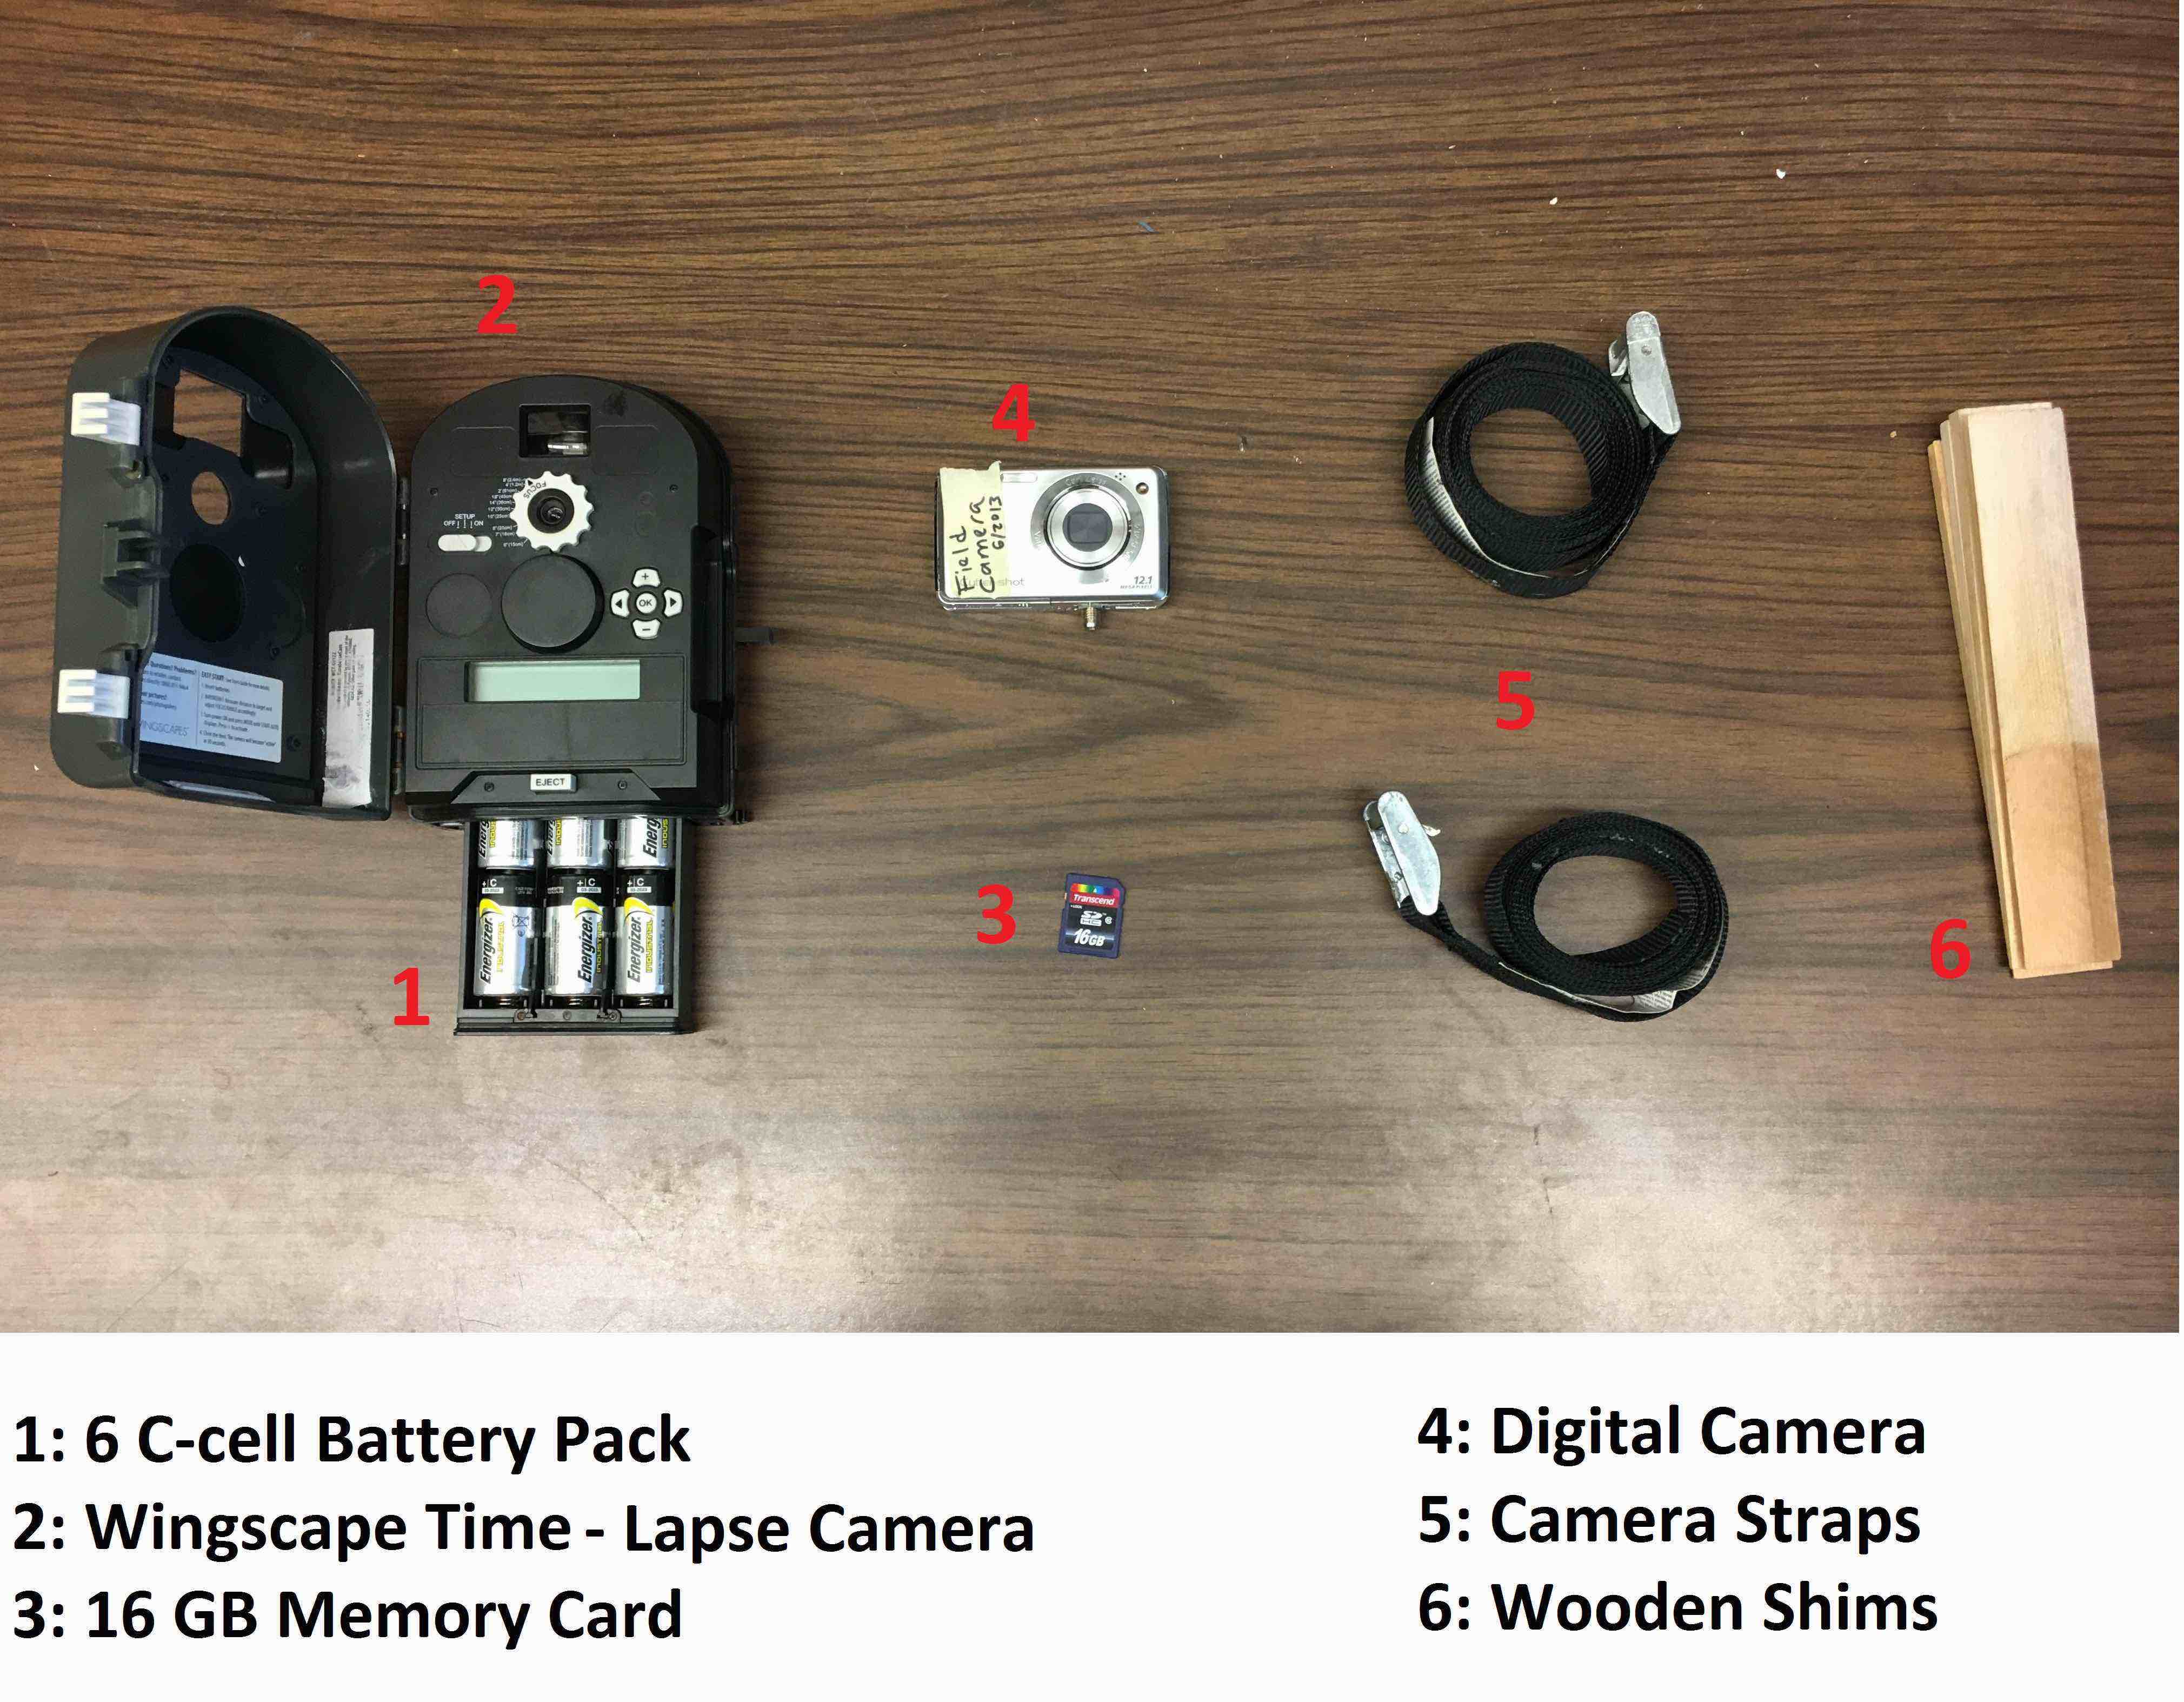
Figure 1: Required equipment for camera installation. Note: PVC piping, gorilla tape and a t-stake are required for the snow depth pole (not shown)
Step 1: Choosing your site
One should consider the topography of the site first. Make sure to find a flat area with as small of a surrounding slope as possible. Snow is subject to “creep”, or downslope movement throughout the winter, which can bend the snow depth poles and cause biases in the depth measurements. Also look around when installing your site; avalanches can move downslope and into the flat area. One other thing to note about the site is that your snow depth poles (Figure 2) should have vibrant-colored tape (e.g. bright orange or hot pink) at a fixed increment to make image processing as easy as possible. We chose every 50 centimeters for orange tape and black every 5 centimeters.
- Note: A fully automated algorithm has been developed with alternating orange and black tape (Parajka et al. 2012). We have developed our own semi-automated algorithms, written in MATLAB. Please e-mail currierw@uw.edu for more details.
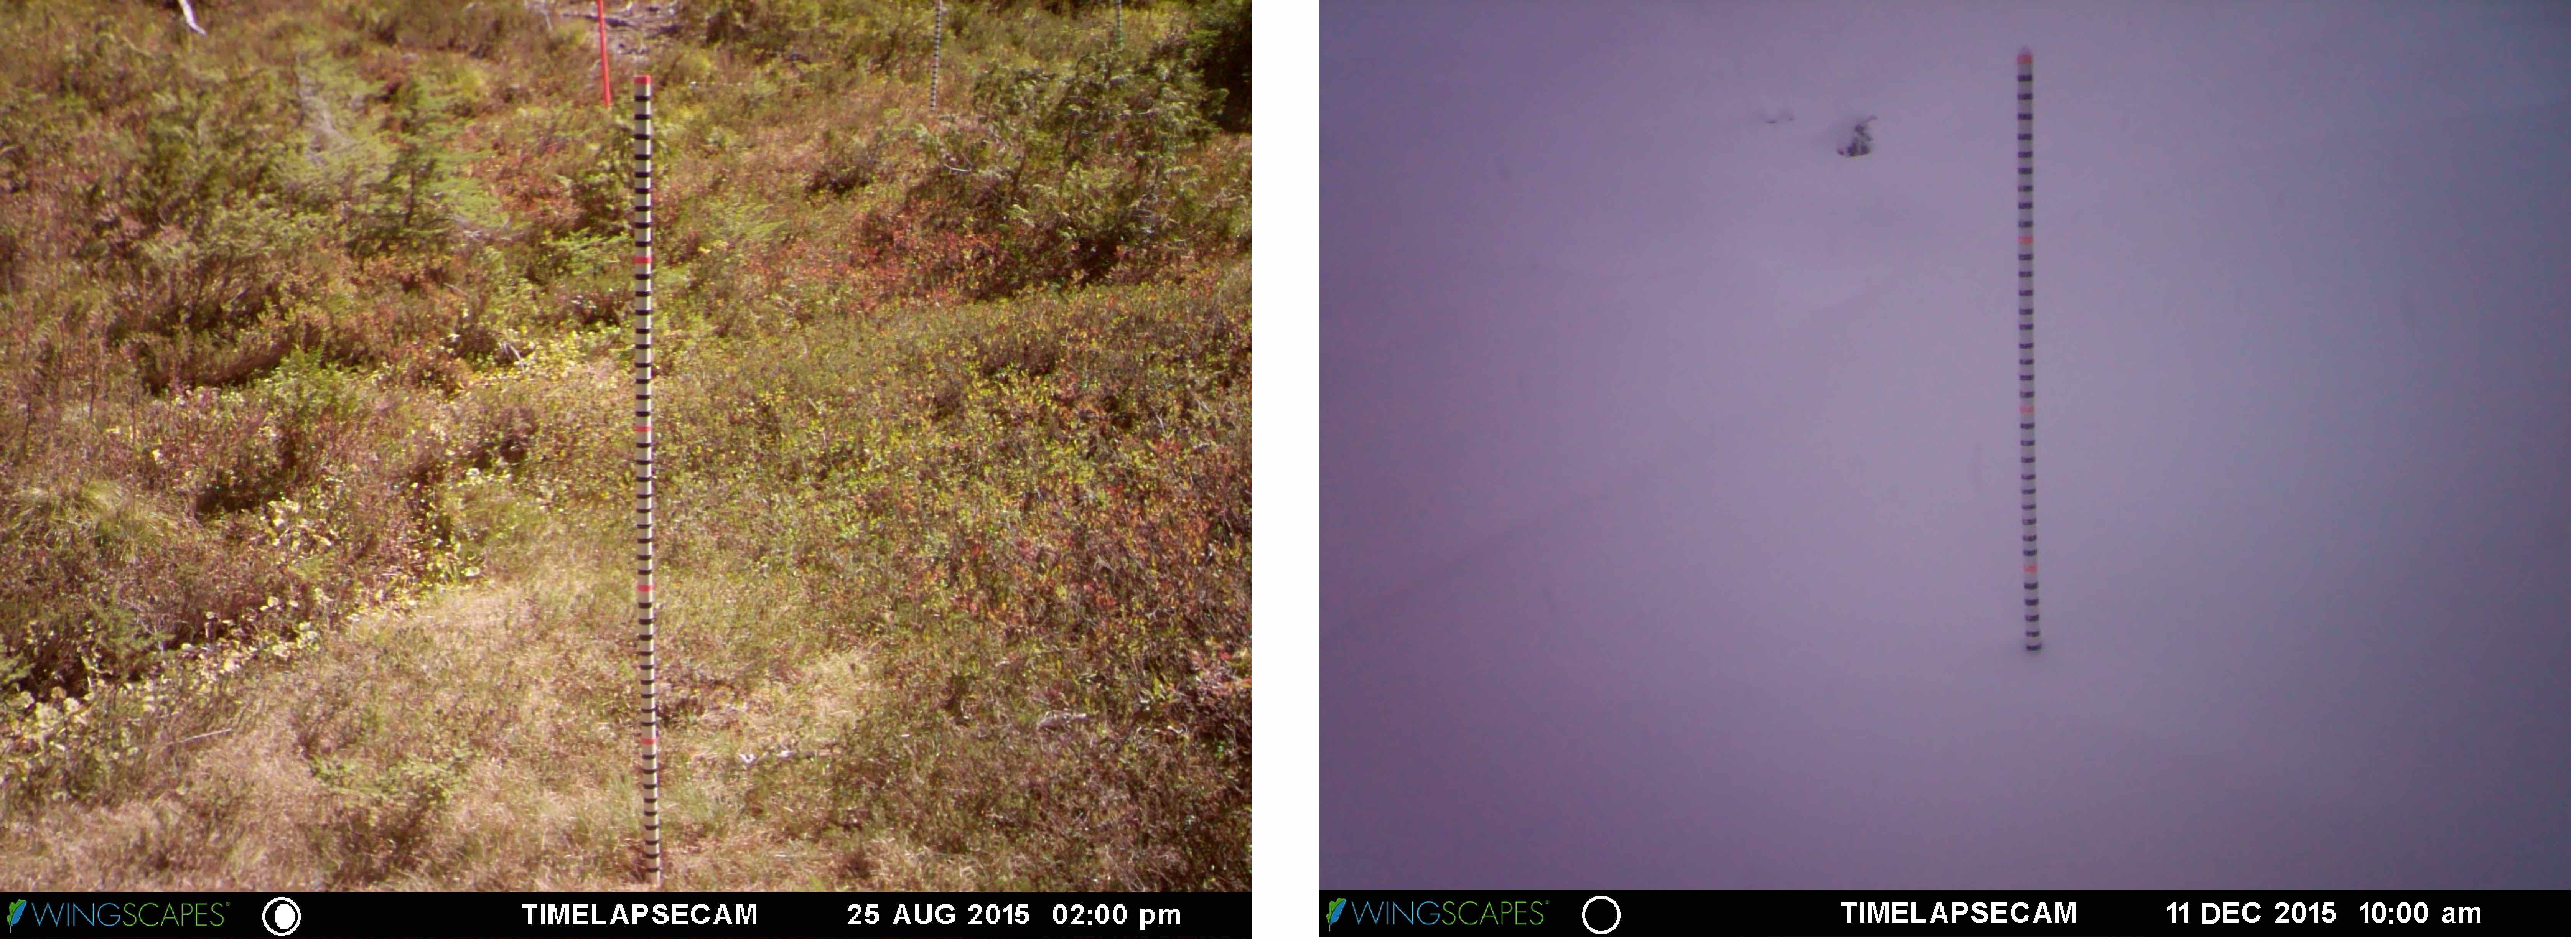
Figure 2: Ideal camera setup with clear images
Step 2: Identifying a tree to climb
Several other important factors need to be considered when choosing a tree for camera installation. The most important concern is proximity to the snow depth poles. The poles need to be close enough to the camera that the poles and marking will be clearly visible in the image, but far enough away that the image captures the entire height of the pole. This is more challenging with taller snow depth poles, as the camera will need to be positioned higher in a tree and further away.
Another important consideration is tree branches. When tree branches directly above the camera intercept snow, the branches become weighed down and can obstruct the camera’s view the poles. It is ideal to pick a tree without braches above the camera, but this is not always possible and trimming branches above the camera may be required.
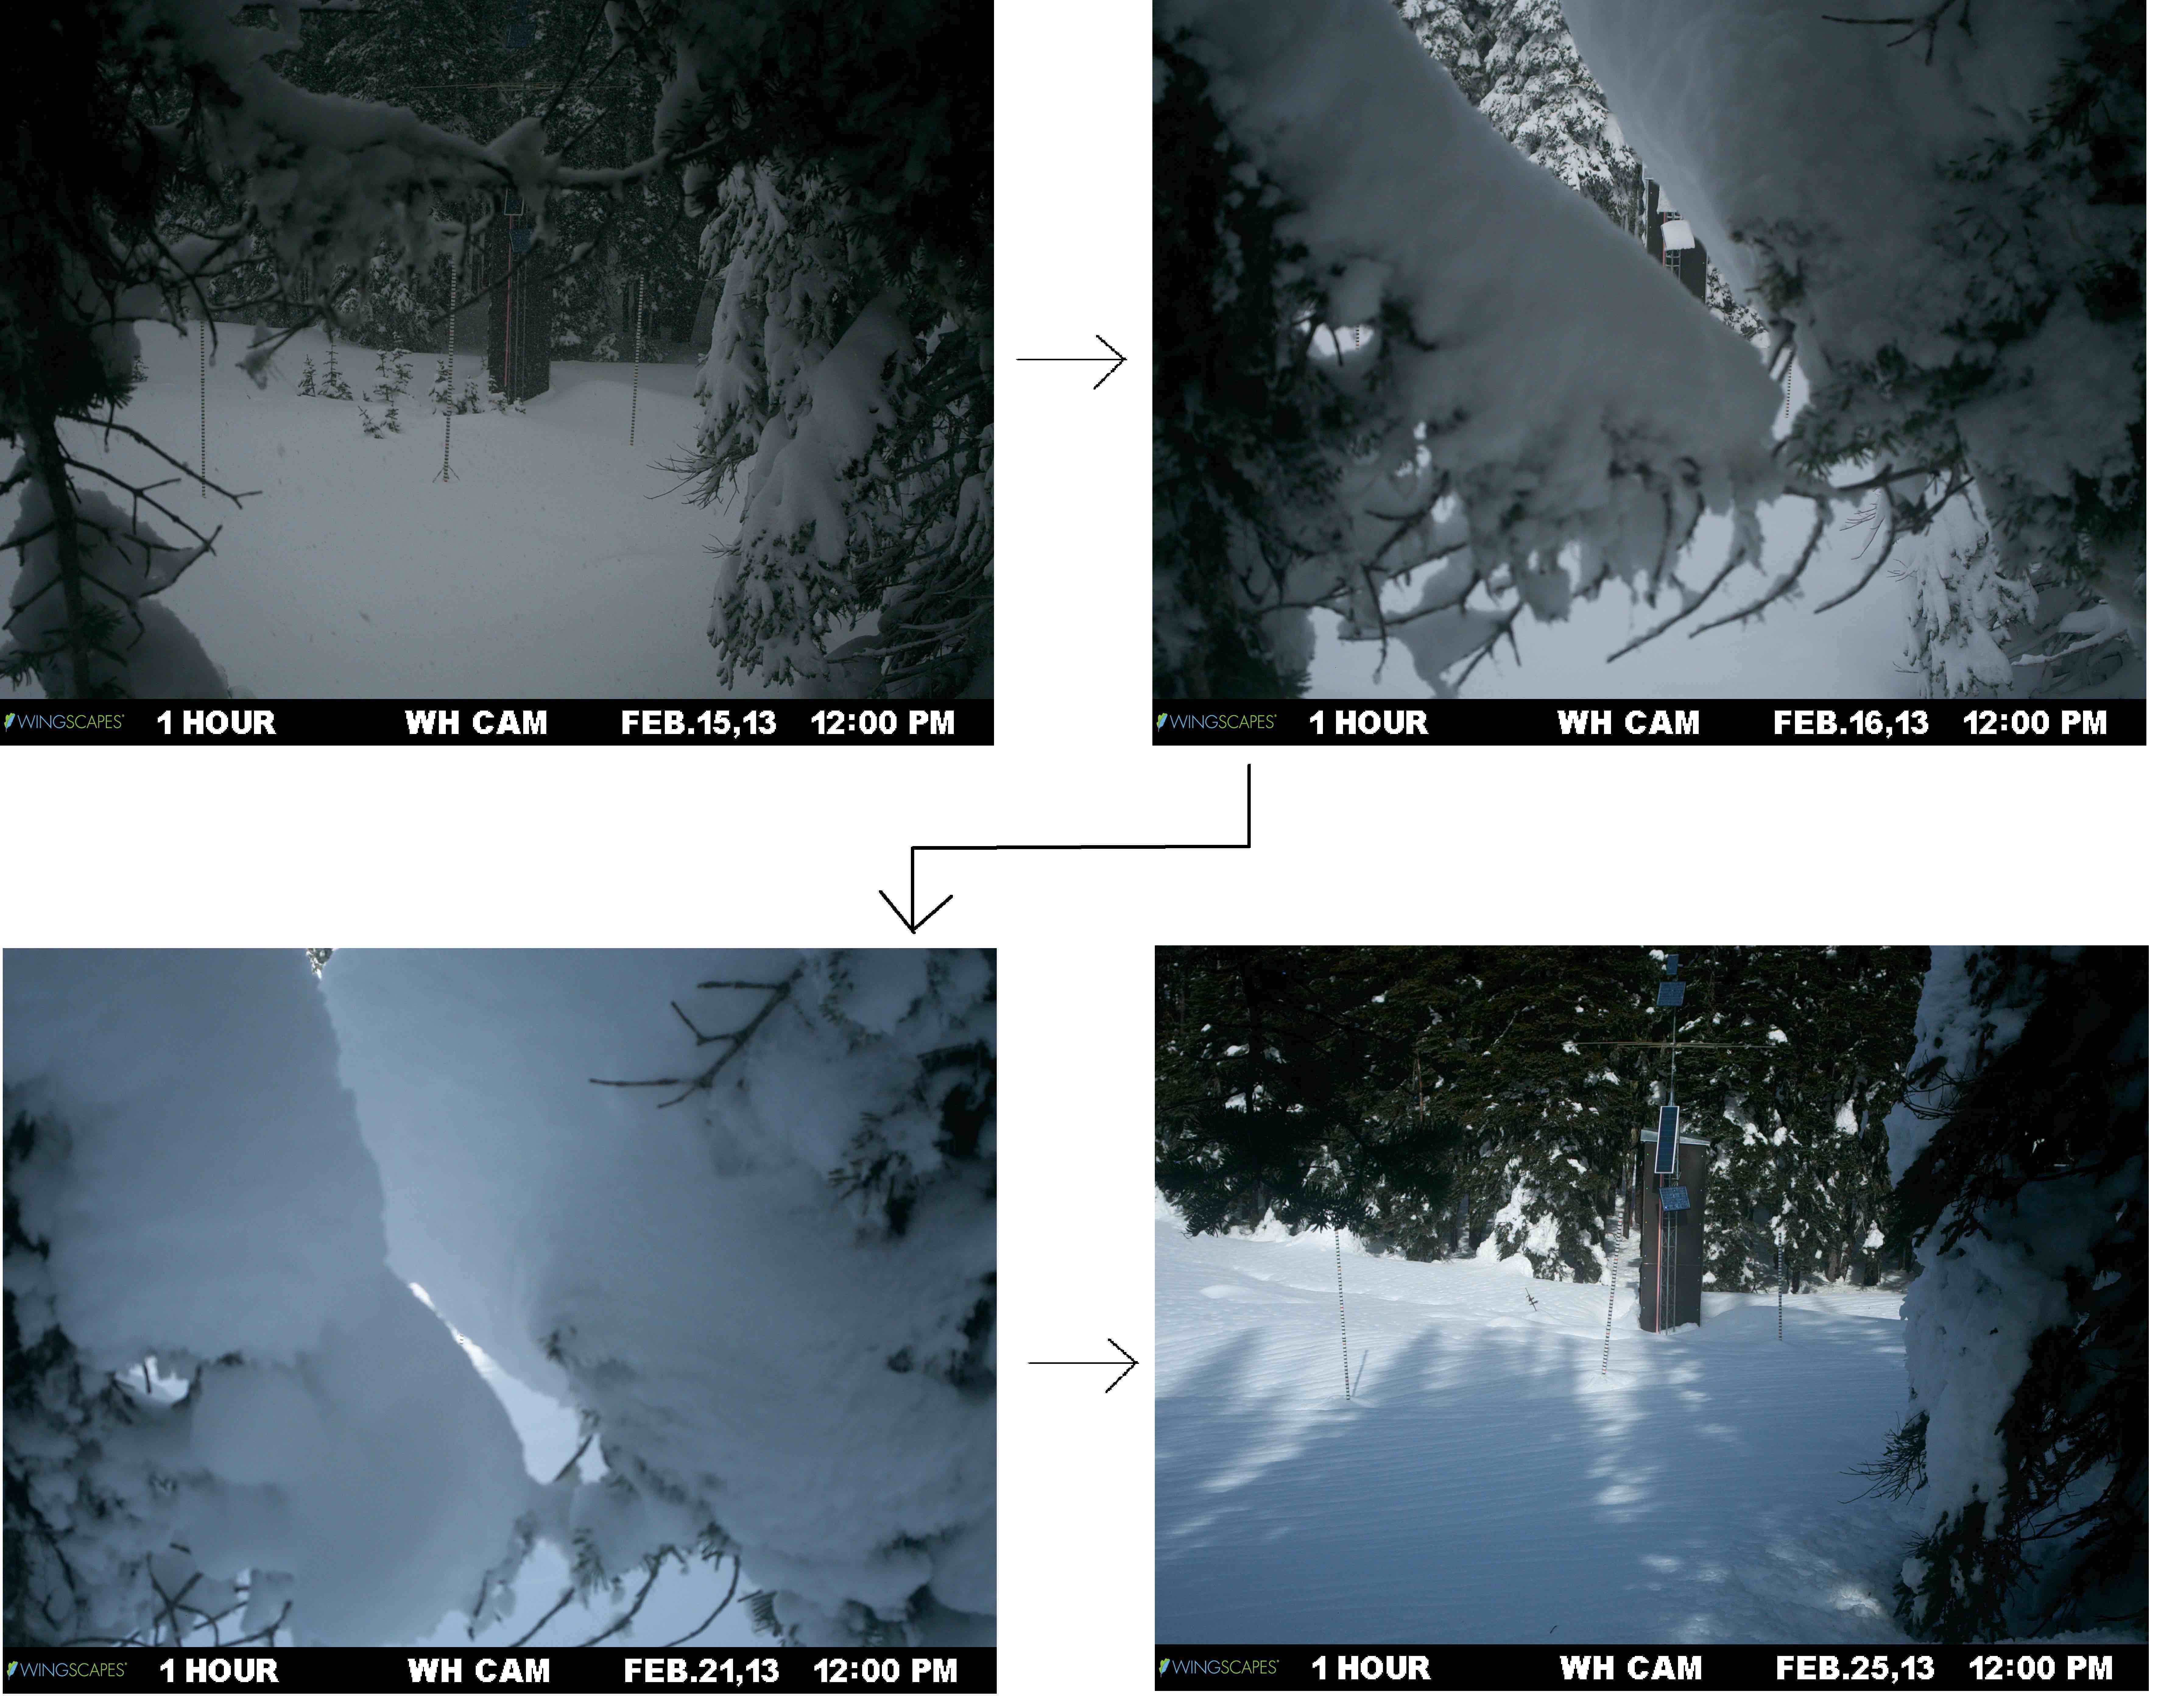
Figure 3: Example of snow interception blocking camera view
There are several methods for climbing trees. The safest and most preferred way is to use a ladder. If it is not feasible to use a ladder at the site, tree climbing gear may be necessary to mount the camera high enough in the tree. A good website for purchasing tree climbing gear is: www.wesspur.com/
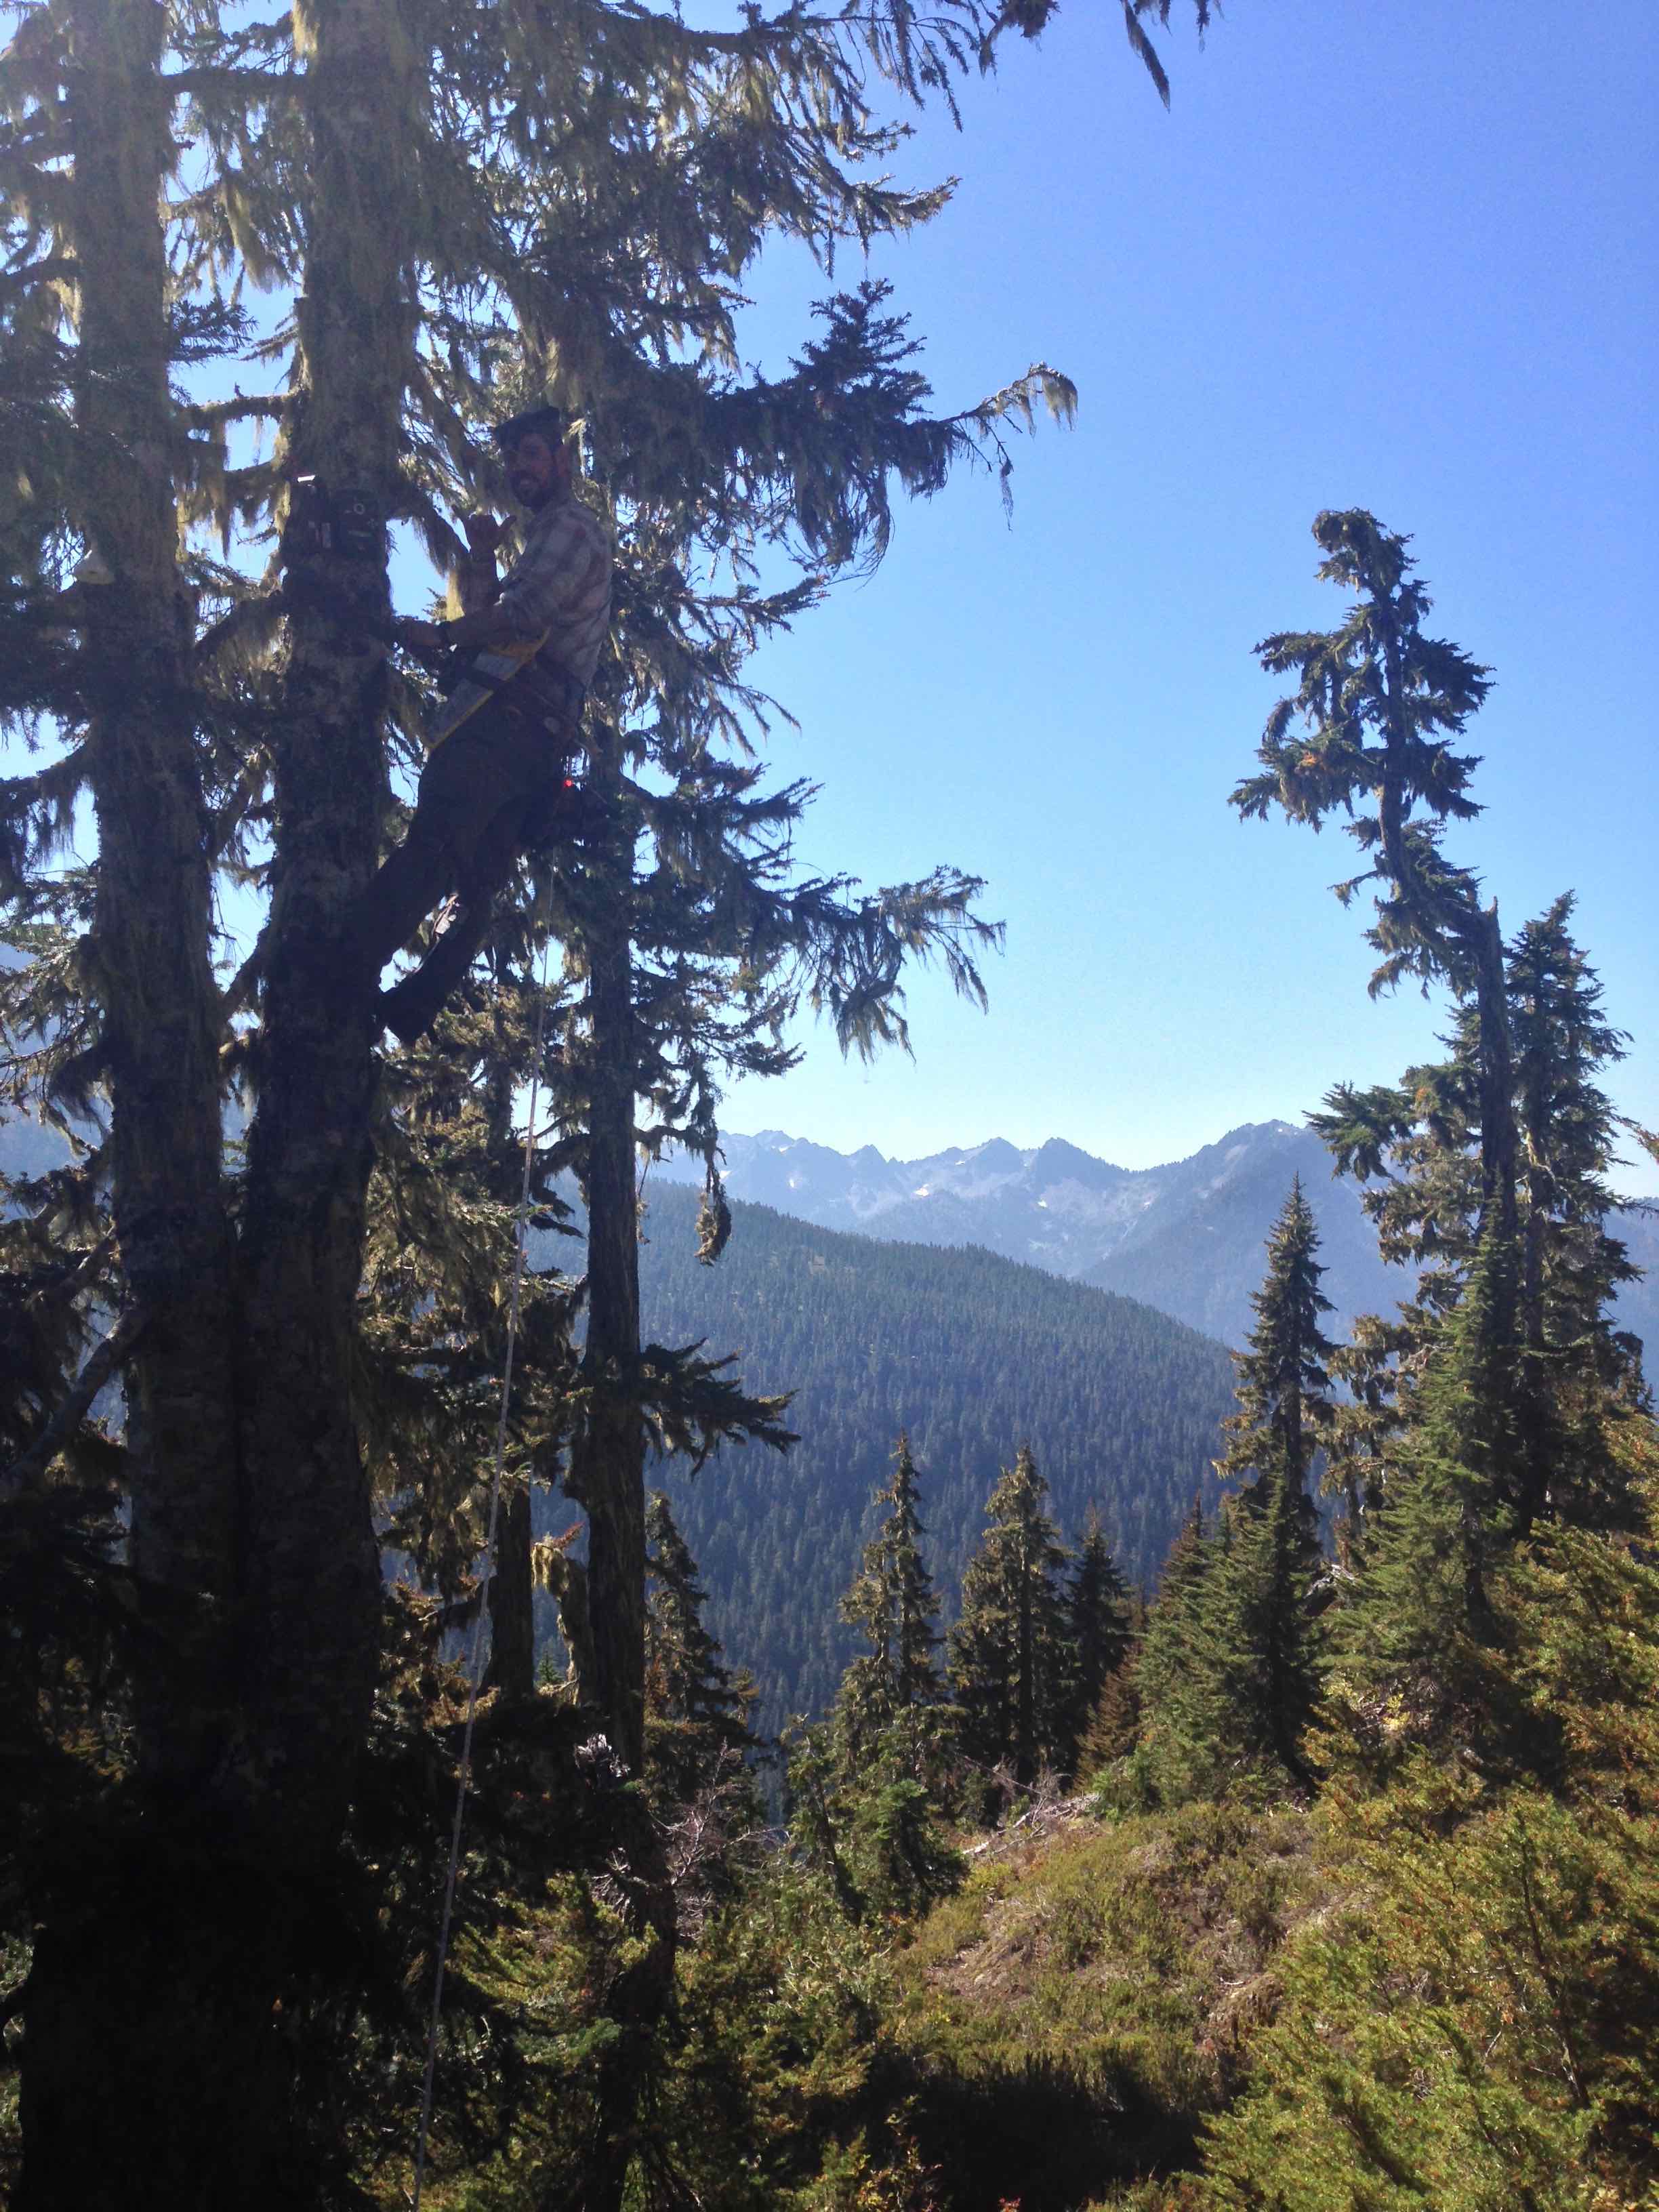
Figure 4: Camera installation using tree climbing gear
Step 3: Installing the camera
Once you’ve reached a desired height in the tree, it’s time to install the camera. Orient the camera towards the snow depth poles and strap the camera to the tree. To do this, take the upper strap first and tighten it around the tree, then repeat with the lower strap. Check that the straps are not overlapping or twisted to prevent camera movement during deployment.
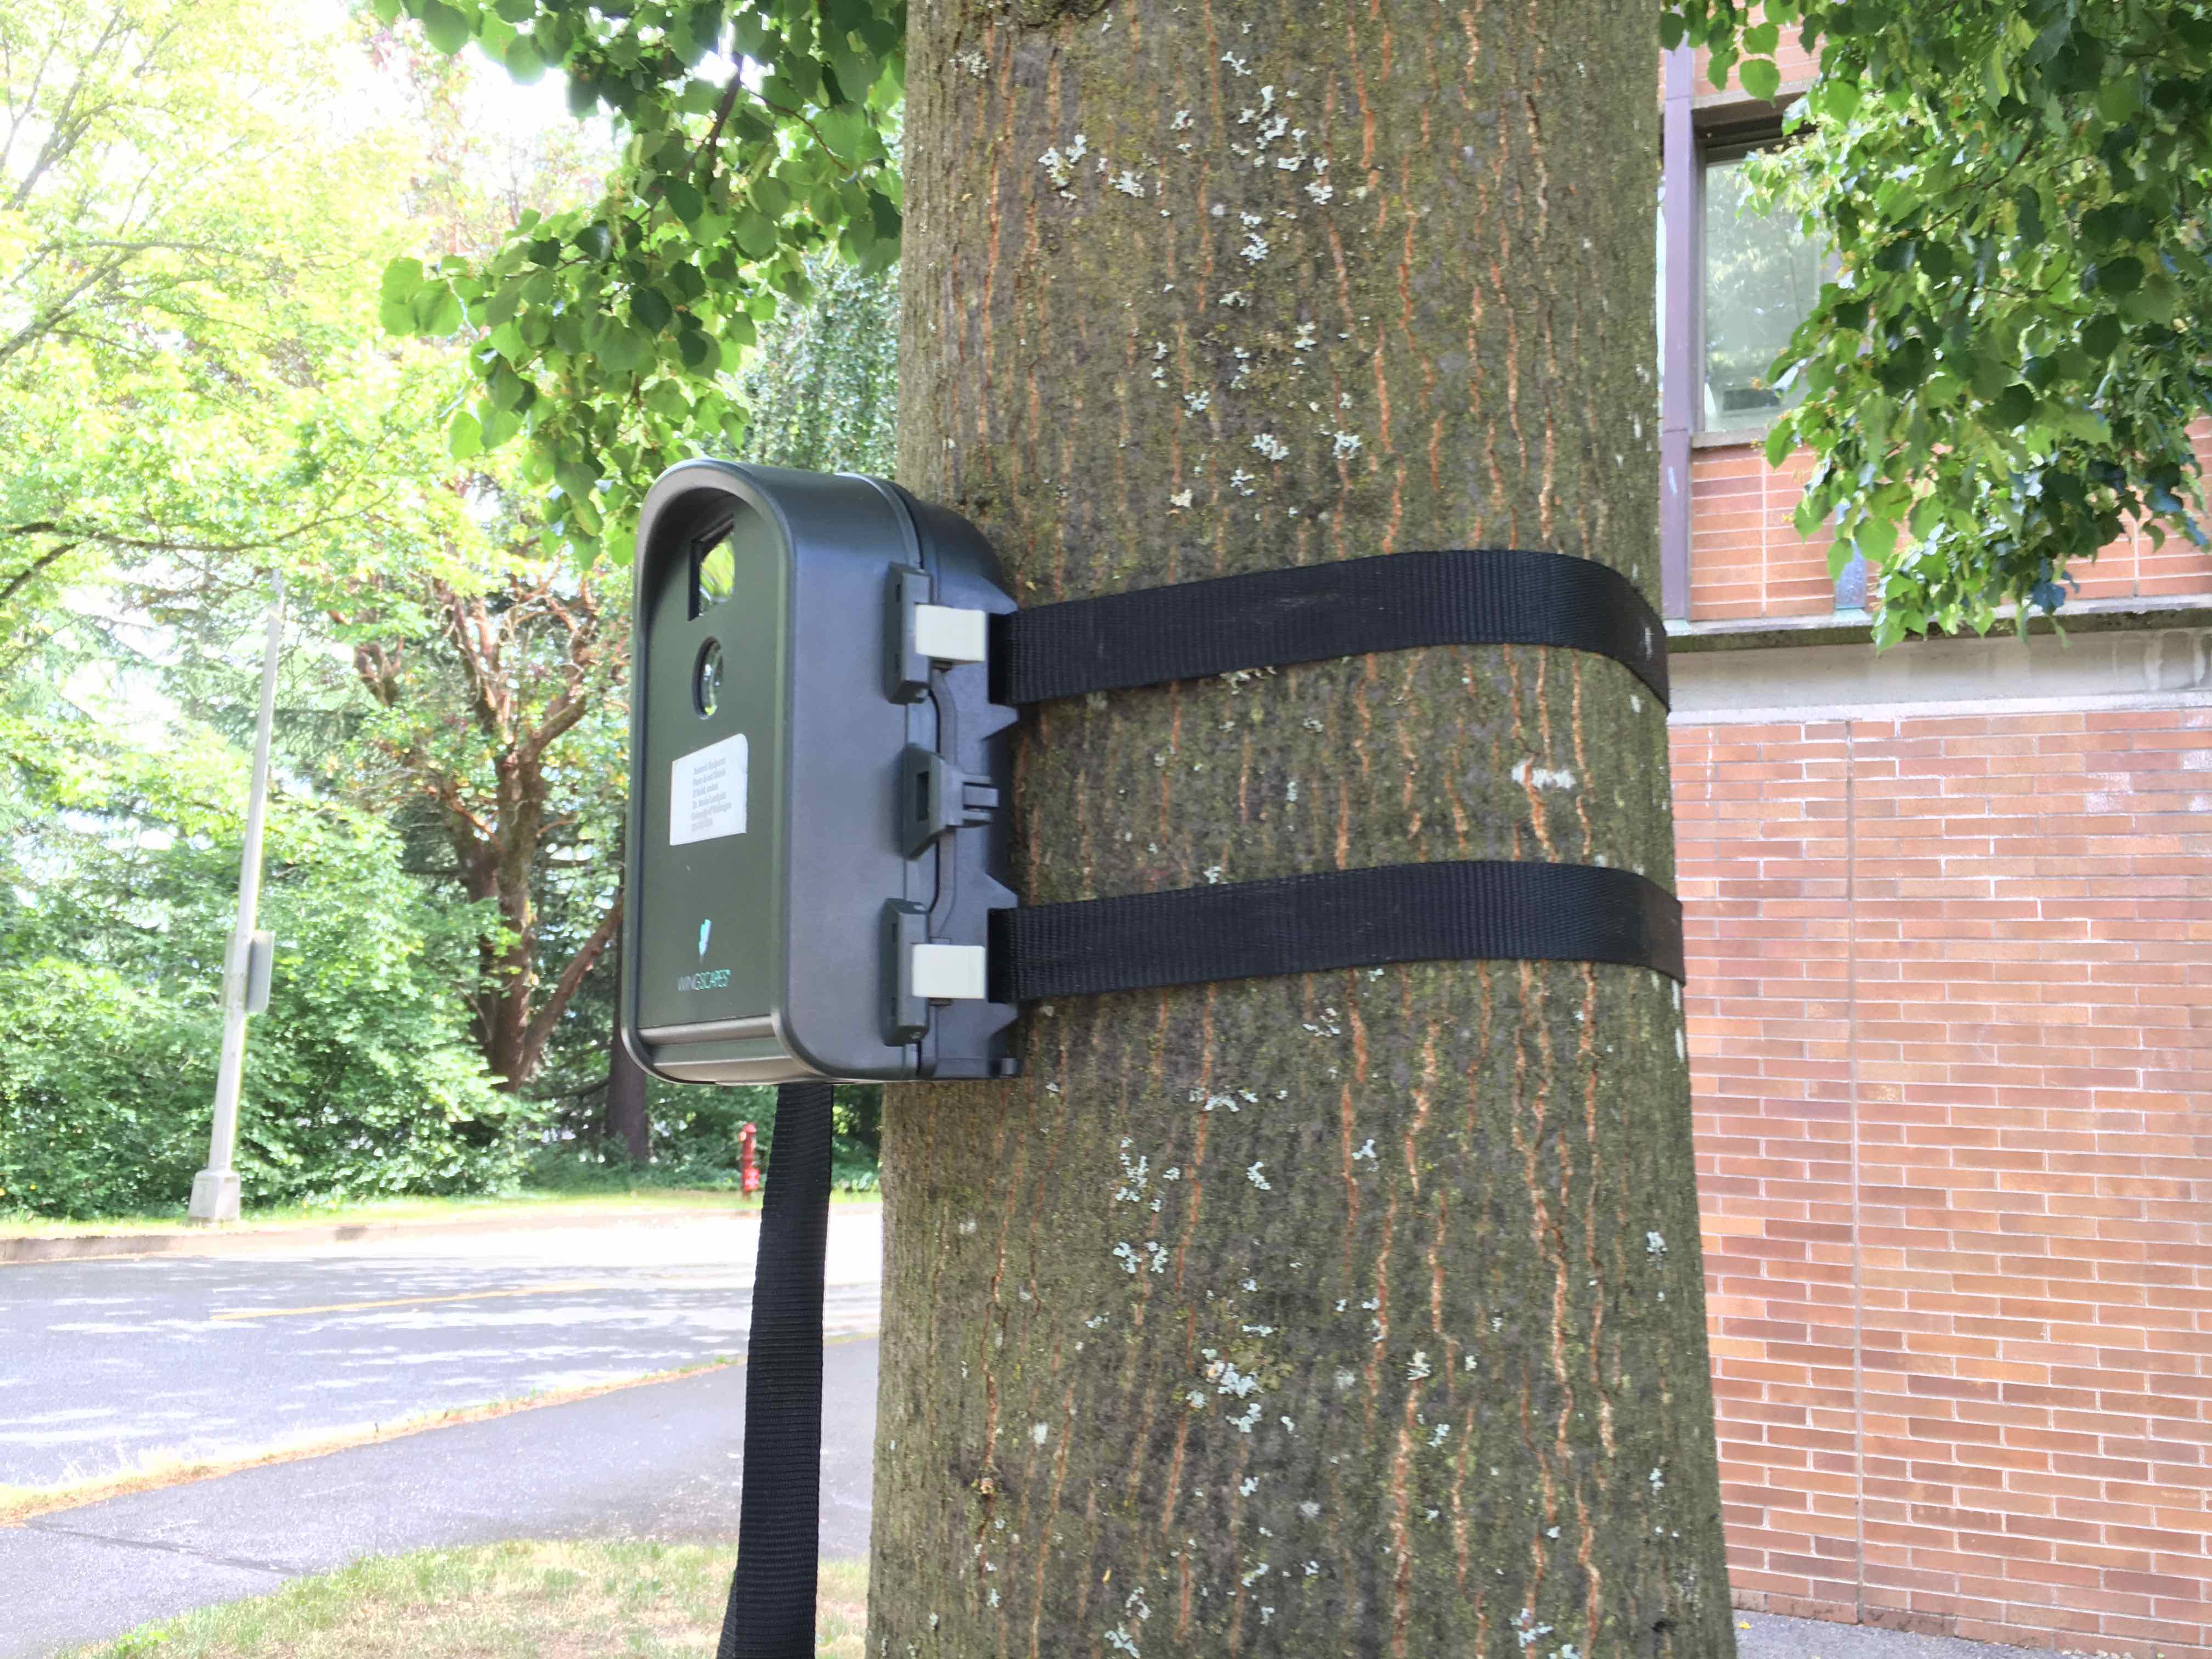
Figure 5: Example camera setup in tree
Step 4: Adjusting the camera
Correctly angling the camera will inevitably require an iterative process of adjusting and checking the camera image. The goal is to have the entire snow depth pole in the camera’s field of view, which often means the camera will need to be angled away from the tree trunk and towards the ground. This requires taking a test picture, reviewing it, adjusting the camera accordingly using wooden shims and repeating as needed.
The recommended process is:
- Take test picture: To do this, set the camera to ON and press the OK button, then press the OK button again to take a picture.
- Review the picture: The best way to review a test picture is to switch the camera to OFF, remove the memory card from the time lapse camera and put it into a digital camera. You can review the image using the digital camera’s playback feature to see if the image captures the entire snow pole.
- Adjust the camera using the wooden shims: If the test picture does not capture the entire pole, the camera will likely need to be angled down. The best way to do this is by loosening the top camera strap slightly and placing wooden shims between the back of the camera and the tree bark (see Figure 6). Once the camera is sufficiently adjusted, replRepeat: Go back to step 1 of this process and repeat until the camera is properly oriented to capture the snow depth pole(s) at the site.
Lastly, it is a good idea to measure the camera declination angle (i.e. angle from zenith) for image processing.
Additionally, almost all sites will require a lens focus of > 8’, but the focal distance can be adjusted by rotating the dial around the camera lens (see Figure 8) if the image is out of focus and a smaller distance is required.
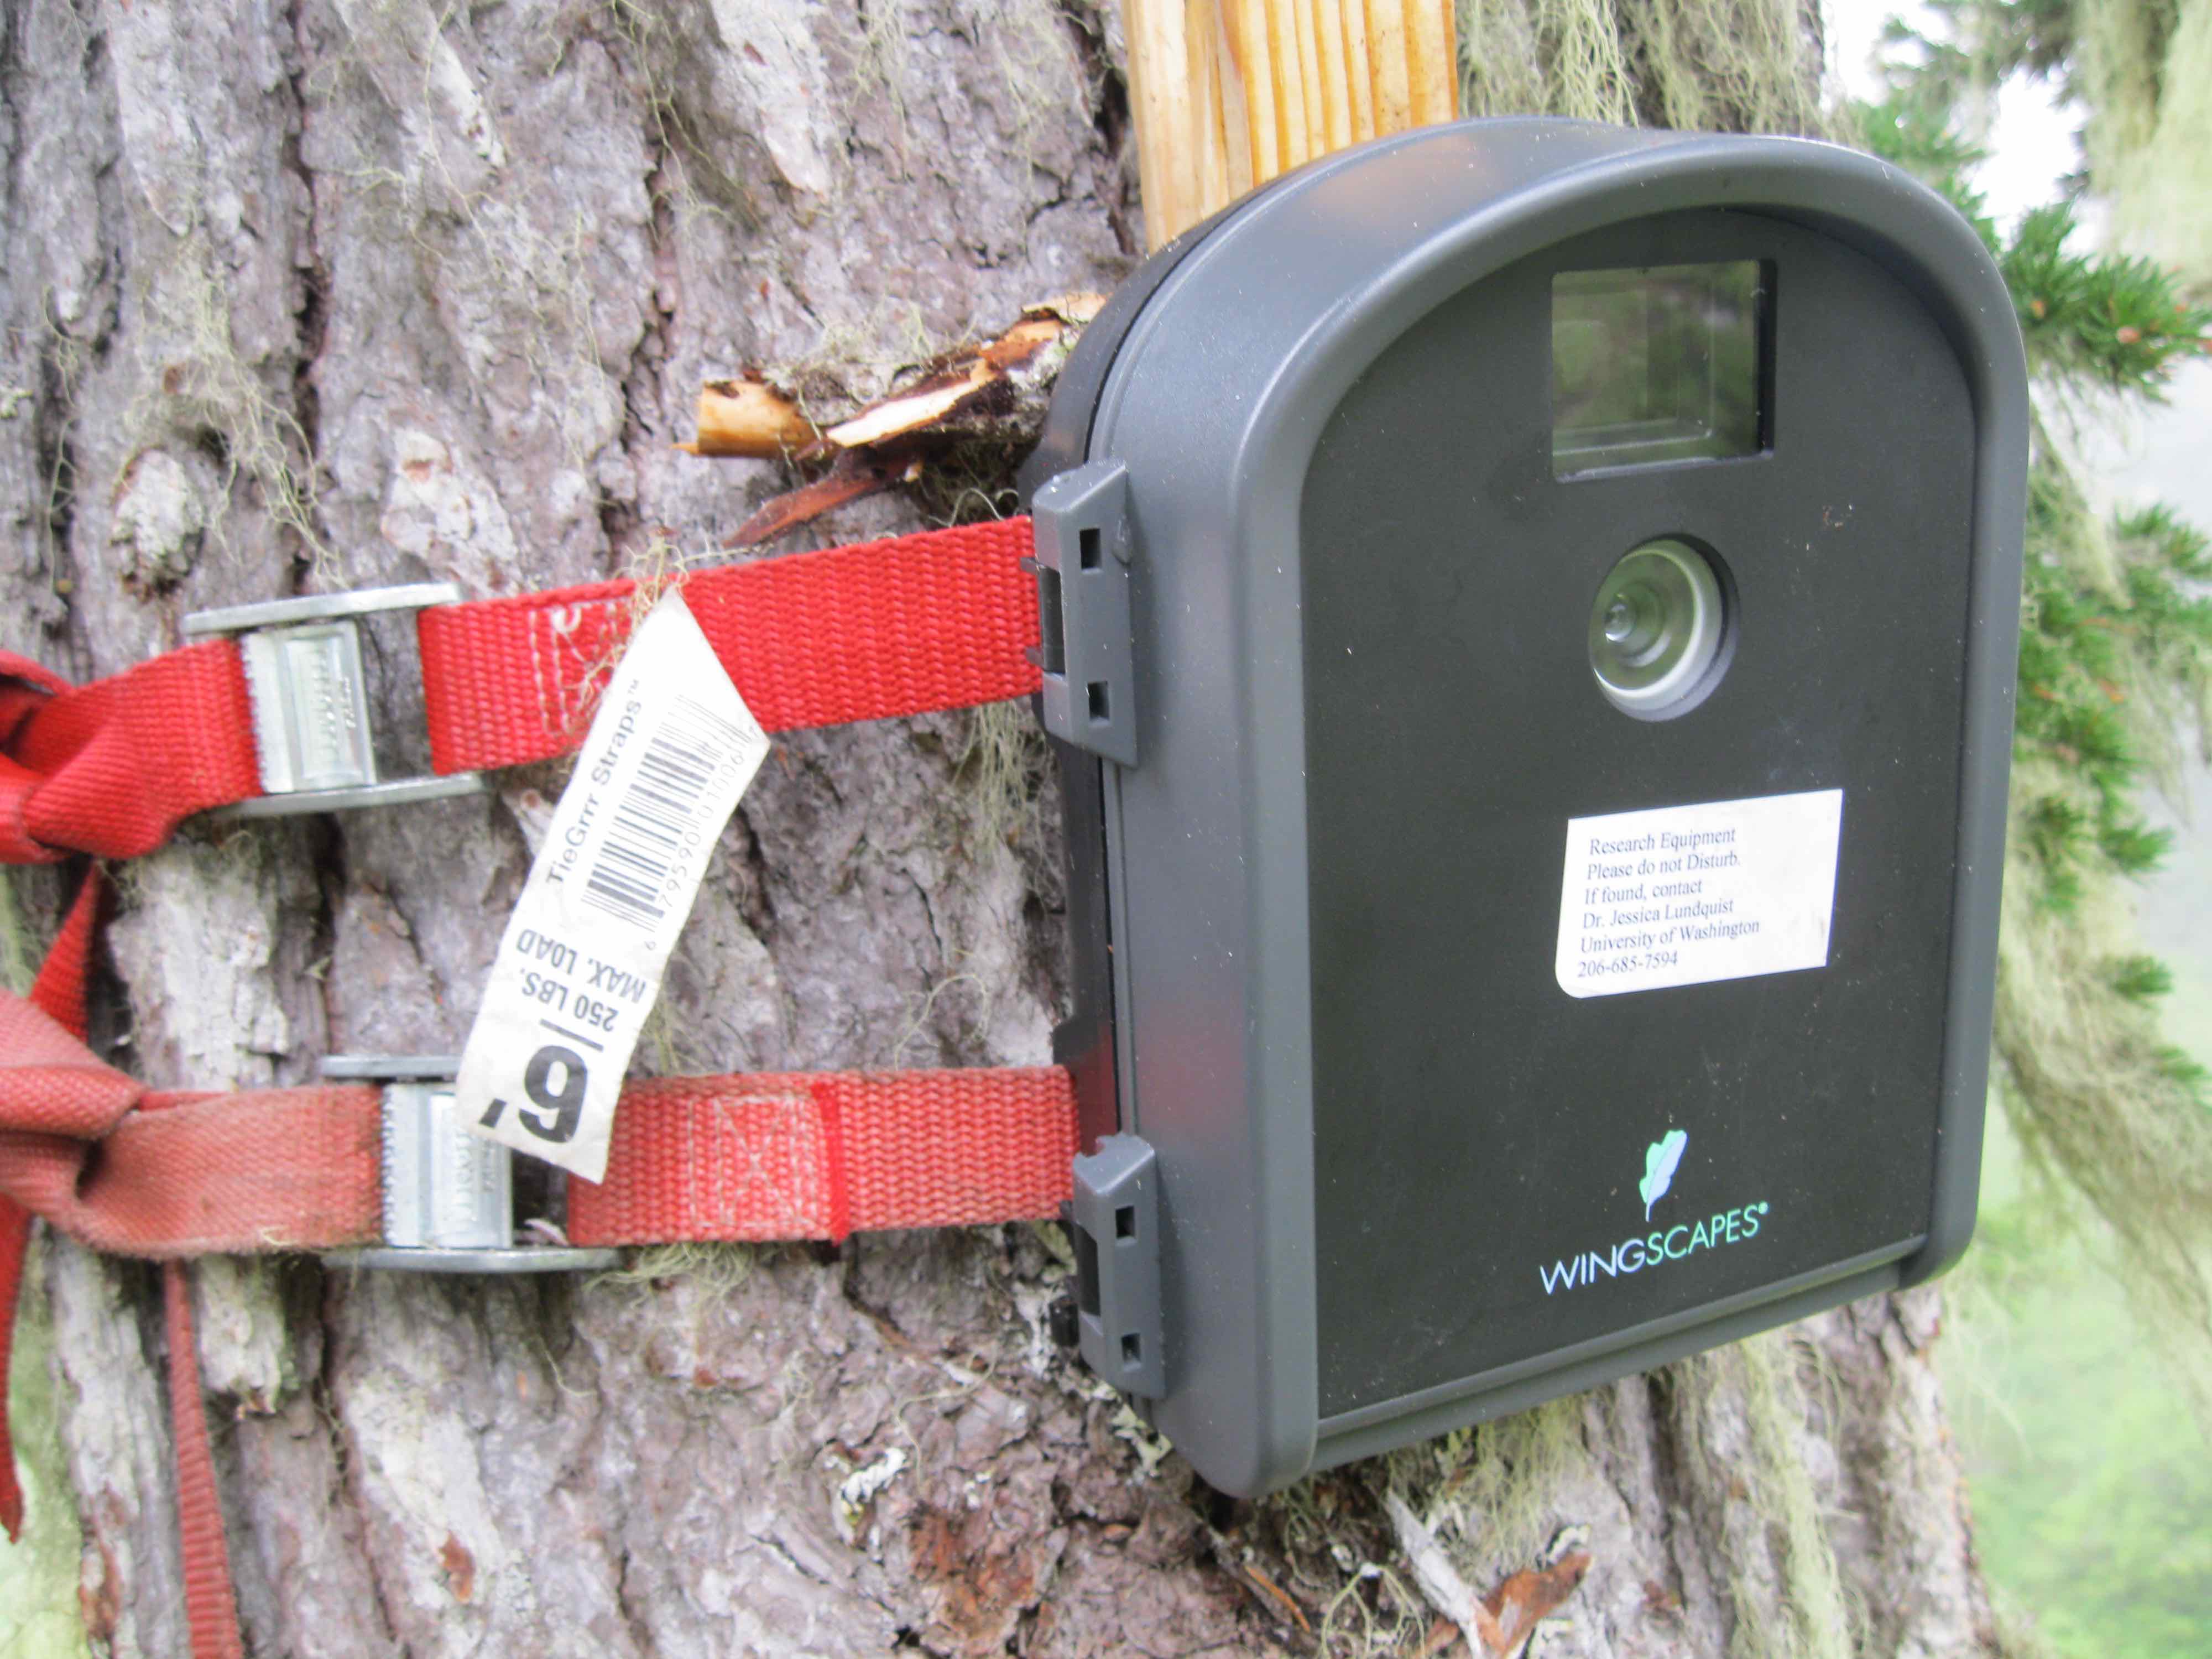
Figure 6: Installed camera with wooden shims to adjust angle
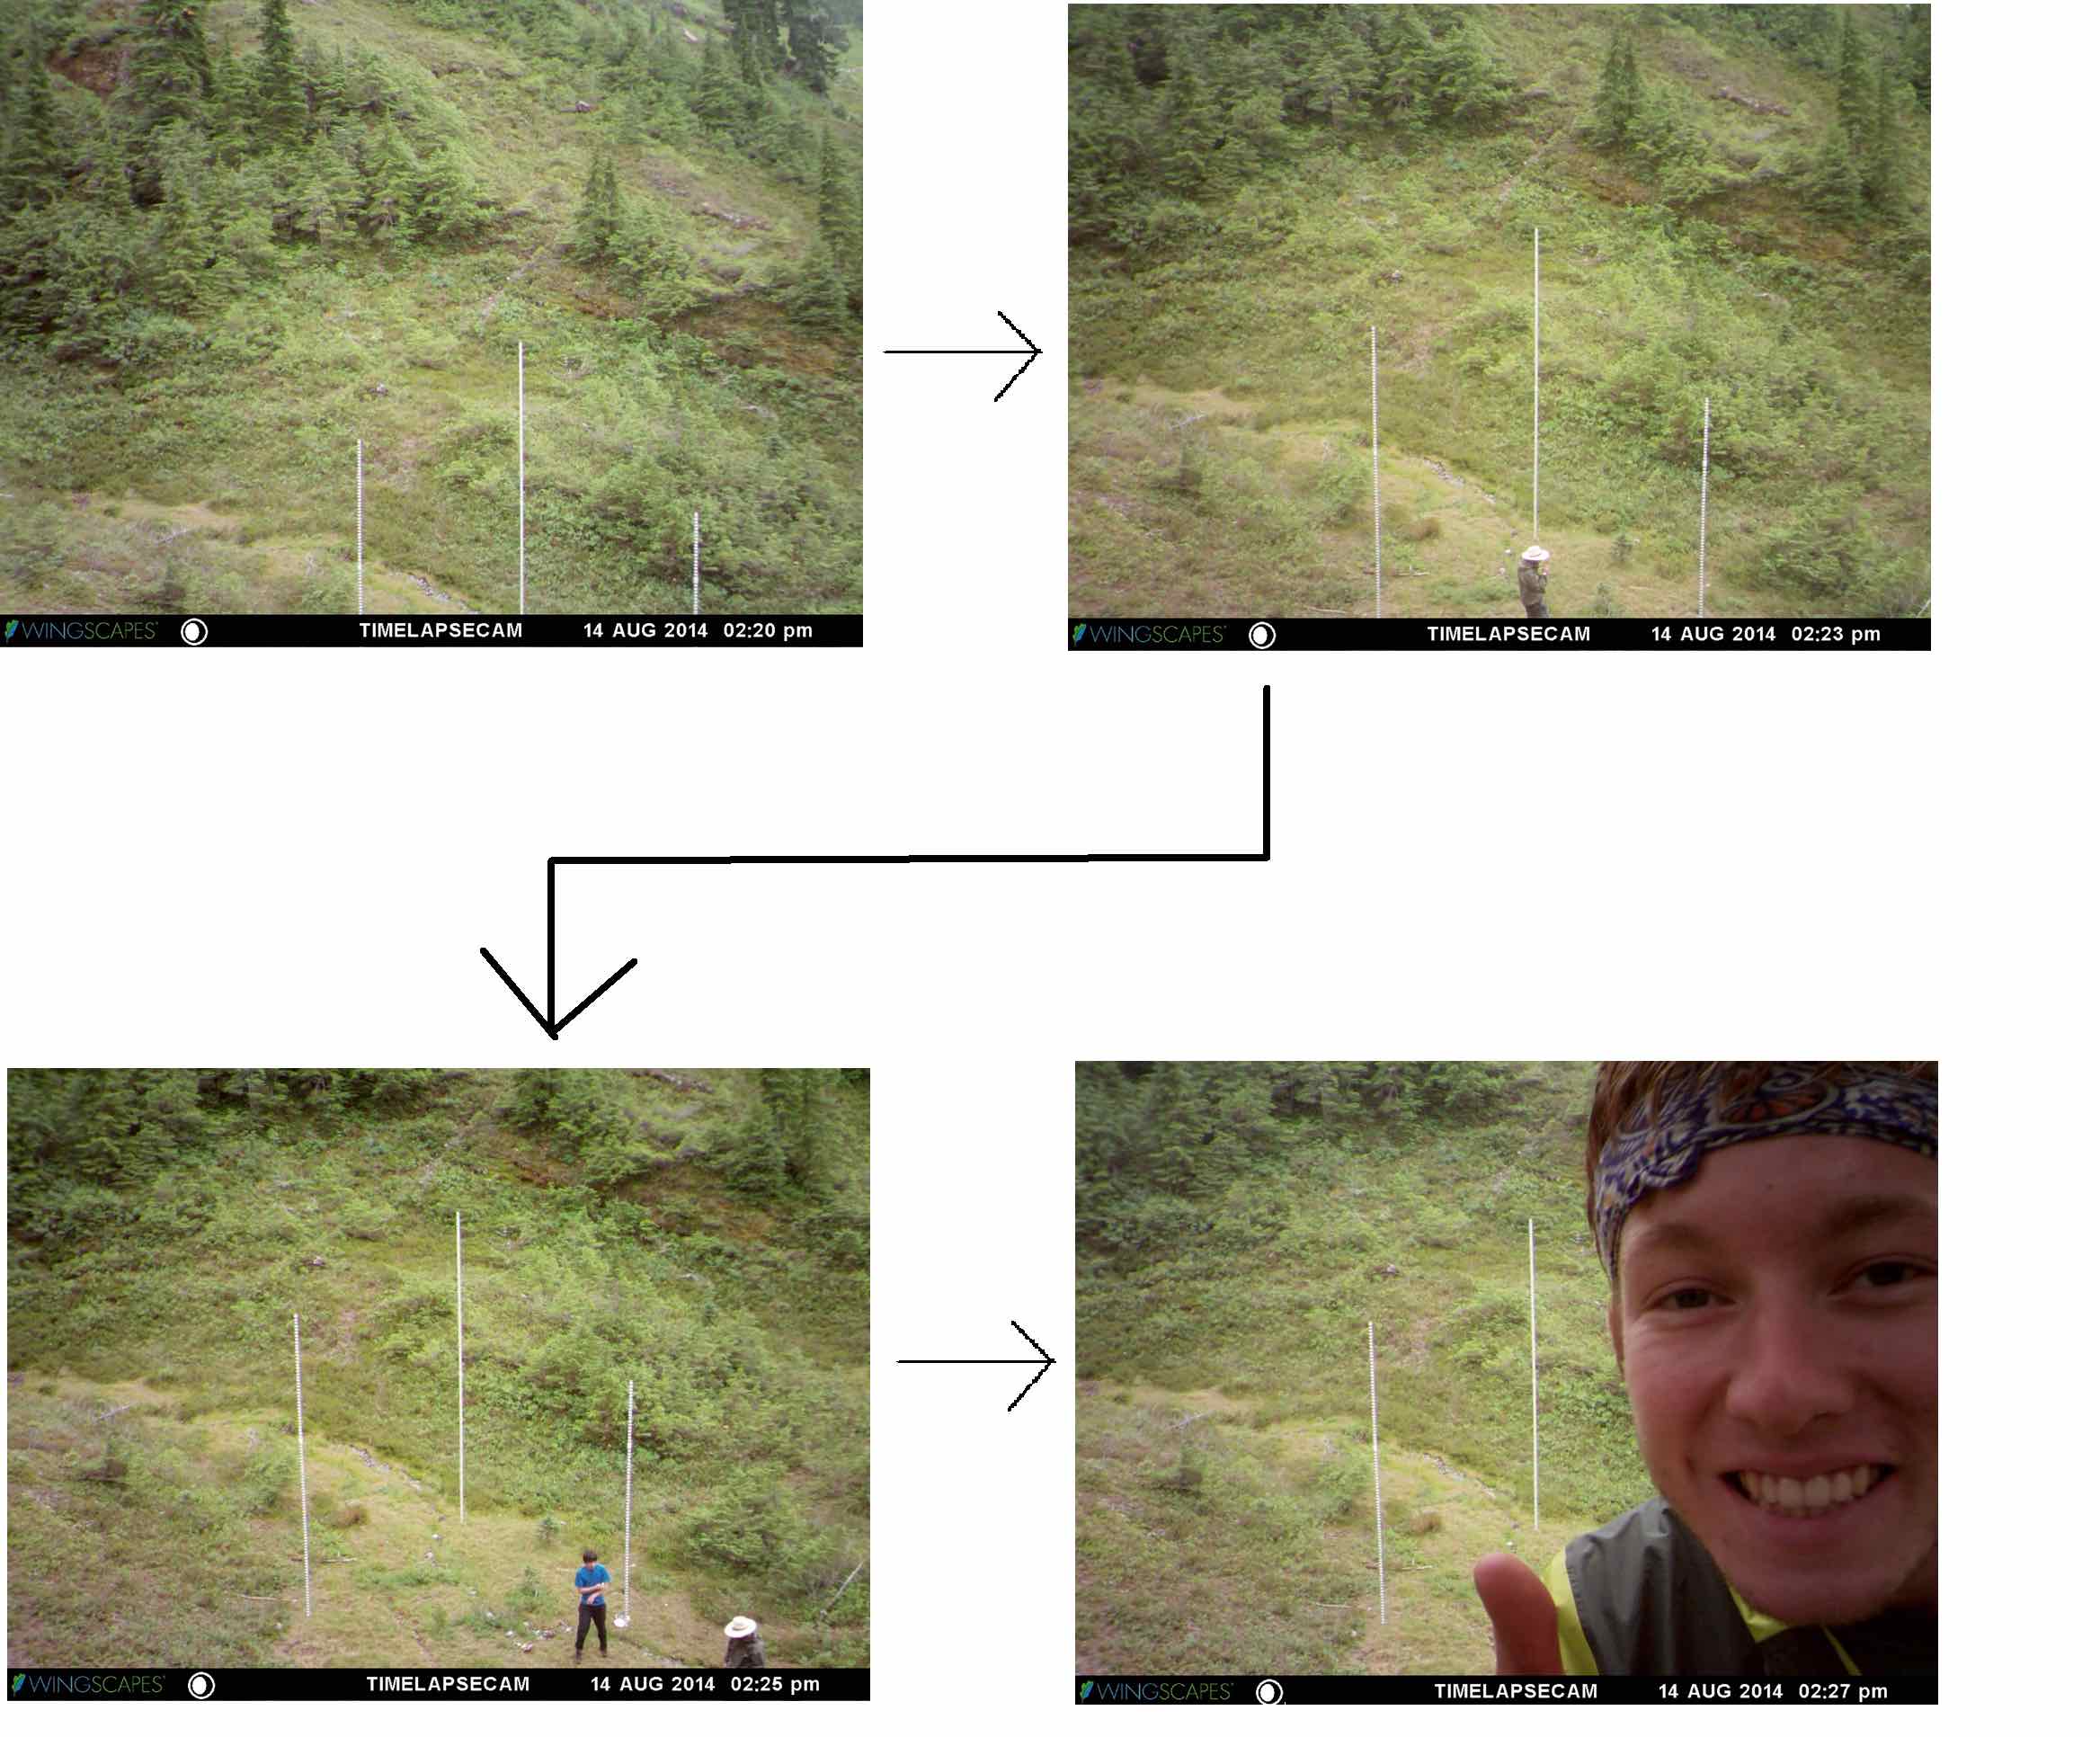
Figure 7: Process for setting camera at correct angle
Step 5: Camera setup
The following instructions are for setting up cameras to take pictures at 2 hour intervals starting at 9 AM and ending at 3 PM, as reflected in our start time, end time, and interval time. This can easily be changed to fit any desired time interval and duration. We recommend setting the camera to take photos between 9 AM to 4 PM because those hours offer the greatest amount of daylight when the snow depth poles will be easiest to interpret for image processing.
- Note: These instructions are only applicable to Wingscapes time lapse cameras. Click here for more information about Wingscapes Cameras, or please refer to the appropriate product manual for other brands of time lapse camera.
- Place new SD card in the time lapse camera
- Move switch to SETUP position
- Hit the right arrow (Date and Time) and adjust time accordingly, then hit OK to finish
- Hit the right arrow (Timelapse Interval), hit OK, set to 2 HR, hit OK
- Hit the right arrow (T.L. Programs Per Day), hit OK, set to 1, hit OK
- Hit the right arrow (T.L. Program #1 Start), hit OK, set to 9 AM, hit OK
- Hit the right arrow (T.L. Program #1 Stop), hit OK, set to 4 PM, hit OK
- Note: The reason we are setting it to turn off at 4 PM is that if we were to set it to turn off at 3 PM, the camera would not take a picture at 3 PM as the camera would turn for the day at the same time the photo would be taken. Setting it to 4 PM ensures an image is taken at 3 PM.
- Hit the right arrow to check settings: Upgrade Firmware: NO, Security Code: 00000, AC: NO, Wi-Fi SD: NO, Camera Name: TIMELAPSECAM, Imprint Info: YES
- Hit the right arrow, hit OK, set to ENHANCED (8MP), hit OK
- Hit the right arrow to check settings: Managed Memory: DO NOT OVERWRITE, Erase all images: NO, Reset to Default: NO
- Move the switch to the ON position.
- If time reads 30 seconds, wait until the photo is taken then press OK and check time again (will vary depending on current time, should be multiple hours)
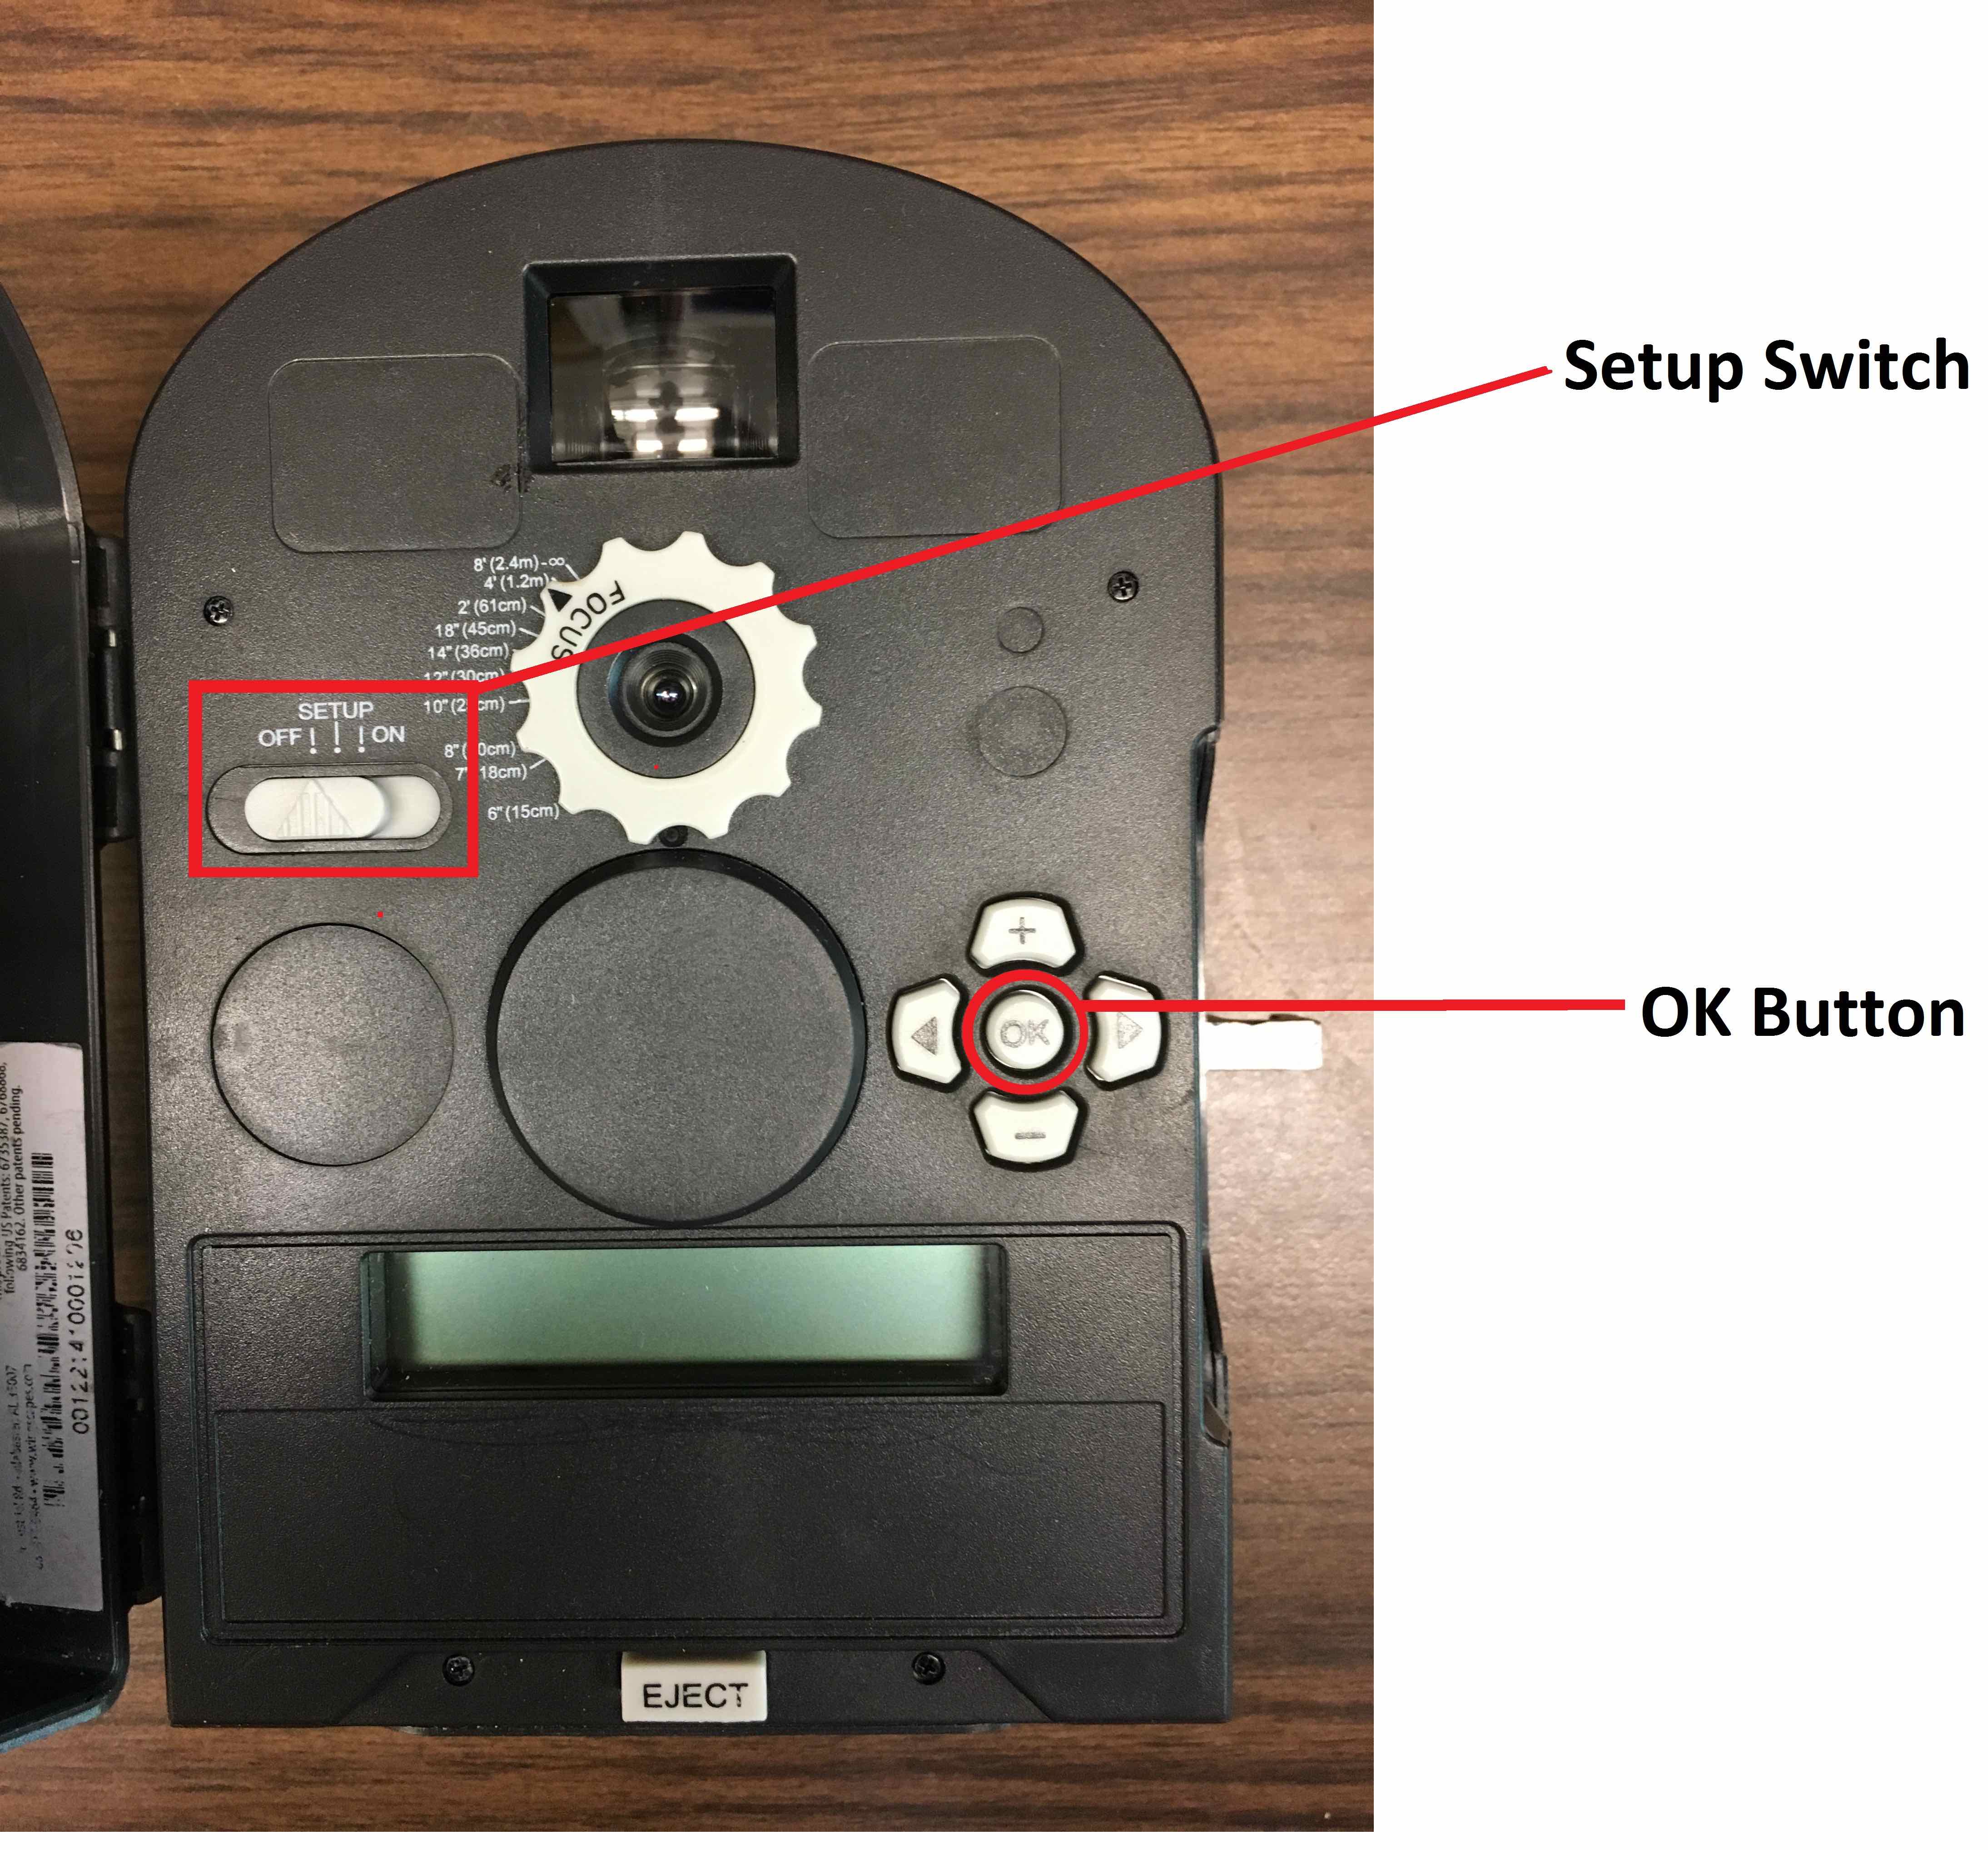
Figure 8: Wingscapes camera interior
Step 6: Final check
Go back and make sure that everything on the time lapse camera is set-up correctly. The following is a checklist:
- Make sure the camera is set to ON.
- When it is set to ON check to make sure that the time until next photo makes sense. Depending on the time of day you install the camera, the time until next photo will vary.
- Wipe the lens and camera housing clean to ensure there are no particles that will alter image clarity.
- Close and secure the camera housing with latches on either side.
- Take care when climbing down. Disturbing the camera can alter the view angle and change your image.