![]()
Installing Otobase Server for Windows
The following procedure will describe how to install Otobase Server for Windows.
To install Otobase ServerAfter installation you will be asked to restart your computer.
Installing 4D Server
To install 4D Server, follow the instructions from 4D for the server software and related files including the Network Components and 4D Write.
Note: In order for Otobase Server to run properly, it is necessary for the folder with all Otobase files to have Read/Write access.To run 4D Server with Otobase
- Browse to the folder 4D Server.
- Double-click on the 4Dserver application file.
- In the open dialog, make sure the Files of type pop-up is set to "Compiled Database (*.4DC)."
- Browse to theOtobaseSVR folder, typically in Program Files.
- Click on the OtobaseSVR.4DC file.
- Click Open.
- When a dialog prompts you to find the Otobase data file, do one of the following:
- If this is your first time working with Otobase, we highly recommend that you use the Example Data file. Find it in the Otobase root directory in the Example Data folder
- If you wish to create a new data file, click New, choose a name for the new file and click OK.
- If you wish to use an existing data file, browse to the file and click OK.
Using 4D Write
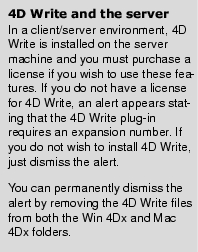
Some of Otobase's features, such as generating reminder letters, are enabled by a built-in word processing program called 4D Write. The 4D Write license is included in stand-alone versions of Otobase. In a client/server environment, if you wish to use 4D Write you can purchase a license from 4D.
To install a license for 4D WriteConfiguring the client machine
The 4D Client software must be installed on each client machine that is connecting to the server. You must repeat the following steps in this section for each client machine connecting to the server. After downloading the client software from 4D or installing it from a disk, you will see the files in a folder called 4D Client. Before connecting to the server, you will need to move the following files:
Modifying access privileges on a client machine
The first time 4D Client is run on a computer, a number of system files need to be initialized. For this reason, the person installing 4D Client should also be an administrator of that machine. Or, in other words, the person should have file modification privileges for the system folder.
To connect to the serverNote: If the server is not visible, see "To manually connect to the server" below.To manually connect to the server
- If you do not see the server you wish to connect to, click More Choices.
The screen enlarges and allows you to manually search for the running 4D Server of your choice
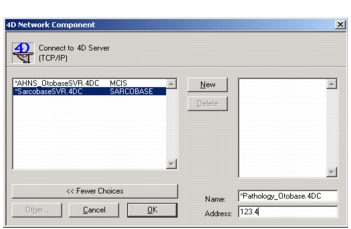
.- If this is the first time you are connecting to the server, tell 4D where the server is. Next to Name, type in a nickname for the server you are looking for, such as Pathology_Otobase.4DC.
- Enter the IP address for the computer running the server.
- Click New.
- When the server appears in the list, double-click the server name.
Note: If the server has been used in the past, its name will appear in the list. Double-click on the server's name to establish a connectionAfter you connect to the server, a dialog requests you to log in. Enter in your user name and password.
Connecting to an encrypted server
If the server you are connecting to is encrypted, an asterisk (*) needs to precede the server's name.
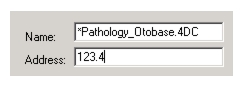
This indicates that the server is encrypted and you can only access it if you are using a TCP/IP connection. Servers located on your local network will automatically display the asterisk in their nicknames. To manually connect to an encrypted server, you will need to precede the server nickname with an asterisk.
To manually connect to an encrypted server
|
Otobase Otobase Web Site Voice: (206) 221-2430 Fax: (206) 221-5152 otobase@u.washington.edu |