Prev Tutorial 5
Tutorial 6
SliderCtrlWithEcho
Class
GOAL: Improve our
knowledge from previous classes and define/customize a new GUI element class,
allowing increasing ability to read and maintain our system
PREQUISITES:
Tutorial 5
Learn and use
‘SliderCtrlWithEcho’ class
- First
download the ‘SliderCtrlWithEcho’
class from the website
- Open
up the Application in which you
want to use the class
- Go to
the [Design] window of your Application
- Go to
your Tools Menu
- In
your Tools Menu, click on the
‘Choose Items’ option (its 6th
item on my menu). Click on it.
- The
menu screen that pops up should look like the screenshot below, what you
want to do next is click on the ‘.NET
Framework Components’ tab.
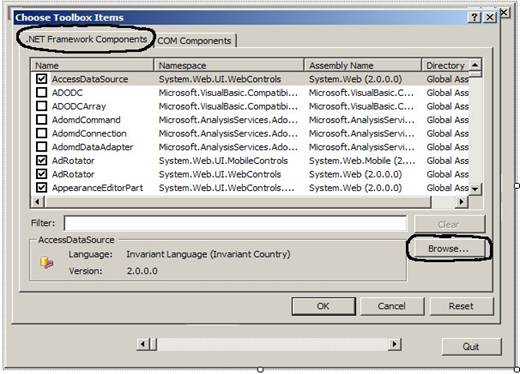
- Next
you want to click on the Browse
button and then navigate to the directory where you downloaded the ‘SliderCtrlWithEcho’ class.
- In
the ‘SliderCtrlWithEcho’ directory,
navigate your way to the Debug
folder and to the ‘SliderCtrlWithEcho.dll’
file and click open.
- The
path to the file on my computer was: SliderCtrlWithEcho--->
SliderCtrlWithEcho--->obj---> Debug---> SliderCtrlWithEcho.dll
- Now go
back to your ToolBox
- Expand
the ‘All Windows Forms’ tab,
towards the very bottom of that list, you should see a new Tool called ‘SliderCtrlWithEcho’. If you do not see it there, check under
the ‘General’ tab. It should see it in one or the other.
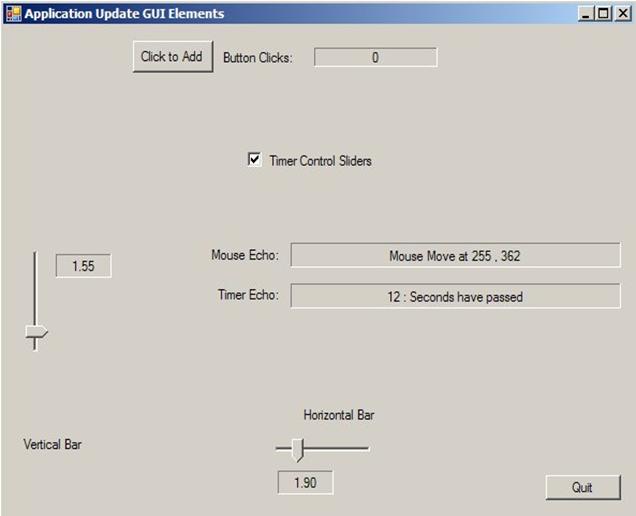
- Now
you can replace your current hScrollBar
with a SliderCtrlWithEcho.
- The SliderCtrlWithEcho’s current
functionality is slightly different than the ScrollBar’s.
Some of SliderCtrlWithEcho’s
Differences:
It
outputs everything in float values and comes with its own echo label.
You can change it’s orientation to
a vertical version as well, but after doing it in the [Design]Window you must also call it’s function OrientationToVertical(), or it won’t
look right.
If you wanted to use the SliderCtrlWithEcho along with the timer_Tick function like in Tutorial 5,
here is an example of what you would do:
§
In the Visual Studio project window, click
- Build
>> Build Solution
- Debug
>> Start to run
Next Tutorial 7