Center for Shared Services
Outlook Configuration for Shared UW Exchange Accounts
The best practice for connecting shared UW Exchange email accounts to users’ Outlook desktop application is through permissions rather than mapping several Exchange accounts to the application. Using the setup below resolves known Outlook performance issues for those users who need access to several UW Exchange mailboxes.
Outlook inbox/folder connection clean up, in OWA (Outlook Web App)
- To begin, remove all additional accounts from standard account settings in the Outlook desktop application. Do not remove your NetID account.
- When all additional accounts have been removed, exit out of Outlook and restart it. It should start up with normally with your single NetID.
- Next, you will need to log into each of your accounts that you wish to have shared with your desktop Outlook.
- Login into your first account you want shared. Click here. (Please note, you will need to log out of your Outlook Web App completely and restart the browser)
- Enter the credentials for the first account you wish to add.
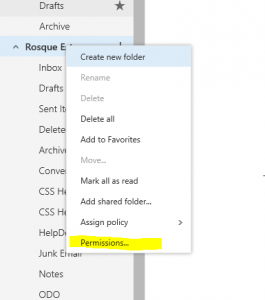
- On the left panel, right-click the top level of the account, and choose ‘Permissions…’
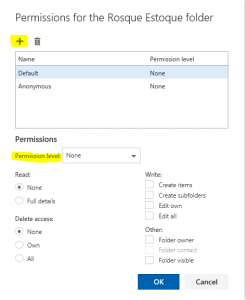
- Click the ‘+’ and add all the relevant users to share the inbox/folder with. (You may add everyone there but for now, just add yourself)
- Next select the appropriate permissions, there is a drop down list that you can select or you can customize it by selecting the type of read & write access.
- Repeat these steps for each folder desired folder, such as the inbox, drafts, sent items…etc.
- Click OK.
- Open Outlook desktop application.
- In the Outlook application under your NetID email account, follow these steps to add the shared resources:
- Open the Outlook application.
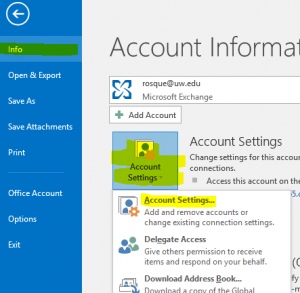
- Click File at the top left of Outlook.
- Click Account Settings on the right, then click Account Settings again.
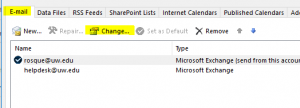
- The E-mail tab should be selected and click your email to be highlighted.
- Click Change.
- Choose More Settings > Advanced > Add.
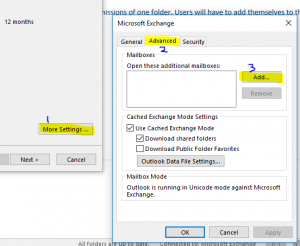
- Type the shared email address, such as helpdesk@uw.edu.
- Click OK > OK.
- Click Next > Finish > Close.
- Restart Outlook desktop application and verify the shared resources are accessible to the application in the left pane.
——————
Outlook calendar connection clean up, in OWA
- Login to the shared NetID acct via OWA, and go to the accounts calendar, using the upper left corner menu
- On the navigation bar, select Share > Calendar.
- In the Share this calendar dialog, type the name or email address of all appropriate users for this calendar. (You can only add one person at a time from Outlook on the web).
- For each user added, select the drop-down box next to their name, and select the level of access you want them to have. i.e. ‘Can view all details’.
- Login to end user acct and accept the share request
- Verify resources are available to end user in the Outlook desktop application, by:
- go to calendars
- under ‘My Calendars’ in the left pane, observe and check off the shared calendar listed