
Creating Checklists
Especially in the case of a clinical study, it is important to make sure records saved in Otobase meet certain minimum criteria. For example, you would want a new subject record to have at least a first and last name before it can be saved. To simplify and enforce this process, Otobase allows the administrator to create Checklists that will review a data entry form when it is being saved, and prompt the user if any of the minimum information is missing.
Checklists are built from Saved Searches in the same way you build a Sequential Search (see Creating Sequential Searches). But instead of using the search to find all the records meeting certain criteria, you use a Checklist search to ensure that a new record being saved in Otobase meets certain criteria to begin with.

Creating checklists
What follows is a step-by-step description of the process of creating a Checklist.
To create a Checklist
- Using the Search form and New Query form, create one or more Saved Searches that define the criteria for your Checklist.
- From the Preferences form, select Search/SeqSearch-Checklist.
- Click on the Checklists/Sequential Searches list item in the right-hand box.
- Click New Checklist/SeqSearch.
The Sequential Search/Checklist creation form appears. On the left, a list contains all Saved Searches in the database, organized by table. An item with a plus sign (Windows) or arrow (Mac) contains a sublist of Saved Searches.- Open the sublists and find the Saved Search(es) that you created.
- Drag the Saved Search sublist item(s) that you wish to define your Checklist to the list on the right.
You can change the order of the Saved Searches by dragging them to a different position in the sublist.

- Once you have defined your Checklist, click Save.
A request dialog will ask you to name your Checklist search.- Enter a name and click OK.
- Click Finished.
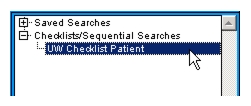
The newly created Checklist search appears in the list of Checklists and Sequential Searches on the Preferences form.Assigning Checklists
Once you have created a checklist, you must assign it to a Clinical Group, and then to Providers, to make it properly test for your criteria.
To assign a Checklist to a Clinical Group and Providers
- From the Home Window or Subject List menu bars, select File > Clinical Group Info to open the Clinical Group List, then double-click on the group you wish to assign the checklist to.
The Clinical Group form opens.- Unlock the Clinical Group form by clicking on the black lock.
- Click Clinical Group Checklist.
A form opens with a list on the left of all Checklists saved in the database.

- Click the Checklist you would like to associate with this Clinical Group.
The Checklist Definition box displays all tables, with sublists attached to the tables that contain the Saved Searches comprising your checklist. You can double-click a Saved Search to display it and check the criteria.- Click Update Checklist Selection.
The Clinical Group form appears again. The text on the Clinical Group Checklist button has changed to italics to signal that a Checklist is associated with this Clinical Group.

- Open a Provider Information form by selecting File > Provider Info from the Home Window or Subject List menu bar.
The Provider List appears, allowing you to choose the provider record you wish to assign the Checklist to.- Unlock the Provider Information form, then click Provider Checklist.
A list creation form appears, allowing you to select a Checklist and also decide whether to allow the user to override the Checklist.
Whenever the user saves a record, Otobase will run the Saved Searches used to create this Checklist to enforce the criteria you set.

|
Otobase Otobase Web Site Voice: (206) 221-2430 Fax: (206) 221-5152 otobase@u.washington.edu |