How to install the
A102 Ricoh Printer
Click the right edge of this box to advance
or use the buttons below.
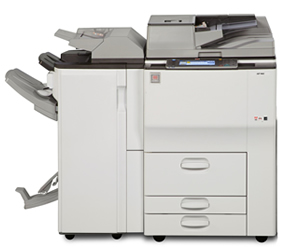
The RICOH copier/printer in the mailroom is available for department faculty and staff.
Normally, this will be your secondary printer, useful when you need fast output or multiple copies.
You can print to the RICOH via the A102 print queue. Installing it requires
2 steps.
First, make your computer aware of the printer. Second, make the printer aware of you.
Then, you will be able to select A102 from your list of printers.
So, this tutorial shows how to
- Install the A102 printer driver
- Add your user code to the printer's preferences
- Select the A102 printer and set options for print jobs.
* if you would like to skip to any of these steps, use the buttons below
Step 1: Install the Driver
-
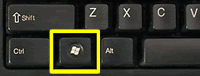 To see the printers installed in Windows, find the Start key left of the spacebar. Hold it and tap R to open a "Run" window.
-
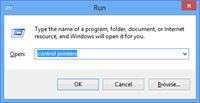 In the Open field, enter:
control printers
-
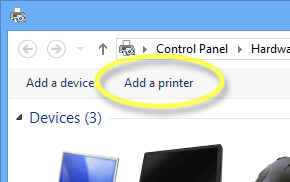 In the next window, click "Add a Printer".
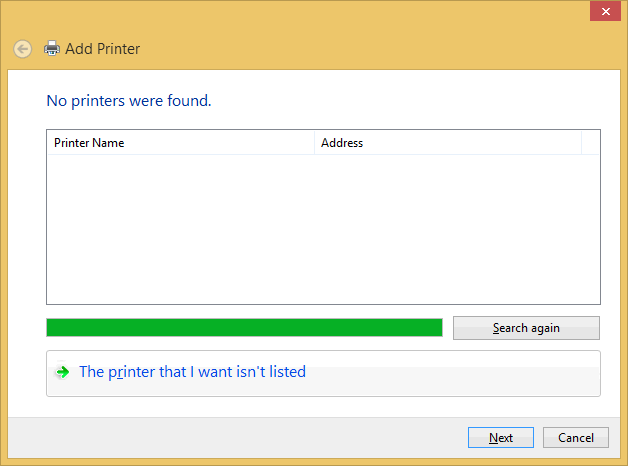
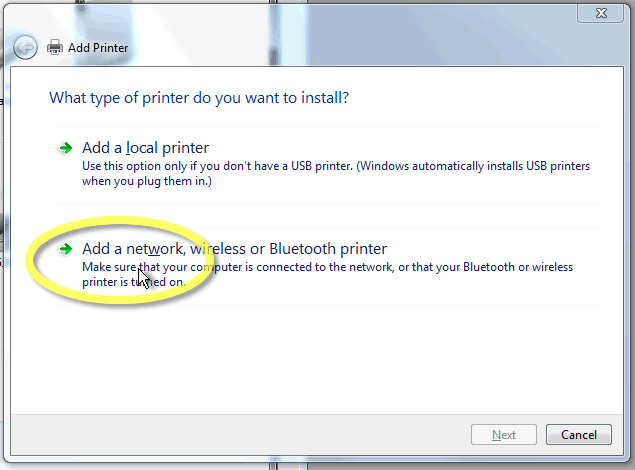
- Your computer will search for available printers. Ignore its efforts.
Instead, click The printer that I want isn't listed.
- click to enlarge -
 - click to enlarge -
- In the Select a shared printer by name field, enter the name of the print queue:
\\dept\a102
- Click Install driver.
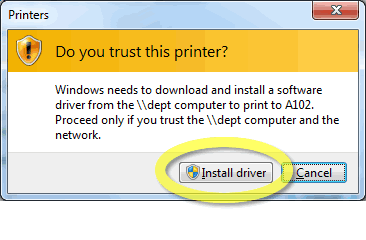
- Windows will now copy files from our server to your computer. Wait for this process to complete.
- In the next window, click "Finish" to close the printer installation wizard. (You probably don't want A102 as your default printer.)
You should then see the newly-added A102 printer in the bottom portion of your Devices and Printers window.
 - click to enlarge -
Step 1 is complete!
Your computer can now send jobs to A102.
However,
the RICOH will quietly throw them away,
UNTIL
you complete the next step.
Step 2: Add your user code
The RICOH ignores jobs that have no valid user code attached to them.
The code it needs is the same one you use to make copies.
- To add yours, open the printer's preferences by RIGHT-clicking the newly-installed A102 printer.
- In the menu that pops up, click Printing Preferences....
 - click to enlarge -
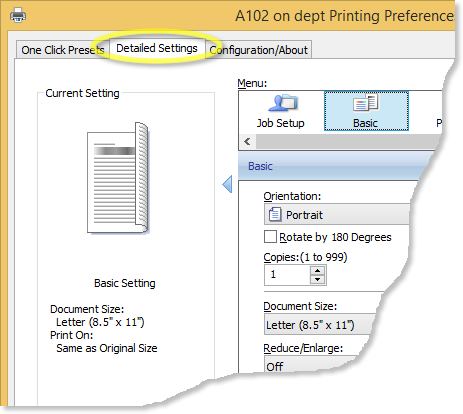
- In the Printing Preferences window, click the Detailed Settings tab.
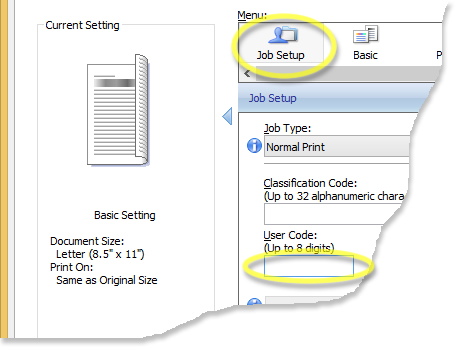
- First, select Job Setup in the Menu, then in the User Code field, type your RICOH code, the same code you enter when standing in front of the machine.
-
Click OK until you return to your desktop.
Done.
Your computer can now print to A102.
(You might want to repeat the steps above for any departmental computer from which you might print, such as those in the graduate lounge or in A-101.)
Now, you merely need to SELECT the A102 printer when you need it.
The next slides will show you how.
3. Selecting A102
To print to the RICOH, select the A102 printer from the print menu.
To bring up the Print Menu, choose Print from the File menu.
Alternately, hold down ALT and press F, then P for the same result.
 - click to enlarge -
Next, click the first downward-pointing arrow to reveal a list of printers installed on your computer.
Click \\dept\a102.
- click to enlarge -
That's it.
When you click OK the computer will send your file to the RICOH in A102.
However...
BEFORE you print:
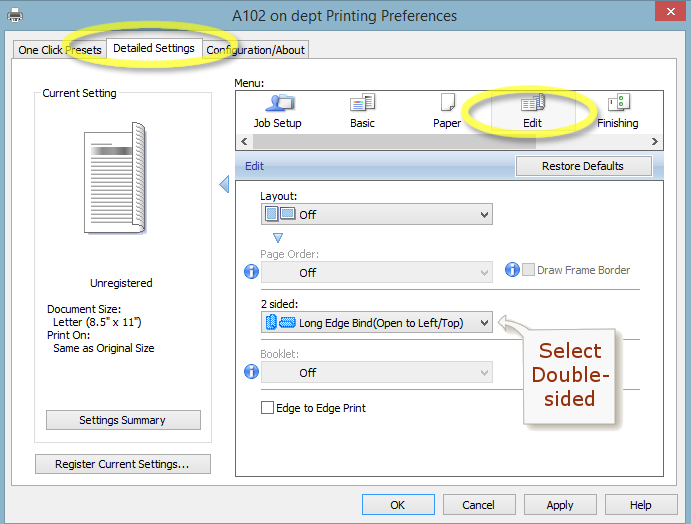
If you want your pages double-sided
select the Edit menu:
- Choose the options you want under 2 sided.
- (Next: stapling and 3-hole-punching)
 - click to enlarge -
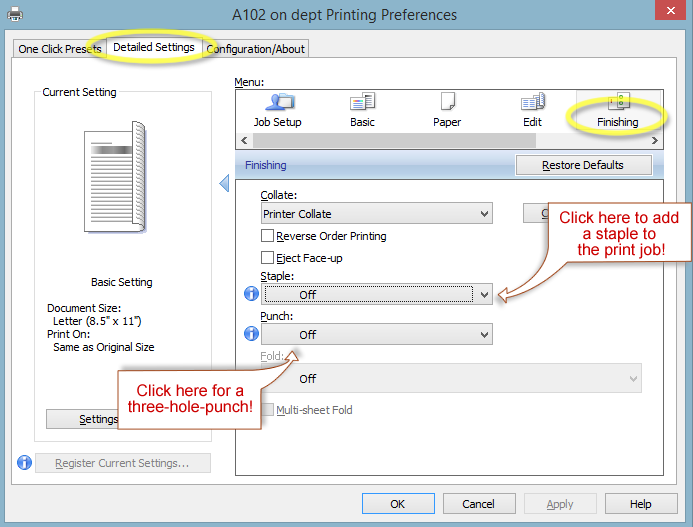
Also BEFORE you print:
If you want the print-job stapled or 3-hole-punched
select the Finishing menu:
- Choose the options you want.
- When ready to print, click OK
- click to enlarge -
The slides below describe the new
Print Release Station.
Read on to learn how to use it.
. . . the end
How to release printing
in A102
Click the right edge of this box to advance.
In the Past

When you printed a document to A102, it would begin printing immediately. By the time you arrived, the RICOH would usually be finished.
At 60 pages per minutes, this is the fastest printer in the department.
Unfortunately
This meant your printing was sitting unattended while you made your way to the mailroom.
And sometimes, jobs meant for a different printer were sent by mistake to A102.
And sometimes they were forgotten.
The uncollected jobs wasted paper, and the lack of confidential printing made the Ricoh less useful.
So, we've installed a computer to hold your printing until you're ready for it.
Now,
when you send a print job to A102, it will first go to the
Print Release Station
.
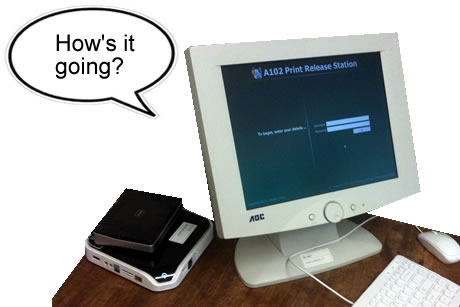
The station holds your print job until you arrive and release it.

So
- You won't need to hunt for your printing.
- Sensitive material won't lie about unattended.
- Unreleased jobs will eventually be deleted without wasting paper.
Here's how to use the station.
Before you begin...
make sure you've installed the A102 printer according to the instructions in the slideshow above.
- click to enlarge -
Once you have prepared a file you wish to print, send it to the \\dept\A102 printer.
- click to enlarge -
Head down to the A102 copy room.

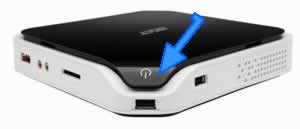
When you arrive, you may need to wake up or turn on the Release Station.
If the monitor is blank
- Move the mouse around or tap the Shift key once or twice.
- Wait a couple of seconds for the release station to wake up.
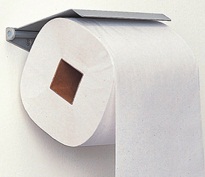
(In very rare cases, the computer might be turned off. If so, press the power button on the Acer unit pictured below. The computer will take a minute or two to boot up.)
At the print release screen, enter:
- your English account name
- your English password
(Use the same name and password that let you log into your office computer.)
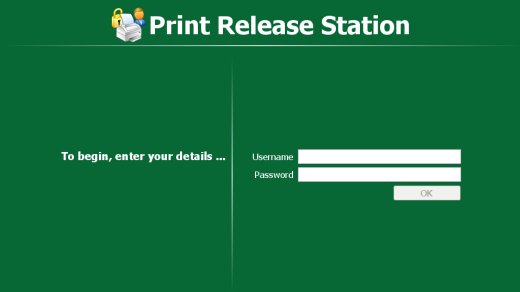
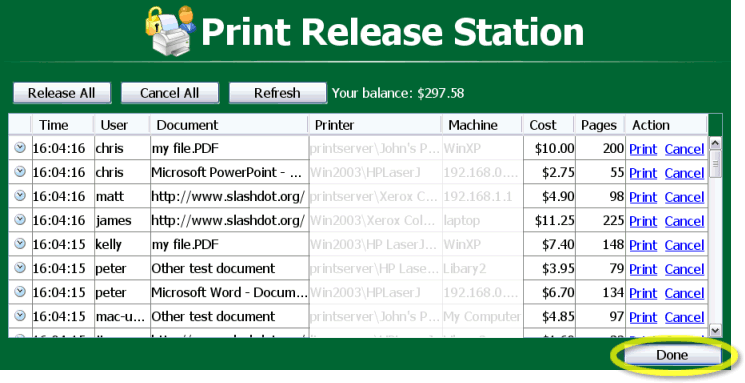
You'll then see a list of print jobs waiting to be released.
Identify your jobs and click Print for each.

Click DONE to log out.
You can pick up your jobs from the output tray behind you.
That's it!
You now know how
to release a job to the printer.
. . . the end


