How to install the
Savery 417 Printer
in Windows XP
Click the right edge of this box to advance.
The hp4100 printer in Savery 417 is available for TAs printing materials for teaching.
But first, you will have to make your computer aware of the printer and able to speak its language.
So in this tutorial, you will install the driver for a network printer.
- Click the
 button (at the bottom-left corner of your desktop)
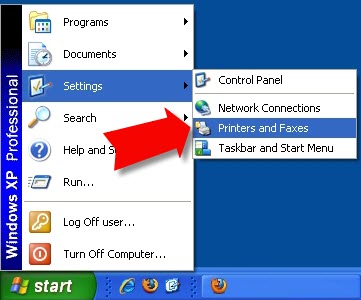
- Click Settings, then Printers and Faxes.
You should then see a Printer and Faxes window, similar to the one below. (Your window may list other printers.)
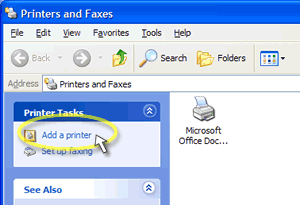
This will initiate the Add Printer Wizard, which will open in its own window.
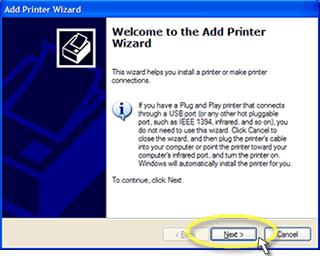
- When it comes up, Click Next >
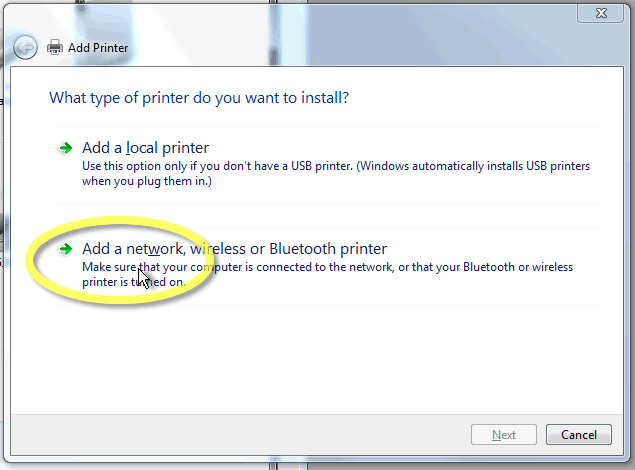
The next window asks if the printer is local, or on the network.
- Select A network printer. . .
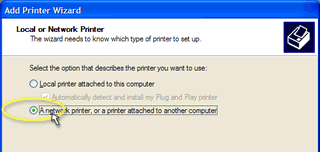
- Then, click Next >
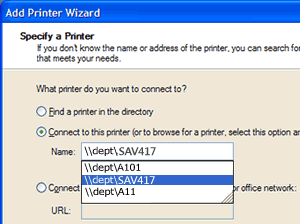
Click "Connect to this printer..."
- Then type "\\dept\SAV417" in the "Name" field.
(Once you've typed "\\dept\" you'll see a list of available printers, and you can click "SAV417" if you prefer.)
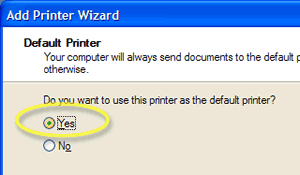
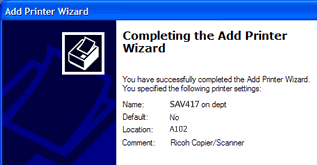
The last question the Wizard will ask is if you want SAV417 as your default printer. You do.
The last window lists a summary of the choices you've just made.
- Click Finish after making sure that the SAV417 printer has been added.
Done.
Your computer can now print to the SAV417 printer.
Last slide . . .
You might want to repeat the steps above for any departmental
computer from which you might print — such as those in the graduate lounge
or in A-101.
How to install the
SAV417 Printer
in Windows 7
Click the right edge of this box to advance.
The hp4100 printer in Savery 417 is available for TAs printing materials for teaching.
But first, you will have to make your computer aware of the printer and able to speak its language.
So in this tutorial, you will install the driver for a network printer.
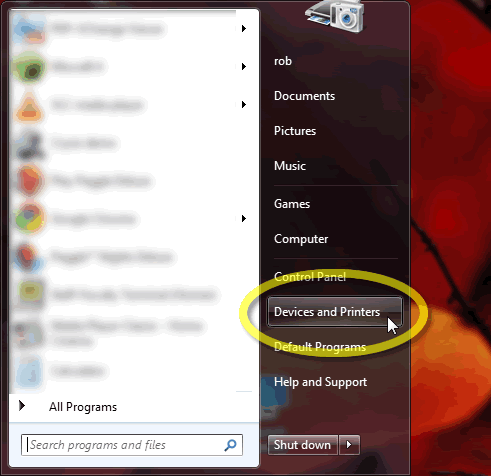
- Click the
 button (at the bottom-left corner of your desktop)
- Click Devices and Printers.
- In the Devices and Printers window, click Add a printer. from the horizontal menu under the address bar.

click to enlarge
- The computer will start to list all available printers, but it's fastest to click The printer that I want isn't listed.
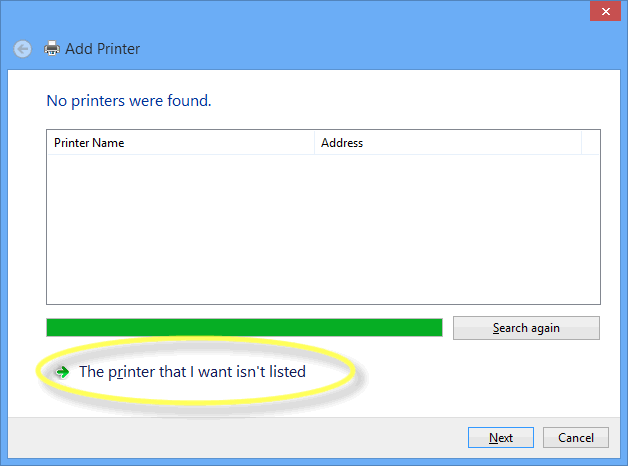
click to enlarge
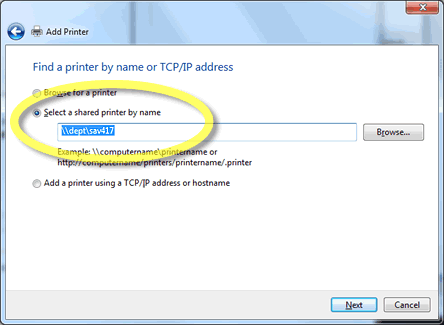
- You'll then have a chance to enter the name of the printer: \\dept\SAV417
- Click Install driver.
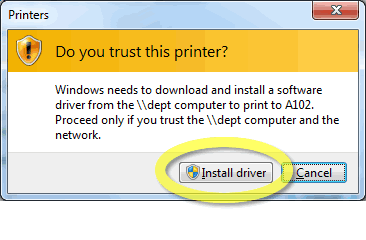
- Windows 7 will now copy files from our server to your computer. Wait for this process to complete.
- In the next window, check the box Set as the default printer.

- Then, click Finish.
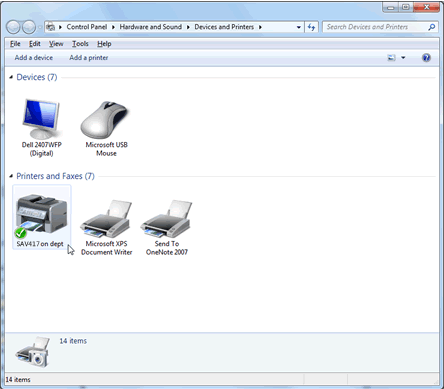
You should then see the newly-added SAV417 printer in your Devices and Printers window
Done.
Your computer can now print to the SAV417 printer.
Last slide . . .
You might want to repeat the steps above for any departmental
computer from which you might print — such as those in the graduate lounge or in A-101.