This tutorial shows the 6 steps needed to scan documents using the ScanSnap scanners.
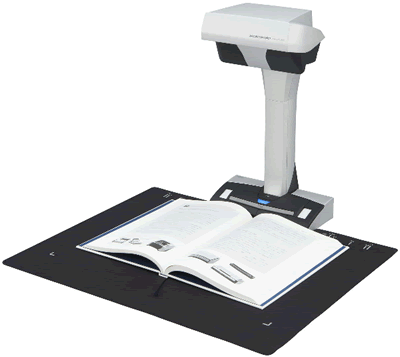
You'll find these in the grad lounge (B-13) and in the mail room (A-104).
1. Center the document to be scanned under the scanner.
Note 1: Although the scanner will auto-correct slanted text, it is best to begin with the document as flat as possible.
Note 2: Avoid using your fingers to hold the pages flat. Doing so may disrupt the auto-correction of the text image.
2. To scan each page, press the Scan button once (note the arrow below).
Or, you can use the page-turn detect feature. Press the Scan button for 3 seconds to start the first scan. The scanner will wait for you to turn the page, then scan again.

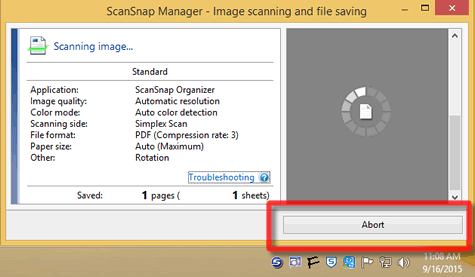
Once a scan begins, a new window will appear on the computer.
To cancel a scan, click "Abort".
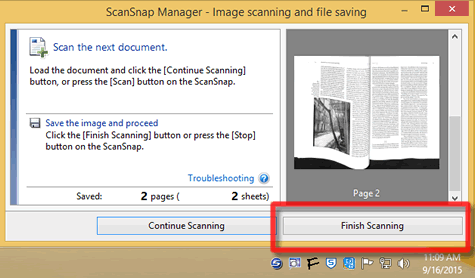
3. Once a scan completes, use the Scan button, or the window shown below, to scan the next page.
Or, in page-turn-detect mode, turn the page. (If the scanner doesn't notice, press the Scan button.)
When you've scanned all your pages, click "Finish Scanning".
4. Now you can correct the scanned images.
Note the corrected image in the right column.
If it's OK, click "Save and Exit".
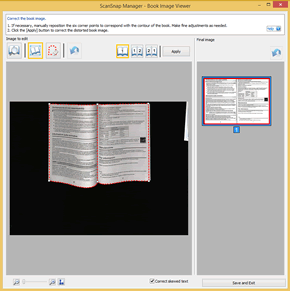 If it isn't OK, alter the cropping by adjusting
the six white squares around the image in the left column. Then click "Save and Exit".
If it isn't OK, alter the cropping by adjusting
the six white squares around the image in the left column. Then click "Save and Exit".
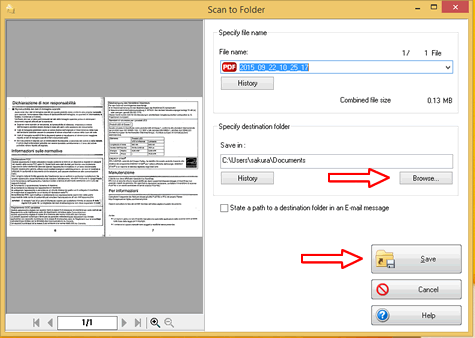
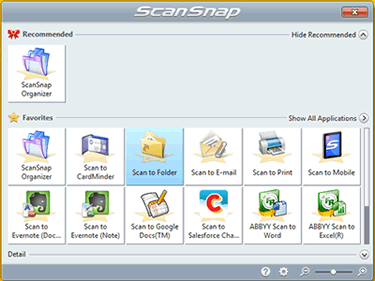
5. Save the scanned image
The next window displays the options for saving the image(s).
"Scan to Folder" (highlighted in blue) allows you to save the image(s) to your profile for safe keeping.
6. In the "Scan to Folder" window, you can change the file name and click "Browse" to choose the folder that will store the image.
Click "Save" when you are finished.