Exporting Movies (MovieMaker)
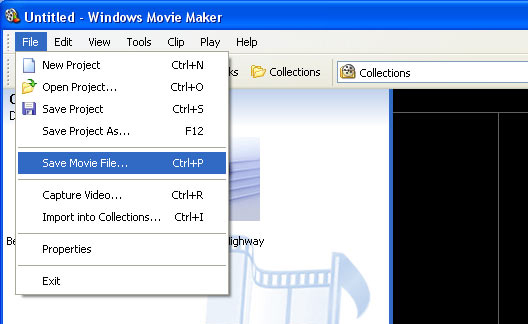
Step 1
Click File, then Save Movie File.
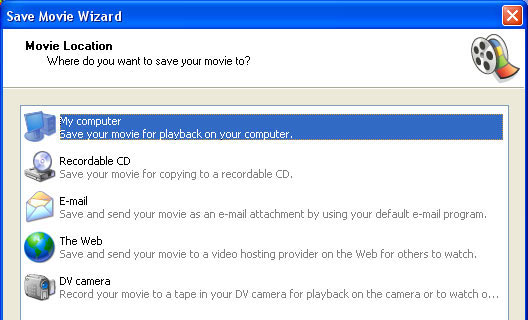
Step 2
Click on My computer to save your movie file there, then click Next.
Step 3
Name your movie file, choose where you would like to save it, then click Next.
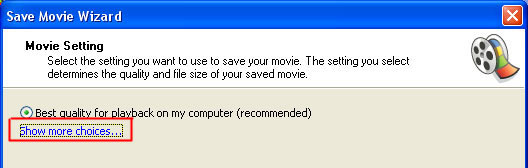
Step 4
Click on Show more choices.
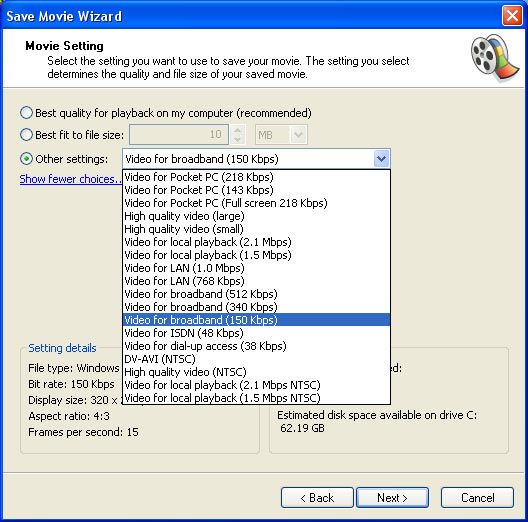
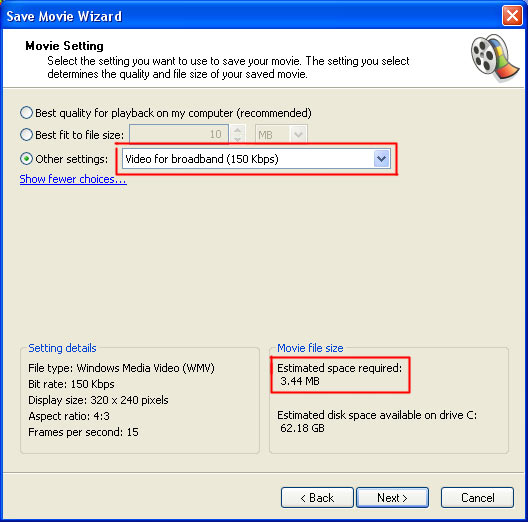
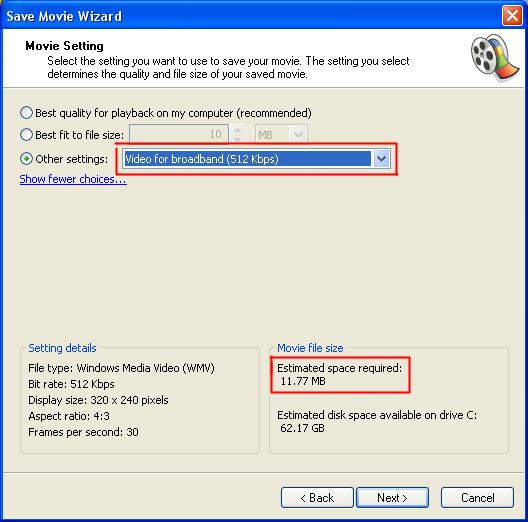
Step 5
You will now see three different choices: Best quality for playback on my computer, Best fit to file size and Other settings. Select Other settings and choose one of the Video for broadband choices. The lower the Kbps, the smaller your movie file will be; the higher the Kbps, the bigger your movie file. Keep in mind that your movie file may not exceed 100 MB, so choose the option that fits you best - 150, 340 or 512 Kbps.
Step 6
You can see below the two different results after choosing Video for broadband (150 Kbps) and Video for broadband (512 Kbps). The length of your movie will affect how big the file size will be. In the example below, the movie file that was used was about 3 minutes long and its output after choosing 150 Kbps was 3.44 MB, and 11.77 MB with 512 Kbps - both of which are well under 100 MB.
Step 7
Once you select your setting, click Next.
Step 8
Windows Movie Maker will start saving your movie. Wait until the save is completed, then click Finish.
Please note that Windows Movie Maker will only export the movie files as WMV files. Though people who use Windows operating system have the capability to play WMV, it is not the case with Mac OS X users. It would be best to provide information somewhere on your page on installing Windows Media Player for Mac OS X for Mac users so they too would be able to view your videos. Another alternative would be converting the WMV to a more cross-platform friendly format, such as AVI.