Instructions
These instructions are for one stopper. You will need to multiply quantities by eight, or repeat the instructions eight times to get a complete set. You may also skip this step and instead insert syringe needles through a standard rubber stopper. However, unless you are extremely careful results will not be as good as molding your own stoppers.

| Gather all parts:
- Two part silicone rubber
- At least 20cm of 2mm OD stainless steel tubing
- 3d printed mold
- Weigh boat or mixing container
- Mixing sticks
- A Dremel tool with cutting wheel, hack saw, or thin file (not pictured).
Note: For a complete set you should start with at least 1.6m of stainless steel tube.
Note: The Dremel part number 409 cuttoff wheel works well.
|
|---|
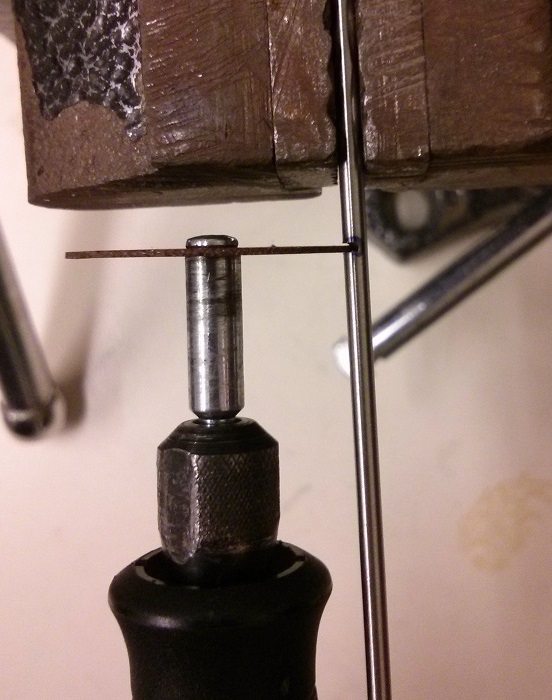 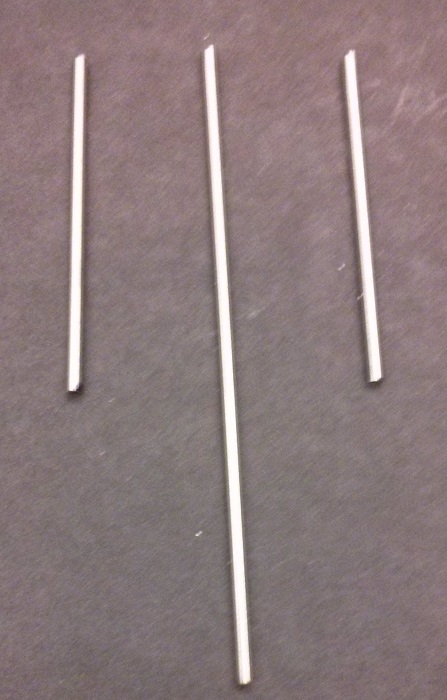
| Cut tubing to length
- Using a hacksaw or Dremel tool cut the tubing to length
- 1pc 9cm long
- 2pc 5cm long
Note: Don't forget eye protection when cutting.
|
|---|
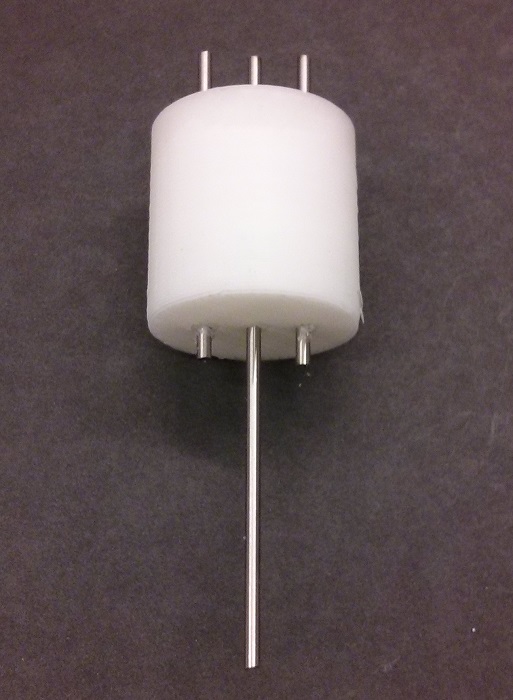 
| Insert tube into mold
- Insert tube through holes in mold with the long tube in the center.
- Adjust tubes so each tube protrudes from the top of the mold by about 1cm.
- Once adjusted, tape tubes together and to the bottom of the mold.
|
|---|
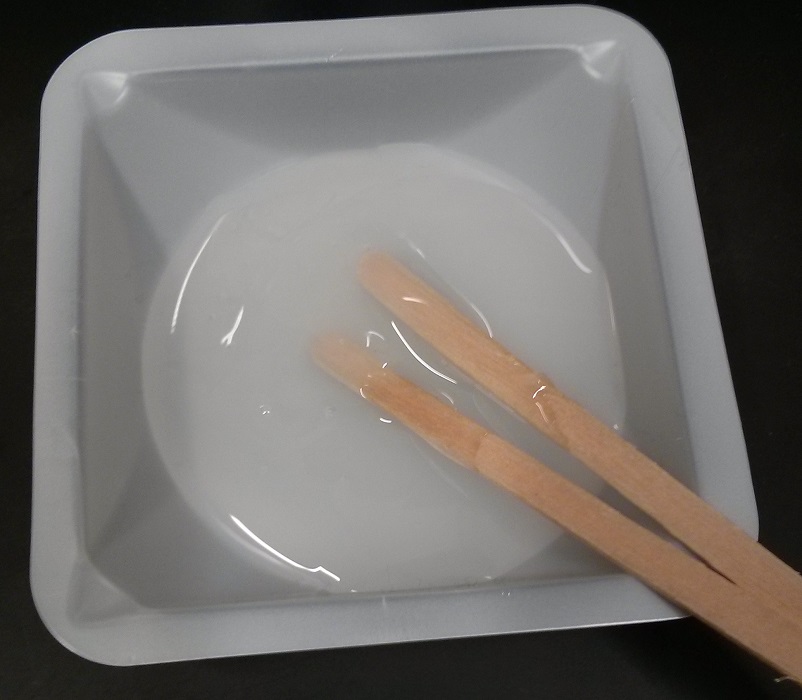
| Mix silicone rubber
- Mix the two part rubber 1:1 w/w or v/v
- Optional: Degas the mixed rubber in a vacuum to remove bubbles.
Note: Final volume of 10ml/stopper or final weight 10g/stopper is more than enough rubber.
Note: Uncured or unmixed rubber can be cleaned up with ethanol.
|
|---|
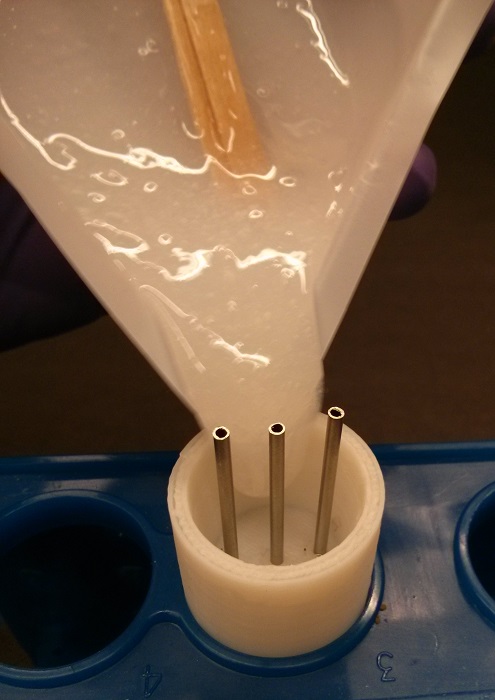 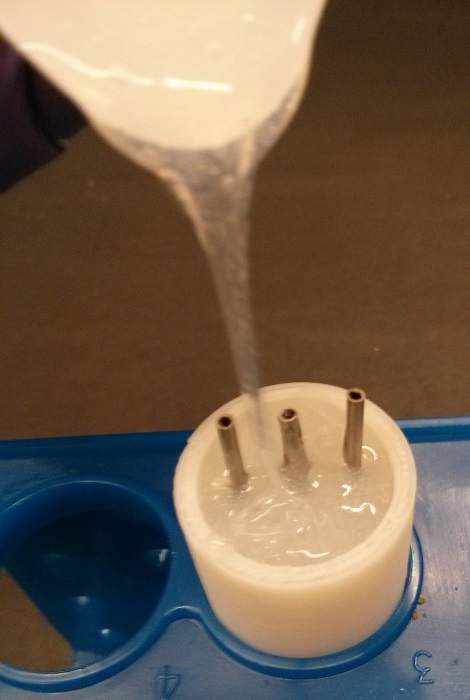
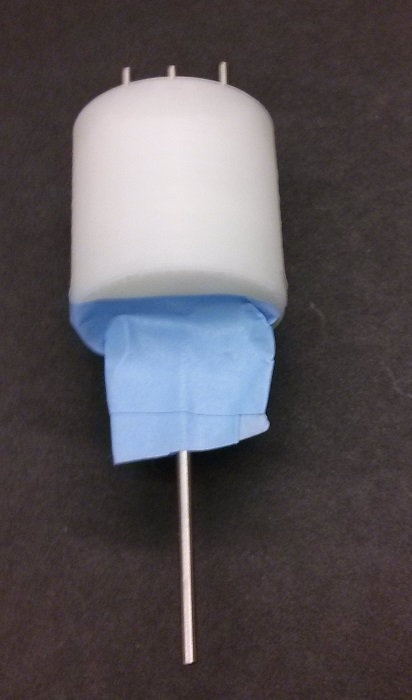
| Pour rubber into mold
- Slowly pour the mixed rubber into the mold.
- Leave overnight to cure
Note: Curing can be accelerated in a 65C convection oven for 1-2 hours.
Note: Excess rubber can be cut away after it has been cured.
Note: Keep unused rubber to gauge cure time; when the unused portion has cured, your stoppers have cured.
Note: Pouring slow helps remove some of the bubbles.
|
|---|
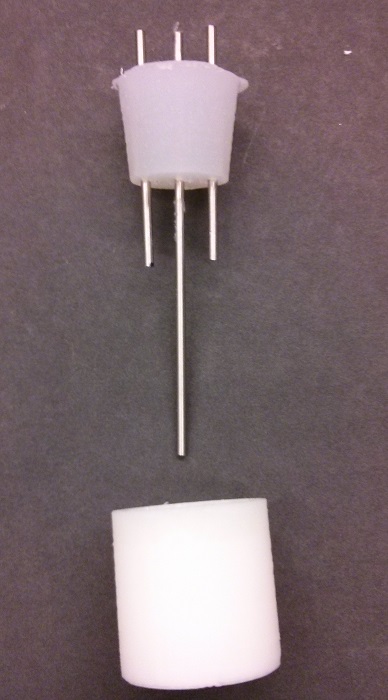
| Remove stoppers
- Carefully pull the edges from the mold to loosen.
- While holding onto all three tubes gently push/pull stopper from mold.
Tip: Running a extra piece of stainless steel tubing or the back of a small drill bit between the stopper and the mold wall will help loosen the stopper.
Note: It's okay if the tubing detaches from the rubber. The compression force once inserted into a tube will keep the environment closed and sterile.
|
|---|
| Attach:s7.jpg Δ Δ TODO: add final photo
| Attach fittings
- To the center (9cm) stainless tube attach (by sliding over) the silicone effluent tube. The length is dependent on where you're waste bottles are, but generally 2' is good. Excessively long tubes may cause too much back pressure and cause problems
- to the other two tubes attach a short piece of silicone tube (~1") and to those tubes attach female Luer-barb connectors
|
|---|


